background image

User Manual

 8

Installation

INSTALLATION POSITIONING

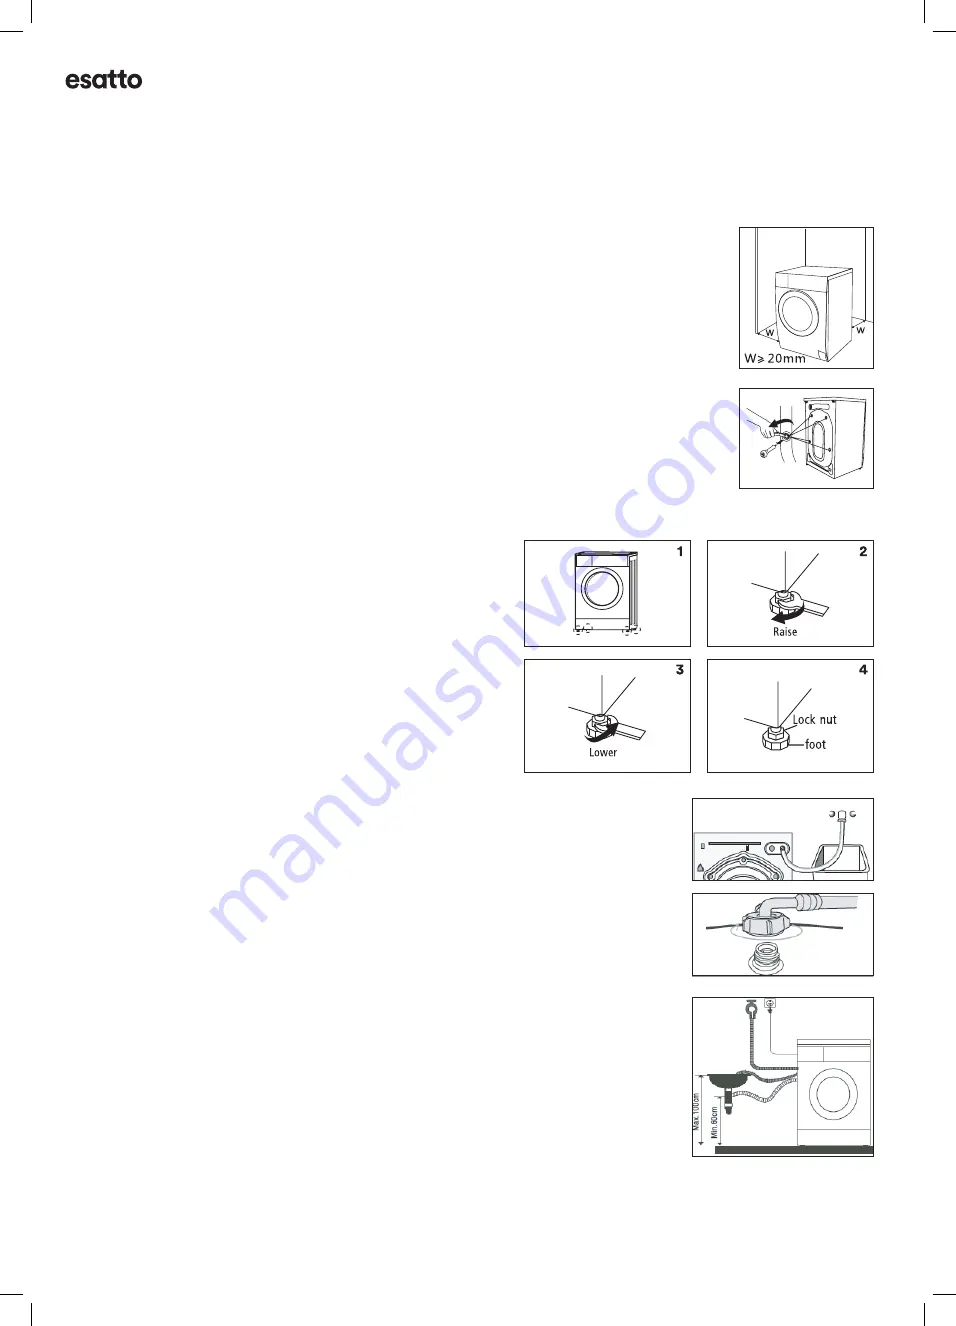
Ensure that your appliance is installed on solid and flat ground, in a level position.
Please do not place the appliance on a slope, soft carpet or wooden floor.
Your appliance should only be installed within an internal environment.  
Do not install the appliance outdoors.

REMOVING THE TRANSPORTATION BOLTS

WARNING:


Before using the appliance, the transport bolts must be removed from the 

backside of this machine. Please take the following steps to remove the bolts:
Loosen all 4 bolts with a spanner and then remove them.
Use the plugs (supplied) to plug the holes.
Keep the transport bolts for future use.

LEVEL ADJUSTING

If the floor is obviously uneven, your appliance feet need to be 
adjusted. If your appliance isn’t level, it will cause your appliance to 
vibrate, and potentially move from its position.
Once you’ve positioned your washing machine, press down from 
the top in all four corners to ensure that it’s completely stable (i.e. 
not rocking in any direction). Also use a spirit level to ensure that it 
is completely level in all directions.
Should you need to make adjustments, use a spanner to turn the 
appliance legs until it makes contact with the floor. Turn the leg 
using one hand and then fasten the nut up against the appliance 
cabinet, to lock the leg in place.
After making any adjustments to the appliance legs,  
re-check to ensure it is level and no rocking occurring.

CONNECT THE INLET PIPE

Connect the hose elbow to the cold water outlet, screwing in a clockwise direction.
Connect the other end of the inlet hose to the water inlet valve on the rear of the 
washing machine.
After installation, if there are any leaks detected, remove the hose and re-install using 
the steps above. The hose is designed to be used on a standard washing machine cock 
outlet.

POSITION THE OUTLET HOSE

The outlet hose (used to drain the discharged water) is to be ideally connected to the 
relevant waste pipe, although it can also be positioned to drain into a sink/trough. 
Note that the outlet hose has a minimum outlet position of 60cm and a maximum 
position of 100cm (as illustrated on the right). 
 

Note:

 If you are positioning the outlet hose to drain into a sink or trough, please ensure 

that it is fixed in place and that the sink remains unblocked at all times.

Summary of Contents for EFLW1000

Page 1: ...everything you need is in this user manual Model Code s EFLW1000 Online esatto house Product 10kg Front Load Washing Machine Version V1 0 0122...

Page 2: ...User Manual 2 everything you need...

Page 3: ...nstallation Page 9 Your Washing Machine Page 11 Quick Start Page 12 Operating Instructions Page 16 Cleaning Maintenance Page 18 Troubleshooting Page 20 Technical Specifications Page 21 Purchase Detail...

Page 4: ...User Manual 4 THIS PAGE HAS BEEN LEFT INTENTIONALLY BLANK...

Page 5: ...the appliance our Support Team are here to help You can use our online Support Centre at anytime by visiting http support residentiagroup com au Or you can contact us via phone by dialing 1300 11 HEL...

Page 6: ...sion INSTALLATION Remove all the packaging Do not install or use a damaged appliance Obey the installation instruction supplied with the appliance Make sure that the floor where you install the applia...

Page 7: ...have been removed Otherwise serious damage can occur to the appliance Before washing any clothes for the first time the washing machine should be operated for one whole cycle without any clothes insi...

Page 8: ...at it is completely level in all directions Should you need to make adjustments use a spanner to turn the appliance legs until it makes contact with the floor Turn the leg using one hand and then fast...

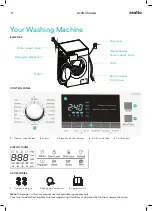
Page 9: ...W1000 Water supply hose Top cover Control panel Service panel Power supply cord Drain hose Drum Detergent dispenser Door ACCESSORIES 1 Transport hole plug 2 Supply hose cold water 3 Owner s manual Not...

Page 10: ...d to be added in case I after selecting pre washing for machines with this function SETTING THE DELAY FUNCTION To set the delay function Select a program by turning the Program dial Press the Delay bu...

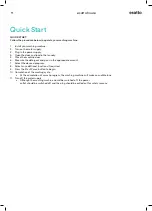
Page 11: ...re the detergent and pour in the appropriate amount 7 Select the desired program 8 Select any additional functions if required 9 Press the Start Pause button to begin 10 Completion of the washing cycl...

Page 12: ...handkerchiefs and ties should be washed within a special washing bag to prevent damage to themselves and other clothes When washing a large single item that could become heavy i e a towel or jacket i...

Page 13: ...iles will be more wrinkled Delicate textiles should be set with a lower spin speed Selecting the main washing program depend on the types of clothing to be washed as follows Cotton To increase the was...

Page 14: ...this cycle for clothes that require handwashing With very low temperature and spin speed this cycle is suitable to wash very delicate items Cotton ECO This procedure saves energy and limits the washi...

Page 15: ...ause button once again to continue the wash program Child Lock To avoid the washing procedure being altered by children you can activate the child lock function All buttons and dials won t alter the m...

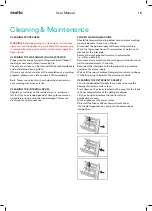
Page 16: ...steel wool or a harsh abrasive FROZEN WASHING MACHINE Should the temperature drop below zero and your washing machine becomes frozen you should Disconnect the power supply for the washing machine Wash...

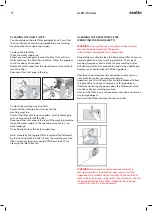
Page 17: ...for cleaning the inlet filter first CLEANING THE DRUM PUMP FILTER REMOVING FOREIGN OBJECTS WARNING To avoid the risk of an electric shock always remove the power plug from the power outlet before clea...

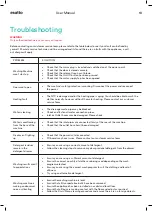
Page 18: ...let hoses may be damaged Please check Water is overflowing from the base of the machine Check that the inlet pipes are connected firmly at the rear of the machine Check that the outlet hose hasn t bee...

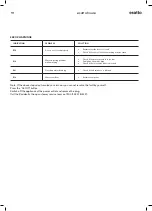
Page 19: ...ressure is too low Straighten the water pipe Check if the inlet valve filter is blocked E21 Overtime water draining Check if the drain hose is blocked E12 Water overflow Restart the washer Note If the...

Page 20: ...0 240V 50Hz 10Amp Standard Water Pressure 0 05MPa 1 0MPa Max Noise Level Washing Spinning 59dbA 78dbA NOTE This product is subject to continuous improvement specification are subject to change without...

Page 21: ...ils For future reference please record the following information which can be found on the rating plate and the date of purchase which can be found on your sales invoice STORE DETAILS STORE NAME ADDRE...

Page 22: ...pliance during the Warranty Period g Warranty Period means i where the Appliance is used for personal domestic or household use i e normal single family use as set out in the instruction manual the Ap...

Page 23: ...nces come with a guarantee by Residentia Group that cannot be excluded under the Australian Consumer Law You are entitled to a replacement or refund for a major failure and for compensation for any ot...

Page 24: ...This page is intentionally left blank A RESIDENTIA GROUP INITIATIVE everything you need...

Reviews: