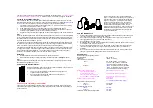
How to install and replace the batteries in the Weather station
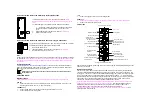
The Weather station uses 2 x AA, IEC LR6, 1.5V batteries.
When
batteries will need to be replaced, the battery symbol will appear on the
LCD
.
To install and replace the batteries, please follow the steps below:
1.
Insert finger or other solid object in the space at the bottom
center of the battery compartment and lift up to remove the
cover.
2.
Insert batteries observing the correct polarity
(see marking).
3.
Replace compartment cover.
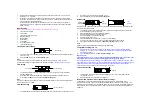
How to install and replace the batteries in the Thermo-Hygro transmitter
The Thermo-Hygro transmitter uses 2 x AA, IEC LR6, 1.5V batteries. To install
and replace the batteries, please follow the steps below:
1.
Remove the battery cover.
2.
Insert the batteries, observing the correct polarity
(see marking).
3.
Replace the battery cover on the unit.
Note:
In the event of changing batteries in any of the units, all units need to be reset by following the setting
up procedures.
This is because a random security code is assigned by the transmitter at start-up and
this code must be received and stored by the Weather station in the first 3 minutes of power being
supplied to it
Replacing batteries:
For best performance, when the low battery appears on
the LCD screen of the Weather station or
when contrast becomes dim and unclear on the LCD, batteries should be replaced to both units at
least once a year to maintain maximum running accuracy.
Please help in the preservation of the environment and return used batteries to an
authorized depot.
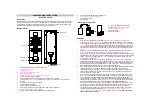
FUNCTION KEYS:
Weather station:
The weather station has four easy to use function keys, 2 on the front side and 2 at the back
:
SET key
•
Used to enter the set mode for the following functions: 12/24 hour display, Time, Time zone,
Weekday, Month, Date, Year, ºC/ºF, and LCD contrast
CHANNEL key
•
Used to toggle between the outdoor Thermo-Hygro transmitters 1, 2 and 3.
•
Used to exit the manual setting mode
+ key
•
Used to changes the values in manual setting modes
RESET key
•
Used to reset all indoor temperatures, and the selected outdoor transmitter temperatures
•
Used to exit the manual setting mode
LCD Screen
After inserting the batteries, all the segments on the LCD will light up briefly before displaying the time
and all the other modes
Radio-controlled time
The time base for the radio-controlled time is a Cesium Atomic Clock operated by the Physikalisch
Technische Bundesanstalt Braunschweig which has a time deviation of less than one second in one
million years. The time is coded and transmitted from Mainflingen near Frankfurt via frequency signal
DCF-77 (77.5 kHz) and has a transmitting range of approximately 1,500 km.
Your
radio-controlled
Weather Station receives this signal and converts it to show the precise time in summer or wintertime.
The quality of the reception depends greatly on the geographic location. In normal cases, there
should be no reception problems within a 1,500km radius around Frankfurt.
Once the outdoor temperature is displayed on the Weather station, the DCF tower icon in the clock
display will start flashing in the upper center in the time section
. This indicates that the clock has
detected that there is a radio signal present and is trying to receive it. When the time code is
received, the DCF tower becomes permanently lit and the time will be displayed.
If the tower icon flashes, but does not set the time or the DCF tower does not appear at all
, then
please take note of the following:
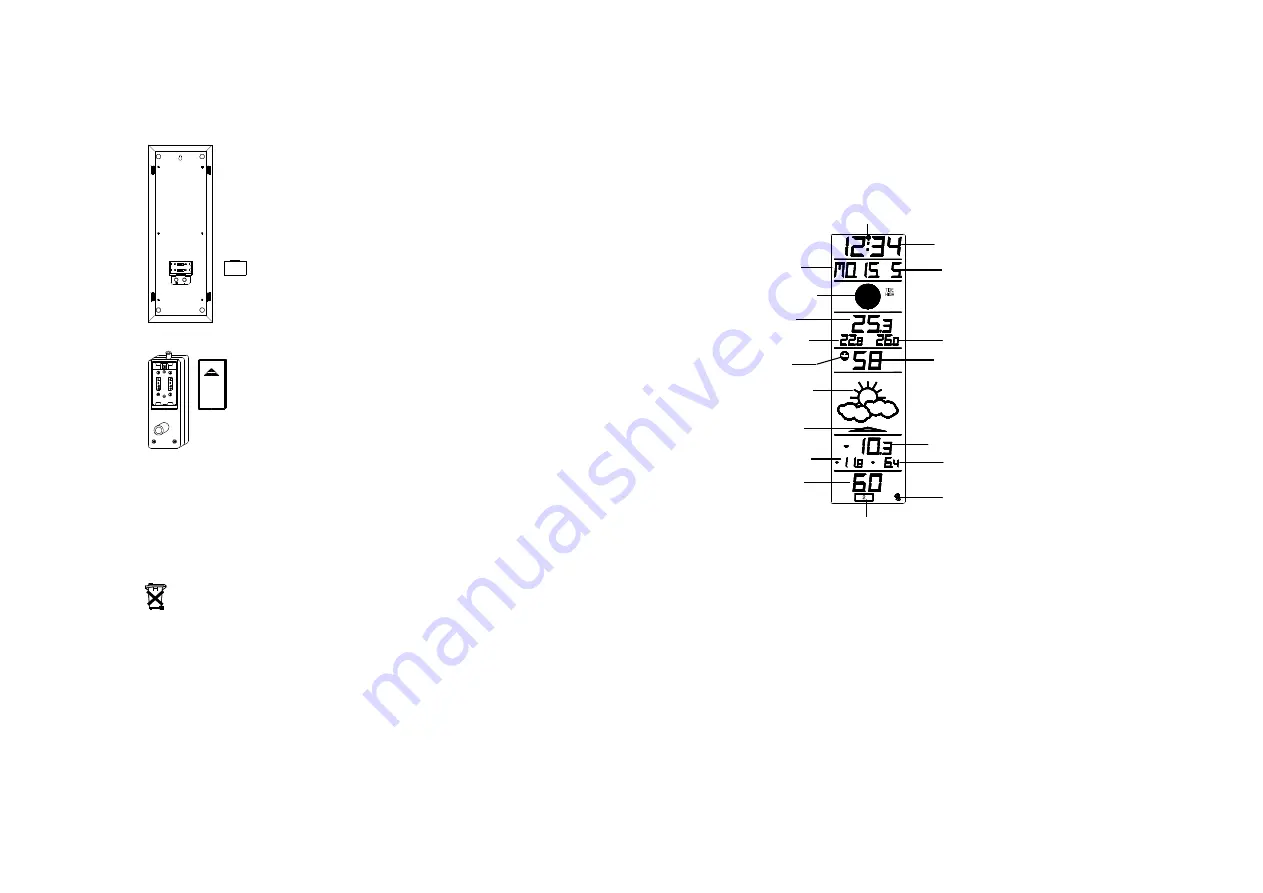
DCF tower reception icon
Time display
Weekday display
Date display
Moon phase display
Current indoor
temperature display
Minimum indoor
temperature display
Maximum indoor
temperature display
Comfort indicator icon
Indoor relative humidity
display in RH%
Weather tendency
indicator
Weather forecast icon
Current outdoor
temperature display
Minimum outdoor
temperature display
Maximum outdoor
temperature display
Outdoor relative humidity
display in RH%
Outdoor transmitter identification
Outdoor transmission signal

