SOINS ET ENTRETIEN
MISE EN GARDE : Débranchez l’appareil avant le remplissage,
le nettoyage et l’entretien.
Gardez toujours le châssis au sec.
INSTRUCTIONS DE NETTOYAGE/DÉSINFECTION
1) Éteignez l’appareil puis débranchez le cordon électrique de la
prise murale.
2) Soulevez le châssis et le médium de transition du boîtier et
mettez-les de côté.
3) Soulevez le filtre à mèche du boîtier tout en le laissant
s’égoutter dans le boîtier et mettez-le de côté.
4) Videz le boîtier dans l’évier. Essuyez toute eau restante dans
le boîtier avec une éponge.
5) Remplissez le récipient d’eau puis ajoutez une tasse (8 oz) de
vinaigre blanc pur. Laissez agir la solution pendant 20
minutes, puis videz.
6) Nettoyez toutes les surfaces internes du récipient à l’aide d’une
brosse à poils souples. Mouillez un chiffon doux avec du
vinaigre blanc pur et essuyez le récipient pour enlever les
dépôts.
7) Rincez abondamment le boîtier avec de l’eau fraîche pour
enlever les dépôts et la solution nettoyante.
DÉSINFECTION DU RÉCIPIENT D’EAU
8) Remplissez le récipient d’eau et ajoutez 3 c. à thé d’eau de
javel. Laissez agir la solution pendant 20 minutes.
9) Videz et rincez abondamment. Remplissez de nouveau le
récipient et remontez l’humidificateur.
ENTREPOSAGE L’ÉTÉ
1) Nettoyez l’appareil tel qu’indiqué dans le chapitre portant sur
les Soins et l’entretien.
2) Jetez les filtres à mèche usés et toute eau dans le récipient.
Laissez le boîtier sécher complètement avant de le ranger.
N’entreposez
pas
l’appareil avec de l’eau dans le récipient.
3) N’entreposez pas l’appareil dans un grenier ou dans un endroit
où la température est élevée.
4) Installez un nouveau filtre à mèche avant le début de la saison.
18
Use only Essick Air brand replacement wicks and chemicals.
To order parts, wicks and chemicals call 1-800-547-3888. The 500
Series humidifiers use Essick Air wick #1040 and air filter #1050.
Only the Essick Air evaporative wick guarantees the certified output
of your humidifier. Use of wicks other than Essick Air brand will
void your warranty as well as the certification of output and may
reduce the efficiency and output of your humidifier.
CAUTION:
Do NOT position the unit directly in front of a hot
air duct or radiator
.
ASSEMBLY, FILLING & OPERATION
ASSEMBLY
1) Unpack humidifier from carton.
2) Remove all packaging material, wicks, etc. from cabinet.
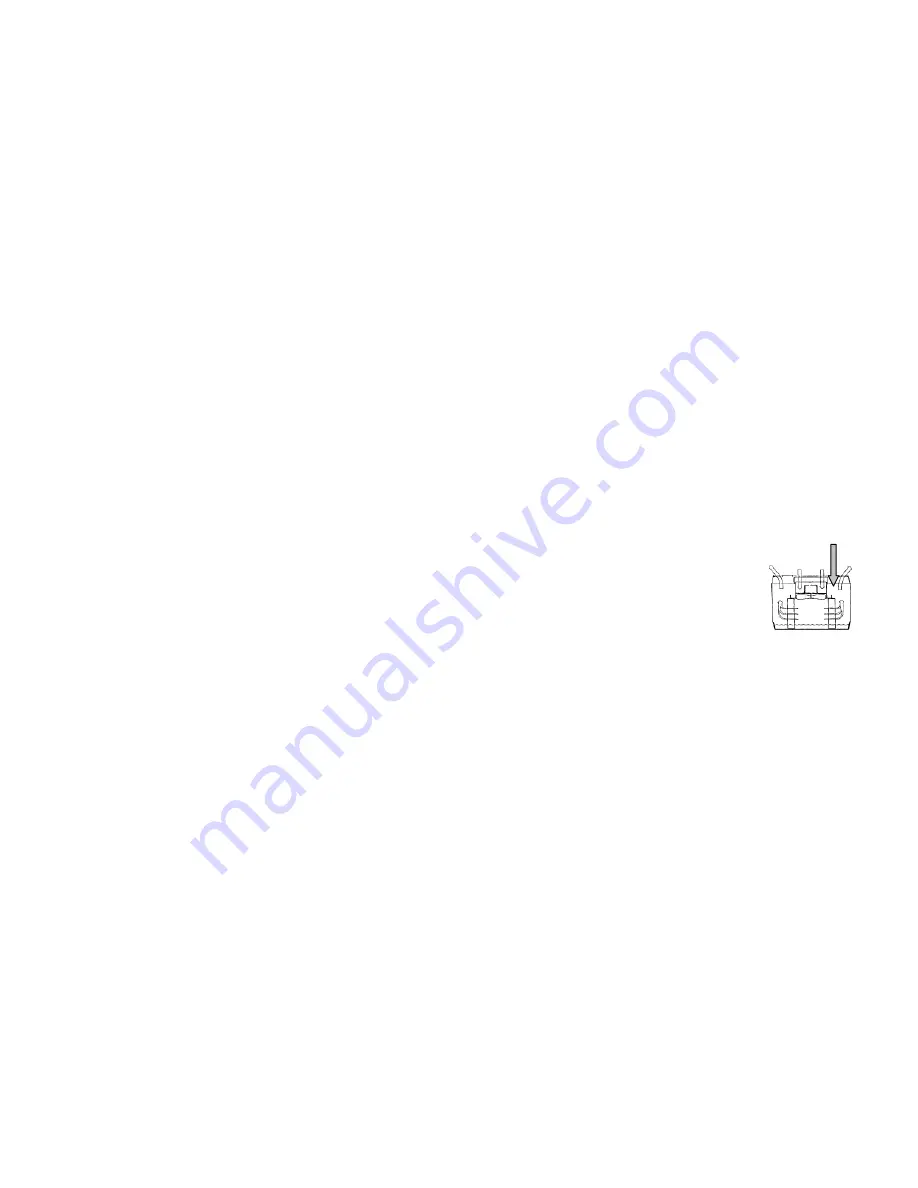
3) The wicks are located by four pairs of ribs in the bottom of the
cabinet. Locate the two wicks. Insert them by dropping each
once down into the locating ribs (see
illustration).
4) After inserting the wicks, place the
transition molding on top of them,
flange side up. The notch along one
side of the transition goes to the back
of the cabinet.
5)
Place the chassis unit onto cabinet.
FILLING
6) Before replacing the chassis, fill the reservoir with water.
DO
NOT POUR WATER OVER THE ELECTRICAL CHASSIS.
Fill
the cabinet only through the opening between the left wick and
the cabinet sidewall. If water spills on the chassis, it must be
allowed to dry completely before energizing the humidifier. If
you have only softened water available in your home, you can
use it, but you will notice a build up of minerals on the
evaporative wicks much sooner. Reservoir capacity is 3.0
gallons.
DO NOT OVERFILL
.
7) We recommend using Essick Air Bacteriostat Treatment,
whenever you refill the humidifier reservoir to eliminate
bacterial growth. Add bacteriostat according to the instructions
on the bottle.
3
Transition
Molding


