background image


14 

14


3. Replacing Fuse 

The fuse of Esway is 50A car type, the fuse may be burned when overload or hit sharply. 

When you find there is no reaction, and the indicator is off after switching on, check the 
fuse if it burnt out, then you need to replace one. Open the fuse cover at the back of body 
with screwdriver, take out the burnt fuse and replace with a new one. 

4. Fastening the Nut of Tire 

Pay attention to the big nut on the wheel, please do regularly checking; if it is loose, you 

must stop the driving and tighten it with a 21mm spanner by approximate 108Nm torque. 

5. Maintenance of Tire 

The normal air pressure is the basic guarantee your safe driving. The standard tire pressure 

is 80kpa = 0.8bar = 0.8 kg, which is we recommend. It is necessary to check the tire pressure 
regularly,  under  inflation  and  over  inflation  will  cause  tire  unequally  wear  and  tear, 
influences control and comfort, and also shorten the life of tire. In addition, under-inflated 
tires also influence the power saving. 

Please also check if there any cuts, splits or other things which could cause the tire to be 

damaged worse; and to check if there is necessary to replace one new tire. 

6. Appearance Cleaning 

It is necessary to keep the pedal and body of Esway clean. Please clean the gravel, soil and 

mud off after driving. Don't use any corrosive chemical such as petrol to clean Esway, you 
can clean it by soft cloth and brush. Don’t wash Esway with water. 

Chapter VIII Notice 

1. Balance Output of Esway 

Computer balance can start immediately when you step on the pedal of Esway. If you keep 

pressing the pedal  switch, the computer balance  will always  on.  But  the  computer keeps 
balance output only 5-second at a low speed, then OFF automatically as the pedal switch 
restored.  Please  pay  attention  that  Esway  will  keep  balance  always  if  the  balance  output 
function is ON, it means letting this scooter on a flat road without driver on it will go forward 
by itself. 

2. Esway Parking 

If for temporary parking, you can just turn on the balance output by remote control and lean 

it against a wall or step that can stop it from moving forward; if for long time parking, you 
can switch off the power and put the supporting foot down. This parking supporting foot 
can be purchased from us independently. 

Summary of Contents for ES-1401 Cross Country

Page 1: ...User Manual for ESWAY ES 1401 Cross Country Shenzhen Ocam electronic technology co LTD Imported by Milbay Australia www milbay com au www eswaychina com...

Page 2: ...ts in the user manual Please read the user manual carefully so that you can know your rights and responsibilities well Please maintain Esway according to the user manual so that you can keep the scoot...

Page 3: ...rts Explanation 4 Chapter III Instruction of remote control of Esway 5 Chapter IV Getting Started 6 Chapter V Driving 8 Chapter VI Charging 12 Chapter VII Maintenance 13 Chapter VIII Notice 14 Chapter...

Page 4: ...AMD The vehicle is equipped with dual wheels its width is as narrow as a normal adult shoulder s width It is 46 5KG Li ion battery or 55KG lead acid battery operated It is not necessary to have a brak...

Page 5: ...it according to his or her own height to make the handle bar comfortable 3 Lock the steering rod after adjustment then turn the handle bar to confirm that it has had been locked 4 Above adjustment of...

Page 6: ...e light warning light 2 Battery will run out soon 3 Red light warning light 3 Battery will run out completely Chapter III Instruction of remote control of Esway Picture 2 1 Function of Remote Control...

Page 7: ...s sound Over speed situation system limits the speed 4 Continuous five sounds system locked or problem from pedal switch Chapter IV Getting Started 1 The Right Starting Operation Hold the turning pipe...

Page 8: ...cture 5 Picture 6 2 Wrong Starting Operation refer to picture 7 and 8 Esway cannot power on if it is not on horizontal level so we must make sure the pedal is on horizontal level then power on it Pict...

Page 9: ...re power on it Picture 9 Chapter V Driving Driving the Esway 2 wheel self balance vehicle is totally different from anything you may have driven before Esway does not have a brake accelerator or gear...

Page 10: ...ply for all landform it can conquer all kinds of grounds made of dirts gravels grasses or sands since the wider ruts increase its stability and the higher chassis ensure your driving will pass thought...

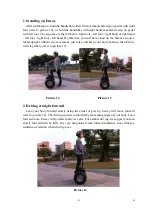
Page 11: ...Stand upright without any movement just relax and keep your body balance then Esway will stay stably refer to picture 15 Picture 14 Picture 15 2 Driving straight forward Lean your body forward slowly...

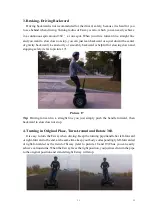
Page 12: ...owing down and stopping safely refer to picture 17 Picture 17 Tip Driving forward in a straight line you just simply push the handle forward then backward to slow down or stop 4 Turning in Original Pl...

Page 13: ...e The max climbing degree of Esway is 25 it is also depend on the driver s actual skill Before climbing up slope you should increase the speed in advance keeping two wheels parallel and keeping your b...

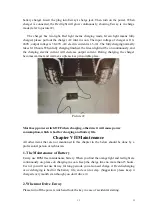
Page 14: ...rmer so please keep in suitable place Picture 22 Must keep power switch OFF when charging otherwise it will cause power consumption which is bad for charging and battery life Chapter VII Maintenance A...

Page 15: ...s or other things which could cause the tire to be damaged worse and to check if there is necessary to replace one new tire 6 Appearance Cleaning It is necessary to keep the pedal and body of Esway cl...

Page 16: ...public places please obey the local traffic rules Chapter IX Indicator and Sound Alarm 1 Indicator introduction 1 Green light Indicator light 1 Continually On no blinking System starts normally and b...

Page 17: ...ld be continuous on as normal starting If the scooter can t balance by using remote control or pressing pedal switch ON it means that there is some problem on gyroscope or accelerometer In above two s...

Page 18: ...ht of footplate pedal 27 cm Max height Of off ground chassis 16 cm Max climbing degree 30 Standard Tire Pressure 250 kpa Battery Indicator 3 states show Fully Charging time 6 8 H 3 6 H Packing Size 85...

Reviews: