background image

EI

N

BA

UA

N

LEIT

UN

G

IN

STA

LL

AT

IO

N


GU

ID

E

V1.

3

VNC711 FI-DUCATO

VNC711 FI-DUCATO-DAB

Summary of Contents for VNC711 FI-DUCATO

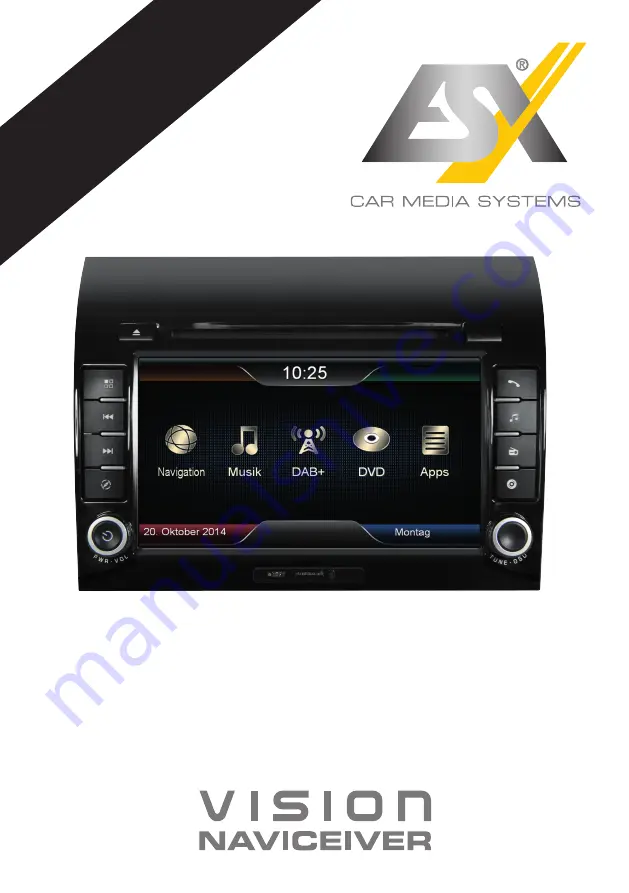
Page 1: ...E IN B A U A N L E IT U N G IN S T A L L A T IO N G U ID E V 1 3 VNC711 FI DUCATO VNC711 FI DUCATO DAB...

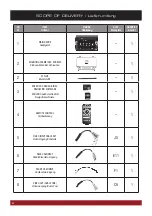
Page 2: ...hmen inkl Schrauben 1 2 STYLUS Markierstift 1 3 MICRO SD CARD 8GB INKL NAVIGATION SOFTWARE MicroSD Speicherkarte 8GB Navigationssoftware 1 4 REMOTE CONTROL Fernbedienung 1 5 VIDEO INPUT CABLE SET Vide...

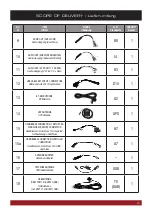
Page 3: ...H 2 CONNECTORS USB Kabelsatz mit 2 Anschl ssen D10 1 13 BT MICROPHONE BT Mikrofon G2 1 14 GPS ANTENNA GPS Antenne GPS 1 15 HANDBRAKE CONNECTION 1 WITH STEE RING WHEEL REMOTE CONNECTOR Handbremsen Ansc...

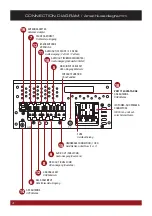
Page 4: ...n AUDIO OUT 2X FRONT 2 X REAR Audio Ausgang 2 x Front 2 x Rear AUDIO OUT SUBWOOFER CENTER Audio Ausgang Subwoofer Center VIDEO INPUT CABLE SET Video Eingang Kabelsatz WITHOUT FUNCTION Ohne Funktion AN...

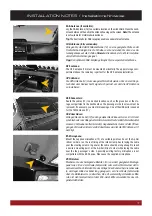
Page 5: ...Teile des Soundsystems und die Komponenten Ihres Fahrzeugs grunds tzlich mit Vorsicht 2 Beachten Sie unter allen Umst nden die Vorschriften des Fahrzeugherstellers und nehmen Sie keine Ver nderungen a...

Page 6: ...lay the an tenna to a suitable location on the windscreen For optimal reception it should be fastened to the windscreen by using the suction cups A hidden installation e g under the A pillar or the da...

Page 7: ...oid laying the cable over the steering column In general the cable should be long enough to reach a desired mounting point at the A pillar driver s side while laying the cable over the the passenger s...

Page 8: ...n Fiat Ducato III Modell von Dethleffs Aufgrund der vielen verschiedenen Ausstattungs varianten der Fiat Ducato Plattform k nnten einige Beschreibungen und Installa tionshinweise in dieser Einbauanlei...

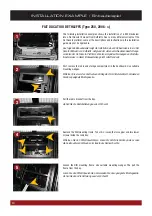
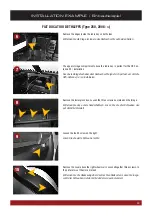
Page 9: ...u installieren Remove the lower glove box Loosen the three screws as marked on the image Entfernen Sie das untere Handschuhfach L sen Sie die drei Schrauben wie auf dem Bild markiert Loosen the fourth...

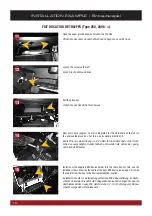
Page 10: ...die im Lieferumfang enthaltene ESX Einbauhalterung im Radio schacht Verwenden Sie daf r die beiliegenden Schrauben Verlegen Sie nun die Anschlusskabel des neuen ESX Ger ts siehe S 2 3 im Fahrzeug vom...

Page 11: ...stalla tion of the new ESX device check its function Please note that it may take up to 15 minutes until a GPS signal can be received in the open Schieben Sie das ESX Ger t vorsichtig in den Radioscha...

Page 12: ...D E S I G N ESX Car Media Systems Audio Design GmbH Am Breilingsweg 3 D 76709 Kronau Germany Tel 49 7253 9465 0 Fax 49 7253 946510 www esxnavi de www audiodesign de 2017 All Rights Reserved...

Reviews: