–
Make sure that the power cable does not come in contact with the rotating brush.
–
Do not plug or unplug the appliance from a socket with wet hands and do not pull
the power cord!
– When winding the cord, hold the plug to prevent lashing of the cord around and to prevent
possible injury.
– If you need to use an extension cord, it has to be uncorrupted and it has to comply with the
valid standards.
– The power cord must not be damaged with sharp or hot objects, open fire, it must not be
sunk into water or bent over sharp edges.
– Check the condition of the power cord of the appliance regularly.
.
For trouble-free operation of the vacuum cleaner, please use the
tested dust filters and micro-filters recommended by the producer.
II. EQUIPMENT AND ACCESSORIES
A – vacuum cleaner
(Fig. 1)
A1 –
suction vent
A2 – lid
A3 – lid lock
A4 – handle
A5 –
depression for attachment of accessories
A6 – power cord
A7 – rear wheels
A8 – plastic fixture for the dustbag
A9 –
dust filter (ETA ANTIBACTERIAL)
A10 – outer grille for the suction filters
A11 – input filter no. 1
A12 – inner grille of the suction filter
A13 – input filter no. 2
A14 –
exhaust grid
A15 – output filter no. 1
A16 – output HEPA filter
A17 – output filter no. 2
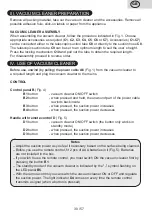
B – Control panel
(Fig. 4)
B1 –
ON/OFF
( ) button
B2 –
power cord winding button
B3 – “
+
” button for suction power setting
B4 – “
-
” button for suction power setting
B5 – LED light panel
B6 – Signal lights indicating when the
dustbag is full
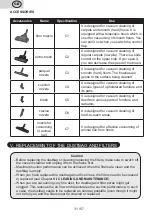
C –
accessories
(Fig. 1)
C1 –
floor nozzle
C2 – turbo-brush
C3 –
parquet nozzle
C4 –
upholstery nozzle
C5 –
brush
C6 – crevice nozzle
C7 – nozzle for vacuuming of animal hair
C8 –
suction hose
C9 –
suction tube
C10 – telescopic suction tube locking
C11 – fixture for small accessories
D – handle with remote control
(Fig. 5)
D1 –
ON/OFF
( ) button
D2 –
“
+
” button for suction power setting
D3 –
“
-
” button for suction power setting
D4 – squeeze signal lights
D5 – battery compartment cover
D6 – battery compartment
29
GB
/ 57


