III. VACUUM CLEANER PREPARATION
Remove all packing material, take out the vacuum cleaner and the accessories. Remove all
possible adhesion foils, stick-on labels or paper from the appliance.
VACUUM CLEANER ASSEMBLY
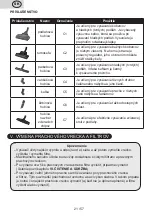
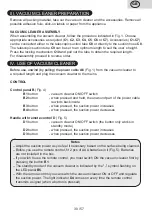
When assembling the vacuum cleaner, follow the procedure indicated in Fig. 1. Choose
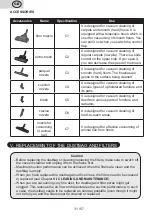
appropriate accessories as required (
C1
,
C2
,
C3
,
C4
,
C5
,
C6
or
C7
). Accessories (
C1
-
C7
)
can be connected either to the telescopic suction tube
C8
or directly to the suction hose
C8
.
The telescopic suction tube
C9
can be set to an optimum length to suit the user´s height.
Press the locking mechanism
C10
and pull out the tube to obtain the required length.
For disassembly proceed in reverse order.
IV. USE OF VACUUM CLEANER
Before use, unwind (by pulling) the power cabl
e
A6
(Fig. 1) from the vacuum cleaner to
a required length and plug the vacuum cleaner to the mains.
CONTROL
Control panel B
(Fig. 4)
B1
button
-
vacuum cleaner ON/OFF switch
B2
button
-
when pressed and held, the unwound part of the power cable
rewinds back inside
B3
button
-
when pressed, the suction power increases
B4
button
-
when pressed, the suction power decreases
Handle with remote control D
(Fig. 5)
D1
button
-
vacuum cleaner ON/OFF switch (the button only works in
standby mode)
D2
button
-
when pressed, the suction power increases
D3
button
-
when pressed, the suction power decreases
Notes
– Adjust the suction power as you feel it necessary based on the surface being cleaned.
–
Before you use the remote control, fit 2 pcs of AAA batteries in it (Fig. 5). Batteries
are not included in the box.
–
If you wish to use the remote control, you must switch ON the vacuum cleaner first by
pressing the button
B1
.
– The standby mode of the vacuum cleaner is indicated by the "–" symbol flashing on
the LED panel
B5
.
–
With the remote control you can switch the vacuum cleaner ON or OFF and regulate
the suction power. The light indicator
D4
comes on every time the remote control
transmits a signal (when a button is pressed).
GB
30 / 57


