ES1050.1 Battery Pack
23
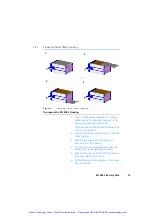
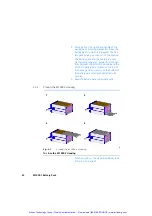
1. Unscrew the two mounting screws at the back
of the top cover which is currently mounted
on the bottom of the housing.
2. Slide the top cover out to the back and
remove it from the housing.
3. Turn the external side of the top cover upside
down so the external side is now facing
upwards.
4. Slide the top cover in the front of the frame on
the top of the housing.
5. Tighten the two mounting screws of the cover
into the housing.
The housing is now operational.
3.4
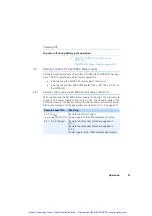
Charging the Battery Pack
Charging the battery pack is temperature-compensated. For safety reasons,
charging cannot take place when the temperature is over + 40 ° C.
3.4.1
Initial Charging
When you receive your ES1050.1 Battery Pack, it is already charged.
3.4.2
Charging at the Battery Pack Interface of the ES1000.3 Housing
The ES1000.3 Power Supply automatically charges the ES1050.1 Battery Pack
via the ES1000.3 battery pack interface as soon as an external voltage source
is applied (automatic operation) or when the ES1000.3 is operating normally.
Note
Warning: Electrochemically speaking, batteries are permanently active and
carry voltages. Therefore never directly connect the battery pole to the SUB-
D connector and never connect it in parallel without a load resistance.
Note
If the battery pack is kept in storage for a long period of time, it should be
recharged at least every 6 months.
Note
Please note that this may discharge a vehicle battery connected to the
ES1000.3!
Artisan Technology Group - Quality Instrumentation ... Guaranteed | (888) 88-SOURCE | www.artisantg.com


