background image

Introduction

1

Introduction

Congratulations on your purchase of ArcSystem products. ArcSystem is a family of overhead LED
products designed for installations where dimming, light quality, and ease of installation are
absolutely essential. With ArcSystem, you will experience perfectly smooth dimming from 100%
down to absolute zero. ArcSystem luminaires come in a variety of form factors, beam angles,
and color-temperature options, all with high-efficiency optics and an outstanding quality of light
ideal for any application.

ArcSystem products with ArcMesh can be controlled using wired DMX or the wireless ArcMesh
protocol. This manual provides step by step instruction on the installation of ArcSystem products
as well as full system integration.

For information on ArcSystem products with RDM control, see

etcconnect.com/ArcSystem

and

the

ArcSystem Pro One-Cell RDM Installation Guide

and

ArcSystem Pro Multi-Cell

RDM Installation Guide

.

Document Conventions

This document uses the following conventions to draw your attention to important information.

Note:

Notes are helpful hints and information that is supplemental to the main text.

CAUTION:

A Caution statement indicates situations where there may be

undefined or unwanted consequences of an action, potential for data loss or
an equipment problem.

WARNING:

A Warning statement indicates situations where damage may

occur, people may be harmed, or there are serious or dangerous
consequences of an action

WARNING:

RISK OF ELECTRIC SHOCK! This warning statement indicates

situations where there is a risk of electric shock.

All ETC documents are available for free download from our website:

etcconnect.com

.

Please email comments about this manual to:

TechComm@etcconnect.com

.

Summary of Contents for ARCP1

Page 1: ...ArcSystem Installation Manual Part Number 7490M2100 Rev G Released 2019 11...

Page 2: ...ademarks and patents go to etcconnect com ip All other trademarks both marked and not marked are the property of their respective owners ETC intends this document whether printed or electronic to be p...

Page 3: ...ns 10 Emergency System Overview 11 Before You Begin Installation 13 Power Disconnect Device 13 Site Survey for Wireless Installations 13 Installation Requirements 13 Standard System One Cell Installat...

Page 4: ...ing 100 240 V Multi Cell Luminaires 30 DMX 30 Installation Procedure 30 Installing 100 240 V Four Cell Round Luminaires 31 Installing 100 277 V Multi Cell Luminaires 32 Supplies 32 Electrical and Wiri...

Page 5: ...Test 46 TX1 Installation 47 Preparing for Installation 48 Supplies 48 Electrical and Wiring Specifications 48 Mounting 48 Terminate Wiring 49 Power 50 DMX In and DMX Out 50 Auxiliary Input 52 Final In...

Page 6: ...iv ArcSystem Installation Manual...

Page 7: ...n on ArcSystem products with RDM control see etcconnect com ArcSystem and the ArcSystem Pro One Cell RDM Installation Guide and ArcSystem Pro Multi Cell RDM Installation Guide Document Conventions Thi...

Page 8: ...fication number if you have called in previously Americas United Kingdom ETC Inc ETC Ltd Technical Services Department Technical Services Department 3031 Pleasant View Road 26 28 Victoria Industrial E...

Page 9: ...READ AND FOLLOW ALL SAFETY INSTRUCTIONS Do not use outdoors Do not let power supply cords touch hot surfaces Do not mount near gas or electric heaters Equipment should be mounted in locations and at h...

Page 10: ...ystem D1 Driver cULus Conforms to UL 8750 Certified to CSA C22 2 No 250 13 EU CE Certified FCC compliant ARCPD1DRDMM ArcSystem D1 RDM Driver ARCPD1HDM ArcSystem D1 High Output Driver ARCPD1HDRDMM ArcS...

Page 11: ...s ARCPED4DCCTRDMM ArcSystem D4 Constant Current RDM Emergency Driver with Two Pin Terminals ARCPED4DCVTM ArcSystem D4 Constant Voltage Emergency Driver with Two Pin Terminals ARCPED4DCVTRDMM ArcSystem...

Page 12: ...ion ArcSystem wireless products contain FCC ID for US TYOJN5168M5 and Industry Canada IC ID IC 7438A CYO5168M5 Note Wireless capable ArcSystem products have been tested and found to comply with the li...

Page 13: ...ver required ideal for short medium throw 20 W full load power consumption adjustable version recessed flush mount with two axis tip and tilt yoke mount version with two axis tip and tilt beam angle o...

Page 14: ...es 48 VDC and 400 mA or 600 mA per output channel with a maximum total output of 2 4 A or 100 W The D4 Constant Voltage Driver with terminals provides 24 VDC and up to 50 W per output channel with a m...

Page 15: ...on see TX1 Installation on page 47 ArcMesh ArcSystem products can be controlled using wired DMX through RJ45 connections or the wireless ArcMesh protocol A wireless installation is an ideal solution f...

Page 16: ...nd continues to reconfigure the communication mesh to establish the most successful path of communication transmission Re Broadcast Mode By default all ArcSystem luminaires are shipped with Re broadca...

Page 17: ...ualified personnel for testing of the emergency operation Note Luminaires must be hard wired to emergency certified drivers to be considered for UL924 certification Note The number of designated emerg...

Page 18: ...120 V and 277 V between the sense and emergency feeds AVERTISSEMENT Ne pas inverser les alimentations 120 V et 277 V entre les alimentations de d tection et de secours WARNING Sense normal and Maintai...

Page 19: ...ment Any work must comply with OSHA Safe Working Practices WARNING Circuits that are installed without an accessible power disconnect device cannot be serviced or operated safely AVERTISSEMENT Il est...

Page 20: ...l a single luminaire each The D2 driver can control two ArcSystem Pro One Cell Micro luminaires The D4 driver can control up to four ArcSystem Pro One Cell or Pro One Cell Small luminaires Up to 32 dr...

Page 21: ...r Four 10 screws and other mounting hardware as needed Note Mounting hardware and installation location must support the weight of the driver conduit hardware and all cable required for installation E...

Page 22: ...6 Nm 4 4 5 3 in lb Power Input ground in conduit 2 5 10 mm2 6 14 AWG 10 mm 3 8 in 4 0 Nm 35 in lb DMX In Thru RJ45 Connectors in conduit Cat5e or better minimum 0 2 mm2 24 AWG conductors terminated t...

Page 23: ...runs to the driver board in the back panel of the driver Be careful when handling It may help to nest the back panel of the driver inside the cover as shown in Wiring the Driver and Luminaire on page...

Page 24: ...es Luminaire Minimum Hole Diameter Pro One Cell 16 5 cm 6 1 2 in Pro One Cell High Output 17 0 cm 6 11 16 in Pro One Cell Small 9 5 cm 3 3 4 in Pro One Cell Micro 7 6 cm 3 in Note If you are installin...

Page 25: ...of the driver consists of wiring power and data DMX to the driver for your luminaire and then running power out to the luminaire from the driver If you are installing emergency system drivers see Eme...

Page 26: ...on Manual Output type varies by model A B C S1 S2 S3 S4 LED1 LED2 LED3 LED4 Switch blocks D4 Driver A Constant Current with Molex connectors B Constant Current with terminal outputs C Constant Voltage...

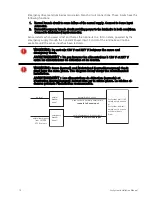
Page 27: ...r les circuits install s sans qu un dispositif de d connexion de l alimentation ne soit accessible 1 Make sure power is off at the main circuit breaker 2 See Wire and Terminal Specifications on page 1...

Page 28: ...all the ceiling with the prepared mounting hole for the luminaire 2 Run the luminaire cable through the previously installed screw clamp conduit connector at one of the driver knockouts Two pin termin...

Page 29: ...s an ISO ground common ETC recommends Cat5e or better minimum 24 AWG conductors terminated to T568B standard Up to 32 D1 D2 or D4 series drivers can be connected per DMX run DMX Connection to Driver 1...

Page 30: ...o not change the switch 1 settings on a D4 Constant Voltage CV model driver Switches 2 through 5 control the DMX channel assigned to the output Switch 6 enables emergency functionality Switches 2 thro...

Page 31: ...POSITIF LECTRONIQUE DE PUISSANCE WARNING Adjustable ArcSystem Pro One Cell fixtures and adjustable ArcSystem Pro One Cell Small fixtures are suitable for Non Fire Rated installations ONLY AVERTISSEMEN...

Page 32: ...e standard ArcSystem Complete the installation as follows referencing the following sections for any additional installation details before wiring the power Preparing to Install the Driver on page 14...

Page 33: ...27 Output type varies by model A B C S1 S2 S3 S4 LED1 LED2 LED3 LED4 Switch blocks SENSE SENSE D4 Emergency Driver A Constant Current with Molex connectors B Constant Current with terminal outputs C...

Page 34: ...ighten the screw 4 Insert the neutral wire typically white into the NEUTRAL N terminal and tighten the screw 5 Connect the line wire typically black into the LINE L terminal and tighten the screw 6 Tu...

Page 35: ...ets the current output threshold ON 400 mA OFF 600 mA Note Do not change the switch 1 settings on a D4 Constant Voltage CV model driver Switches 2 through 5 control the DMX channel assigned to the out...

Page 36: ...connectors DMX is installed in a daisy chain topology and includes one pair of wires Data Data plus an ISO ground common ETC recommends Cat5e or better minimum 24 AWG conductors terminated to T568B s...

Page 37: ...to Threaded Rod Power cable connection DMX Thru DMX In Power switch Fixture attachment plate nut 1 1 Install one of the provided fixture attachment plates nuts M10 1 5 mm or 1 2 13 in with the two pr...

Page 38: ...e on a power distribution system with reliably identified earthed neutral and install a maximum 20 A circuit breaker on the line conductor ArcSystem 100 277 V luminaires and drivers accept 100 277 VAC...

Page 39: ...nd installation location must support the weight of the luminaire conduit hardware and all cable required for installation 1 Make sure power is off at the main circuit breaker 2 Attach a C clamp or ot...

Page 40: ...onnectors ETC part number J4717 WAGO part number 221 412 See Installing 100 277 V Emergency Multi Cell Luminaires on page 38 for more information about wiring for emergency installations Factory Wire...

Page 41: ...line hot a Locate the WAGO connector on the line hot wire black from the input b Run a line hot wire through conduit to a free position on the WAGO connector Note Line hot wire color varies based on...

Page 42: ...roperly and secure in their terminals 2 Tuck wiring and WAGO connectors inside wiring compartment Replace the wiring compartment cover using the screws set aside previously 3 Rotate the luminaire so i...

Page 43: ...d emergency luminaires are supplied with hard wired power cables with NEMA 5 15 connectors for North America and bare ends for Europe and the rest of the world The cables are labeled near the strain r...

Page 44: ...conduit entry for 1 2 in conduit C DMX in and thru D knockout for 1 2 in conduit With the exception of power input terminations ArcSystem 100 277 V emergency system installation requirements are the s...

Page 45: ...tion WAGO ETC part number J4629 WAGO part number 221 413 and four two position WAGO connectors ETC part number J4717 WAGO part number 221 412 Factory Wire Colors Color Type green ground black line hot...

Page 46: ...e WAGO connector on the line hot wire black from the input labeled Maintained b Run a line hot wire through conduit to a free position on the WAGO connector Note Line hot wire color varies based on vo...

Page 47: ...and press the clip down onto the wire d Tug gently to make sure the wire is secure 6 Continue by connecting DMX see Terminate DMX on page 35 then complete the installation Complete Installation 1 Chec...

Page 48: ...y installed and wired During system commissioning the certified ETC technician will remove this setting and configure DMX addresses for normal use During normal use after commissioning is complete Arc...

Page 49: ...ess ArcSystem Initial programming of a wireless ArcSystem requires a USB commissioning tool ARC CT and existing hardware such as a laptop or desk top computer that is connected to ArcSystem This progr...

Page 50: ...un nettoyage ou un entretien WARNING Circuits that are installed without an accessible power disconnect device cannot be serviced or operated safely AVERTISSEMENT Il est imprudent d utiliser ou de r...

Page 51: ...Pro Four Cell Round Pro Eight Cell Troubleshooting ArcSystem multi cell luminaires have DMX LEDs that indicate the status of the processor and DMX communication DMX Link LED Slow flash wireless opera...

Page 52: ...eut causer des blessures graves ou la mort De energize main feed to ArcSystem and follow appropriate Lockout Tagout procedures as mandated by NFPA 70E It is important to note that electrical equipment...

Page 53: ...corder au bo tier du driver ArcSystem ou l metteur TX1 s assurer de la coupure lectrique du disjoncteur principal ou d une autre arriv e lectrique pour l alimentation normale et l alimentation de seco...

Page 54: ...in conduit up to 10 AWG solid or stranded up to 6 mm2 7 mm 1 4 in 0 5 Nm 4 in lb AUX contact inputs input 1 input 2 ground in conduit 22 14 AWG solid or stranded 0 6 1 6 mm2 5 mm 3 16 in 0 5 Nm 4 in...

Page 55: ...ion 49 Terminate Wiring GND DATA DATA GND DATA DATA DMX IN DMX OUT GND AUX contact Inputs ground is common for both inputs Power Terminals front panel LEDs I P 2 I P 1 Fuse NEUTRAL N GROUND HOT L Fuse...

Page 56: ...rdingly 3 Loosen the three screw terminals for NEUTRAL N GROUND and LINE L connections 4 Insert the ground wire typically green into the GROUND terminal and tighten the screw 5 Insert the neutral wire...

Page 57: ...shield wire 6 Twist each shield wire back onto its data pair then apply a 38 mm 1 5 in piece of 5 mm 3 16 in heat shrink all the way down each 3 wire set Make sure to capture the foil shielding at th...

Page 58: ...t terminals If applicable to your installation DMX IN DMX OUT GND DATA DATA GND DATA DATA GND I P 2 I P 1 AUX INPUTS Detail of TX1 Transmitter AUX input with input 1 I P 1 and ground GND connected 1 M...

Page 59: ...ckup transmitter to take control if the master transmitter fails Note Transmitter switch over may take up to 1 minute to complete depending on the size of the network Dual redundancy requires the use...

Page 60: ...isconnect device cannot be serviced or operated safely AVERTISSEMENT Il est imprudent d utiliser ou de r parer les circuits install s sans qu un dispositif de d connexion de l alimentation ne soit acc...

Page 61: ...55...

Page 62: ...56 ArcSystem Installation Manual...

Page 63: ...57...

Page 64: ...852 2799 1220 Paris FR 33 1 4243 3535 Web etcconnect com Support support etcconnect com Contact etcconnect com contactETC 2019 Electronic Theatre Controls Inc Trademark and patent info etcconnect com...

Reviews: