TX1 Installation
51
On board DMX In and Out
terminal connections
Pin
Description
1
common/ground (GND)
2
Data -
3
Data +
DMX IN
DMX OUT
GND
DATA -
DATA +
GND
DATA -
DATA +
GND
I/P 2
I/P 1
AUX INPUTS
Detail of TX1 Transmitter with
DMX IN connected
DMX (Belden 9729) Cable Preparation
1.
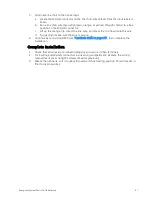
Cut cable (if necessary), leaving an 20 cm (8 in) tail extending from the edge of the box.
D1
3
8
11
7
6
10
5
12
2.
Strip 18 cm (7 in) of the outer jacket off.
3.
Label the cable with the data type and run
designation. (DMX1, DMX2, etc.)
4.
Strip the foil shielding from each wire set back to
within 6 mm (1/4 in) of the outer jacket.
5.
Untwist the shield wire from each pair and apply a
piece of 2 mm (1/16 in) clear heat shrink to each
shield wire.
6.
Twist each shield wire back onto its data pair, then
apply a 38 mm (1.5 in) piece of 5 mm (3/16 in) heat
shrink all the way down each 3-wire set. Make sure
to capture the foil shielding at the base.
7.
Apply the 50 mm (2 in) of the 10 mm (3/8 in) heat
shrink centered on the end of the cable jacket and
the bases of all the wires in the cable.
8.
Cap the ends of the unused pair of wires with a 25
mm (1 in) of 5 mm (3/16 in) heat shrink centered
over the end of the wires.
9.
Strip 5 mm (3/16 in) of insulation off all of the wires
to be used.
Note:
In the case of two wires landing at the
same terminal, strip both wires to 19 mm (3/4 in),
twist them together tightly and then trim them to
5 mm (3/16 in).
10.
Bend back the unused set of wires.
11.
Secure the unused wires to the cable with a wire tie.
12.
Secure the terminated wire set(s) together with a
wire tie 50 mm (2 in) from the termination point.
Summary of Contents for ARCP1
Page 1: ...ArcSystem Installation Manual Part Number 7490M2100 Rev G Released 2019 11...
Page 6: ...iv ArcSystem Installation Manual...
Page 61: ...55...
Page 62: ...56 ArcSystem Installation Manual...
Page 63: ...57...


