


409-35011
Rev D
82
of 83
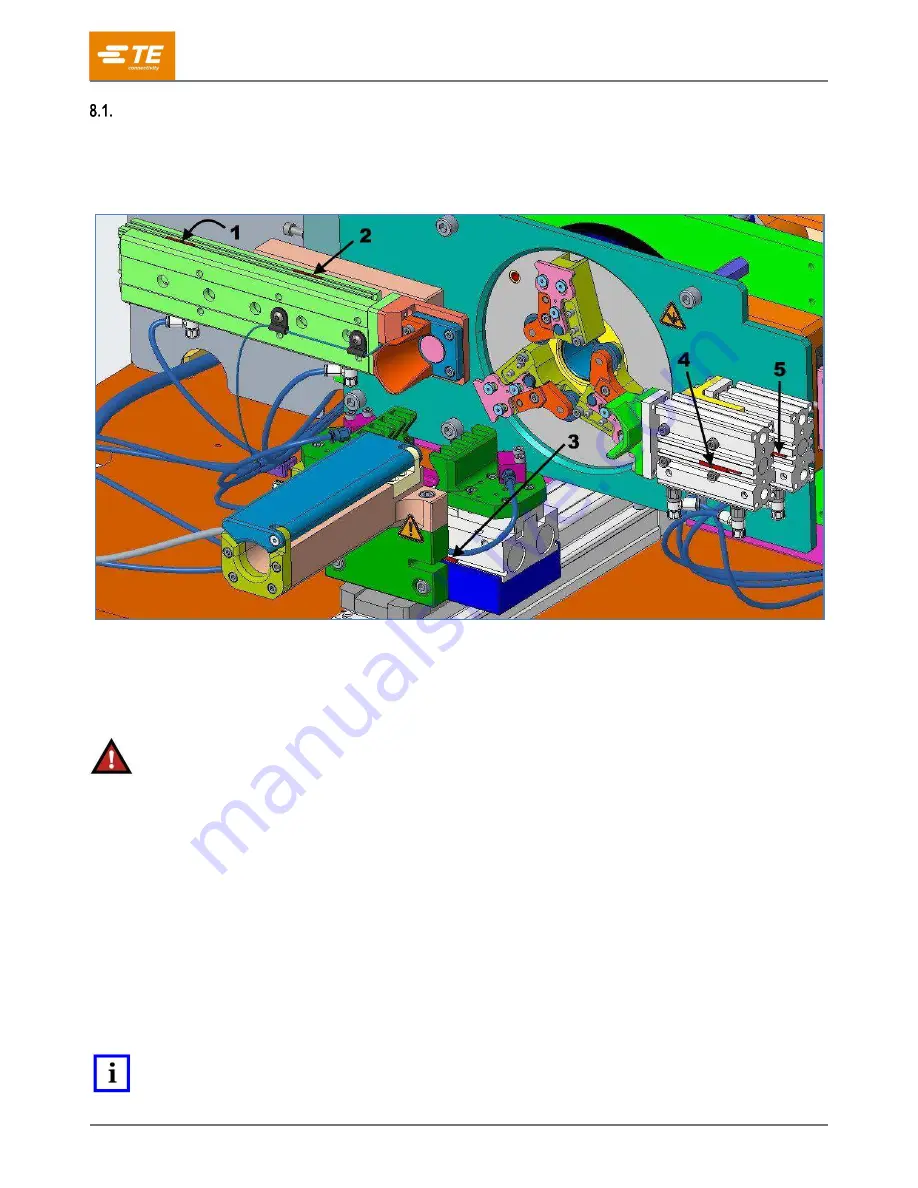
Sensor replacement
Six sensors monitor the position of the various actuators in the machine. Five of the sensors (Figure 102) are
customer-replaceable. (The Braid Wiper Retract sensor is located inside the machine and is not customer-
replaceable.) You might have to remove the top rear cover of the machine to replace these sensors.
Figure 102: Sensor locations
1
Cable gate open sensor #1
2
Cable gate closed sensor
3
Gripper open sensor
4
Cable gate open sensor #2
5
Cable gate open sensor #3
DANGER
Always turn off and lock out the Main Disconnect and the Pneumatic shutoff when performing maintenance on the machine.
1. Disconnect the sensor from the main wiring harness by unscrewing the M8 connector at the end of the
sensor wire. Remove the top rear cover to gain access to the end of the sensor wire, if necessary.
2. Use a small screwdriver to loosen the sensor mounting screw.
3. Slide the sensor out of the slot in the actuator.
4. Install and connect the new sensor.
5. Re-install the top rear cover (if removed).
6. Connect power and turn on the machine.
7. Open the sliding door.
8. Move the actuator to Full OPEN or Full CLOSED position.
9. Adjust the sensor until the LED indicator is ON.
10. Tighten the sensor mounting screw to lock the sensor into position.
NOTE
The cable gate open sensors must be adjusted in numerical order (starting with #1 and ending with #3). The LED for sensor
#1 must be
on
when adjusting sensor #2. The LEDs for sensors #1
and
#2 must be
on
when adjusting sensor #3.


