background image

T

ROUBLESHOOTING

E1:


Room-in sensor error.

E2:


Floor sensor error.

E4:


Room-out sensor error.

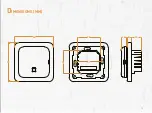
86

86

59

51

52

24

9

12

15

16

D

IMENSIONS (MM) 

Summary of Contents for eTOUCH-WIFI

Page 1: ...Easy touch Easy warm eTOUCH WIFI Thermostat Instructions...

Page 2: ...APP for eTOUCH WIFI...

Page 3: ...roubleshooting 10 Dimensions 08 Function and Operation 02 Technical Specifications Table of Contents 01 01 05 01 02 03 04 07 13 14 8 1 Temporary Override Temperature 8 2 Mode 8 3 Key Lock 8 4 1 Clock...

Page 4: ...minimiz ing energy use Install the app on your smart phone to control the heating system remotely with the WiFi thermostat 01 IP class IP21 Cable specification 2 5mm Connect the thermostat according t...

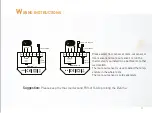
Page 5: ...SENSOR MAX LOAD 16A SENSOR L1 N1 N L FLOOR SENSOR POWER 85V 265V 50 60Hz IP 21 N1 N L L1 S2 COM S1 POWER FLOOR SENSOR ROOM OUT SENSOR Please select floor sensor or room out sensor or floor sensor and...

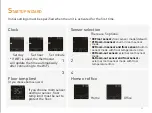
Page 6: ...tch down to turn the thermostat on and move it up to turn the thermostat off Press and to select parameters Press to confirm the selection 03 WiFi Day Clock Room temp Floor temp Set Actual temp Heat P...

Page 7: ...t in sensor mode with floor temperature limit 03 Room out sensor external room sensor mode 04 Room out sensor and floor sensor external room sensor mode with floor temperature limit Floor temp limit I...

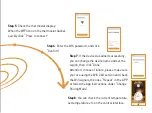
Page 8: ...device Step 1 Scan the QR code or download the Warmme app from App Store Google browser Step 2 Register and log in with mobile number email address in the APP Attention Please read and confirm Privac...

Page 9: ...check the current temperature set temperature etc on the control interface Step 7 If the device was added successfully you can change the device name and set the region then click Done Attention In ca...

Page 10: ...t mode The thermostat runs according to event parameters set in Event Setting to save energy Depending on the setting the home or office will be shown Manual mode The thermostat will run with the set...

Page 11: ...r selection 1 Room temp calibration 2 Floor temp calibration 3 Floor temp limit 4 LI Schedule selection 5 Set heating or cooling 6 Adaptive function 7 Set home or office use 8 Reset to factory setting...

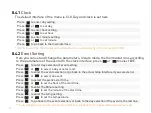
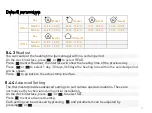
Page 12: ...e day selection if the event is the last one 8 4 1 Clock Press to enter day setting Press or to set day Press to enter hour setting Press or to set hour Press to enter minute setting Press or to set m...

Page 13: ...Press to enter Readout the interface will show the heating time of the previous day Press or to select 1 day 30 days 365 days the heating time within the selected period will be shown Press to go bac...

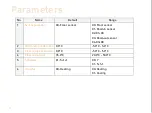
Page 14: ...sor 01 Room in sensor 02 01 00 03 Room out sensor 04 03 00 2 Room temp calibration 0 0 C 5 0 C 5 0 C 3 Floor temp calibration 0 0 C 5 0 C 5 0 C 4 Floor temp limit 35 0 C 20 0 C 50 0 C 5 Schedule 01 5...

Page 15: ...erature limit 2 Room temp calibration calibrate the temperature detected by room sensor 3 Floor temp calibration calibrate the temperature detected by floor sensor 4 Floor temp limit if you choose bot...

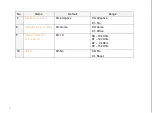
Page 16: ...Range 7 Adaptive function 00 Adaptive 00 Adaptive 01 No 8 Setting home or office 00 Home 00 Home 01 Office 10 Reset 00 No 9 Sensor selection floor sensor 00 No 01 Reset 00 10 00 10 kOhm 01 12 kOhm 02...

Page 17: ...room temperature 7 Adaptive function after several days of installation and use Adaptive function ensures that the required temperature has already been reached when the next event begins 8 Location...

Page 18: ...TROUBLESHOOTING E1 Room in sensor error E2 Floor sensor error E4 Room out sensor error 15...

Page 19: ...86 86 59 51 52 24 9 12 16 DIMENSIONS MM...

Page 20: ...V1 2 INSTALL 02 01 03 04...

Reviews: