background image

8

1

2

3

4

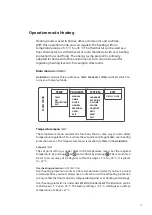
Start menu

The start menu is used to quickly and simply set the three requisite basic settings; 

it is only shown the first time the thermostat is switched on (or if the thermostat is 
fully reset using the reset function). Begin by choosing a language, continue with 
the date and time setting, and finish off by setting operation mode and sensor. 
The headings in grey are the menu name used in the thermostat.

Language setting 

LANGUAGE

You can choose between several languages; the factory setting is English. 
Set the required language by scrolling through them using the 

 or 


button and confirm with 

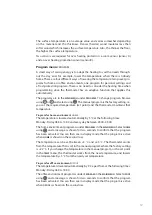
Date & time 

DATE/TIME

The time and date must be set in order for the program functions to work 
correctly. The thermostat automatically sets the day of the week and 
summer and winter time (this function can later be switched off later if so 
desired). 
The value that is blinking can be decreased or increased using the 

 or 


button; when the required setting is made, confirm it with 

 and the next 

value will start to blink. Repeat this procedure until all the values are set. Start 
by setting the applicable date, month and year. Then set hours and minutes.

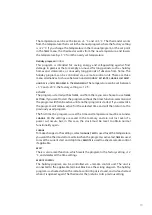
Operation mode 

OPERATION MODE

There a four operation modes: 

HEATING

COOLING

,


INDUSTRY

 or 

MAX/MIN

. The 

operation mode can only be selected in the start menu and cannot be 
changed after this menu is left.
The settings for heating and cooling are for regulating the temperature in 
home, office and storeroom environments or similar. The industry mode is 
used for controlling industrial processes and high temperatures or to safe-
guard sensitive installations against frost damage. Max/Min is used above 
all to keep roof and ground surfaces free of snow and ice.
Set the required operation mode by scrolling through them using the 


or 

 button and confirm with 

. When you have selected the mode that 

best suits your needs, configure the sensors for your installation. Read more 
about sensor settings under the section for the operation mode you have 
selected.

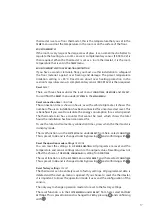
Exit the start menu 

EXIT

When you have made all the settings, press 

EXIT

 to leave the start menu; by 

pressing 

YES

 you come directly to 

DISPLAY MODE

, which is the "normal" mode 

for the thermostat. 

INTRODUCTION

Summary of Contents for ITR-80

Page 1: ...www etherma com ITR 80 Electronic universal thermostat for distributor installation Installation and usage instructions...

Page 2: ...devices in the residual refuse Dispose of your old device in accordance with applicable local regulations Properly dispose of packaging material future replaced parts and or components RESERVATION We...

Page 3: ...n menu 11 Temperature menu 11 Program menu 12 System setting menu 15 Operation mode Cooling 18 Main menu 18 Temperature menu 18 Program menu 18 System setting menu 21 Operation mode Industry 24 Main m...

Page 4: ...stallations It must be permanently in the shade e g on the north side or a shade side Ensure that it is not affected by heat emittance from the building or a heating cable 4 Roof sensor You need to co...

Page 5: ...ht or draught If the room sensor is installed in an appliance box it must be sealed to prevent the air temperature being affected by draught For other types of operation and control the temperature se...

Page 6: ...ces free of snow and ice The temperature range is adjustable between 20 C and 10 C For the best results and the best energy saving combined temperature and humidity control should be used in the Max M...

Page 7: ...rmostat always opens in display mode see page 9 The thermostat has two modes for background lighting full and half strength If no buttons are pressed for 30 seconds the background lighting reverts to...

Page 8: ...ll start to blink Repeat this procedure until all the values are set Start by setting the applicable date month and year Then set hours and minutes Operation mode OPERATION MODE There a four operation...

Page 9: ...press to go to the main menu From the main menu you can reach all settings read more about the main menu under the section for the selected operation mode To return to the display mode wait thirty sec...

Page 10: ...Then you come directly to the language menu read more about the language menu under the section concerning the selected operation mode Shortcut to temperature setting press 3 s To quickly change the t...

Page 11: ...g protection are set The temperature menu is reached via TEMP in the MAIN MENU Set point TEMP The set point setting is under TEMP in the temperature menu Set the required temperature by pressing or an...

Page 12: ...set point and the thermostat maintains that temperature Program for home environment HOME The temperature is lowered automatically by 5 C at the following times Monday Friday 08 30 15 00 and every da...

Page 13: ...the program without the timer function select NO and the program will then be active until another program is started If you select YES the program will remain active for the selected time and will th...

Page 14: ...time of day they shall occur at and the required floor temperature at that time Start by setting the time which is blinking Browse with the or the button to the time you want the event WAKE to occur...

Page 15: ...r the set point is changed in the TEMP menu the thermostat will react based on the new temperature REMOTE CONTROL The Hotel program is controlled by a remote control device such as a card reader conne...

Page 16: ...at calculates when heating should be started to provide the required temperature at the right time The function is activated on delivery but can be switched off as required You will find the settings...

Page 17: ...ou want to calculate the energy consumption for a certain period The thermostat also has a counter that cannot be reset which shows the total hours the installation has been connected for To see the t...

Page 18: ...for home or office environments one program for personal settings and a holiday program There is no need to consider the cooling time when programming since the thermo stat has an adaptive function t...

Page 19: ...aised automatically by 5 C apart from at the following times Monday Friday 06 00 18 00 The office environment program is under PROGRAM in the MAIN MENU Select OFFICE using and a message is shown for t...

Page 20: ...controlled via a remote control unit The unit is con nected to the applicable terminal block see the wiring diagram The holiday program is activated when the remote control input is closed and is deac...

Page 21: ...s for for example language and date as well as resetting functions for the time counter and for complete resetting to factory settings The system settings are under SYSTEM in the MAIN MENU Language LA...

Page 22: ...message is shown for a short time confirming that the function is switched off Activate the function in the opposite way by selecting ON Ventilation mode VENT Iftheroomtemperatureincreasesbymorethan3...

Page 23: ...etting for DATE TIME The reset function is in the SYSTEM menu under RESET and there select CONN TIME This is preset to NO and is changed to YES by pressing and confirming with Reset factory settings F...

Page 24: ...temperatures or for the frost protection of sensitive installations Temperatures within the ranges 15 C to 75 C and 0 C to 170 C can be regulated in this mode or the range can be limited to between 10...

Page 25: ...rature alarm is not activated in the factory settings The function is in the ALARM menu under TEMP in the MAIN MENU Activate the temperature alarm in the ALARM menu under ON OFF and there select ON to...

Page 26: ...B terminal block 7 and 8 Low temperature program LOW TEMP This program limits the temperature range to between 15 C and 75 C This program is provided for two reasons partly to minimise the risk of th...

Page 27: ...riod of more than fifty hours The setting function then comes up automatically The date and time setting is in the MAIN MENU under SYSTEM and DATE TIME Change the value that blinks with either or and...

Page 28: ...by pressing and confirming with Reset the operation mode settings OP MODE Settings can be reset in OP MODE INDUSTRY All programs are reset and the temperature and sensor settings return to the output...

Page 29: ...of snow and ice The temperature range is adjustable between 20 C and 10 C For the best results and the best energy saving combined temperature and humidity control should be used in the Max Min positi...

Page 30: ...d then ON to switch off the timer select OFF When OFF or ON have been selected a message is shown for two seconds confirming that the function has been activated or deactivated In the factory settings...

Page 31: ...s for three seconds Then go directly to the language menu A practical function if you by mistake set the wrong language and then have difficulty finding the language menu again Date and time DATE TIME...

Page 32: ...ection time CONN TIME The connection time is shown in hours as with a vehicle trip meter it shows the number of hours an installation has been connected for since it was last reset This is beneficial...

Page 33: ...If you choose to reset the thermo stat it is important to know the operation mode it uses and the configuration of the sensors The only way to change operation mode is to reset to the factory settings...

Page 34: ...EXCESS TEMP ALARM blinking display SUB TEMP ALARM blinking display OVER HEATING PROTECTION ACTIVE If you have forgotten to make a setting in the start up menu you must go back in the menu and make the...

Page 35: ...1 Connection difference Adjustable 0 3 to 10 3 C Encapsulation class IP20 Reserve power 50 hours Max length sensor cable 50 m 2x1 5mm Alarm relay 2 A 120VAC Normal connection Installation Standard DIN...

Page 36: ...800 No logo EN vers 1 9 190418 ETHERMA Elektrow rme GmbH Landesstra e 16 A 5302 Henndorf Tel 43 0 6214 76 77 Fax 43 0 6214 76 66 Web www etherma com Mail office etherma com...

Reviews: