background image

Instruction for use Nova freshbrew FT

5

© ETNA Coffee Technologies b.v.


C O F F E E   T E C H N O L O G I E S

1

INTRODUCTION

1.1

This user manual

Congratulations on the purchase of yourNova freshbrew FT. 
This machine has been developed and produced using state-of-the-art 
technology.  This, combined with the ISO 9001 certification that applies 
to all our products, means you can rest assured that you are the owner 
of a high quality product.

This manual is intended for authorised and trained users and contains 
all the information required to operate the machine safely and to carry 
out regular maintenance and cleaning tasks. Read the relevant user 
manual carefully before using your machine. 

Ensure that the user manual is kept with the machine to 
ensure that all procedures are carried out correctly.

1.2

Pictograms and safety symbols on the machine

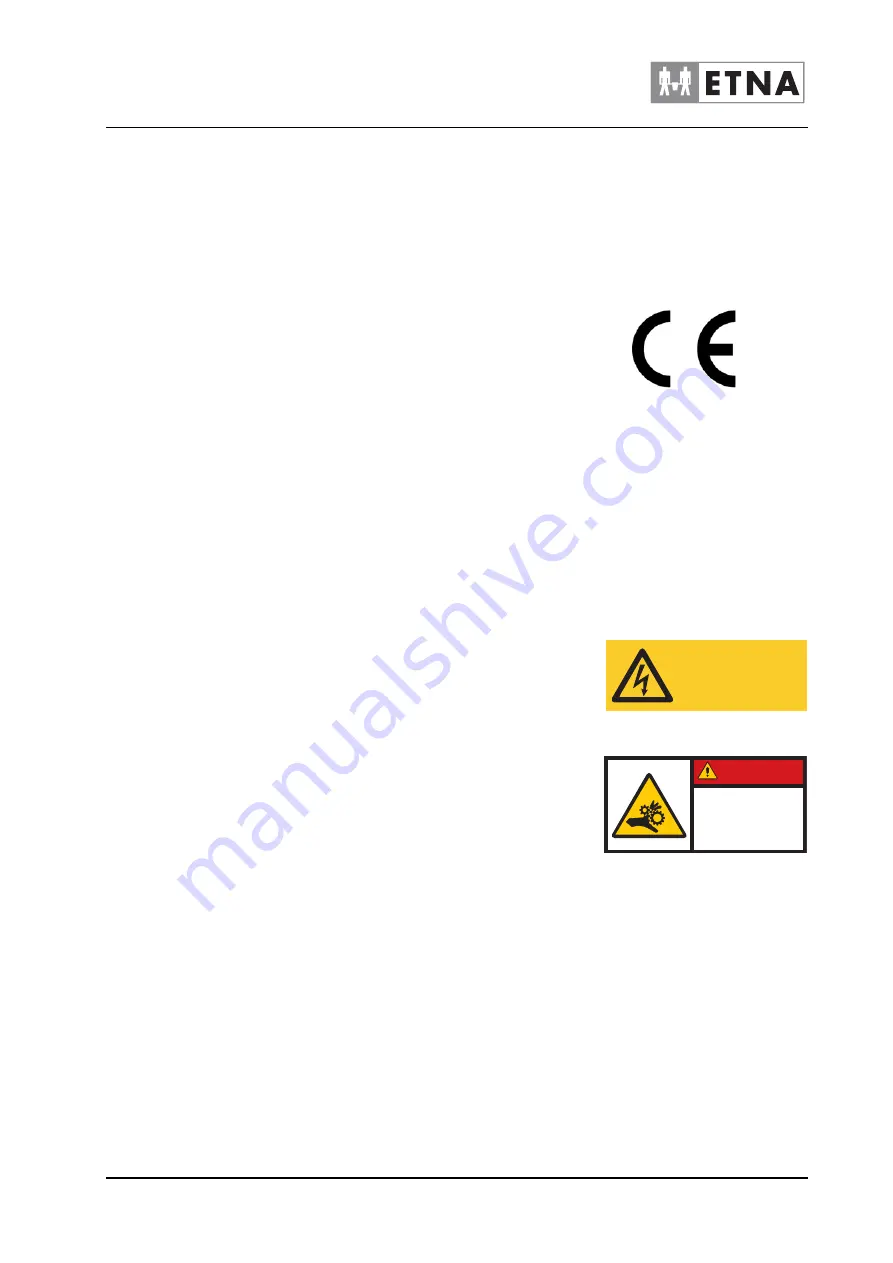
The following pictograms are used on the Nova freshbrew FT:

Electrical hazard

Risk of fingers being trapped

Figure 1-1     

Figure 1-2     

WARNING

DISCONNECT THE

MAINS SUPPLY BEFORE

REMOVING COVER

Figure 1-3     

DANGER

Follow service
procedure as
in manual.

Summary of Contents for Nova freshbrew FT

Page 1: ... ETNA Coffee Technologies b v C O F F E E T E C H N O L O G I E S Instruction for use Nova freshbrew FT ...

Page 2: ...n for use Nova freshbrew FT Manufacturer ETNA Coffee Technologies b v P O Box 200 7130 AE Lichtenvoorde The Netherlands Distributor ETNA Coffee Technologies b v Articlecode 000868641001 Status Publish Revision 1 ...

Page 3: ... 1 Operating and cleaning instructions 8 1 9 2 Icons and instructions 8 1 9 3 Users 9 1 9 4 Technical specifications 9 1 9 5 Modifications 9 1 9 6 Intended use 9 1 10 Available documentation 9 2 DESCRIPTION OF MACHINE 10 2 1 General description 10 2 2 Main components 10 2 2 1 Front view 10 2 2 2 Interior view 11 2 3 Container lay out 12 2 4 Principle of operation 13 2 5 Switching ON and OFF 13 2 6...

Page 4: ...brewing group automatically 21 4 5 6 Cleaning valves 21 4 5 7 Clean the exterior 22 4 6 Weekly maintenance 22 4 6 1 Cleaning mixer components 22 4 6 2 Cleaning the brewing group 23 4 6 3 Cleaning the espresso mixer 26 4 7 Monthly maintenance 27 4 7 1 Cleaning the brewing group monthly 27 4 8 Maintenance overview 27 5 RESOLVING PROBLEMS 29 5 1 LCD display on the selection panel 29 5 1 1 Fault messa...

Page 5: ...al is intended for authorised and trained users and contains all the information required to operate the machine safely and to carry out regular maintenance and cleaning tasks Read the relevant user manual carefully before using your machine Ensure that the user manual is kept with the machine to ensure that all procedures are carried out correctly 1 2 Pictograms and safety symbols on the machine ...

Page 6: ...itions Throughout the document reference is made to the left right front and rear of the machine Where a component or specific part of the machine is referred to this is described from the user s viewpoint facing the selection panel 1 5 Service and technical support Please contact your dealer for further information on settings maintenance and or repair activities that are not dealt with in this m...

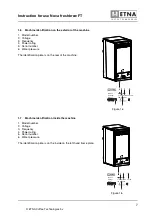
Page 7: ...he machine 1 Model number 2 Voltage 3 Frequency 4 Power rating 5 Serial number 6 Water pressure The identification plate is on the inside on the left hand frame plate Figure 1 4 2 3 6 1 4 C O F F E E T E C H N O L O G I E S Model Nova 154 L Voltage a c 230v 50 Hz 2 31 kw Water 150 800 kPa 4A 012540E1 ETNA Coffee Technologies BV Lichtenvoorde Holland 5 Figure 1 5 2 3 6 1 4 C O F F E E T E C H N O L...

Page 8: ... when using the machine The user of the machine is fully responsible at all times for observing locally applicable safety regulations and guidelines 1 9 1 Operating and cleaning instructions All those using and or cleaning the machine must be familiar with and follow the operating and cleaning instructions closely The owner must ensure that personnel are informed of the operating and cleaning inst...

Page 9: ...sively for dispensing beverages as indicated on the selection panel Use of the machine for any other purpose falls outside the terms of conditions of use The manufacturer does not accept responsibility for any damage or injury that may result from improper use The machine meets current standards and directives The machine may only be used in perfect technical condition for the purposes indicated a...

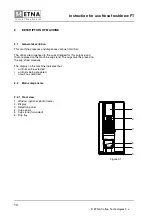
Page 10: ...re dispensed in the cups intended for this purpose and that are placed on the machine cup stand The cups must be placed on the cup stand manually The display on the machine indicates that a drink can be selected a drink is being prepared a fault has occurred 2 2 Main components 2 2 1 Front view 1 Window optional photo frame 2 Display 3 Selection panel 4 Cup sensor 5 Cup stand two sided 6 Drip tray...

Page 11: ... b v C O F F E E T E C H N O L O G I E S 2 2 2 Interior view 1 Ingredient containers 2 Dispenser nozzle 3 Mixer components 4 Dispensing holder 5 Waste bucket 6 Espresso mixer optional 7 Zuma brewer tea brewer brewing group 8 Service switch Figure 2 2 1 2 3 4 5 7 8 6 ...

Page 12: ...E S 2 3 Container lay out The different types are fitted with the following containers Figure 2 3 FT200 FT211 FT221 FT232 Machine Freshbrew con tainer Instant con tainer Nova FT200 1x 1 8 L 1x 3 9 L Nova FT211 1x 1 8 L 1x 3 9 L 1x 3 9 L Nova FT221 1x 1 8 L 1x 3 9 L 2x 1 8 L Nova FT232 2x 1 8 L 3x 1 8 L ...

Page 13: ...cup placed on the cup stand The cup stand has two sides hot water on the left drinks on the right The start button can be used when a drink has been selected and a cup has been placed 2 5 Switching ON and OFF The machine does not have a manual on off switch The key switch used to open the door incorporates the on off switch When the door is opened the machine switches itself off When the door is c...

Page 14: ...electing more than one cup is described below 1 Push the cup stand up and put a jug under the dispensing nozzle 2 Use the jug function button and press the desired selection button several times 3 Now operate the MILK and or SUGAR buttons to obtain the required combination 4 Press the START selection button for the required drink The jug is filled Ensure that the jug is large enough for the number...

Page 15: ... closed and all plating has been fitted Never use sharp objects to operate the buttons Only use the cups or jugs that are available at the counter Ensure that the wall socket with earth connection and the water connection point remain accessible during use In case of emergency the mains plug can then be removed quickly and the water supply can be shut off immediately If the machine is not going to...

Page 16: ...achine The containers hold the ingredients required to prepare drinks Ensure that no fingers are trapped when filling the containers Make sure that the right ingredient is put in the correct container See the label on the inside of the door for an overview of the maintenance functions 1 Open the door of the machine 2 Open the upper lid 3 Lift the container to be filled off the holder and pull it t...

Page 17: ...The photo display is operated with the remote control The photos can be stored on a memory card SD MS MMC XD The photos must be in JPG format 1 Select Photo in the main menu and press Enter or OK The photo browser is shown 2 Select the directory with the photos that are to be shown 3 Press Enter or OK 4 The photos are shown automatically Changing photos 1 Select Edit in the main menu and press Ent...

Page 18: ...ained service engineers with a background in electrical engineering h Warning with respect to burns parts within the machine can be very hot After cleaning or maintenance activities the machine must not be used until all the removed parts have been correctly reinstalled Then inspect and check the inside of the machine The dispenser holder must be aimed at the middle of the cup The ingredient conta...

Page 19: ... of the ingredient containers and refill them if necessary Clean and empty the waste bucket underneath the brewing group Clean and empty the drip tray Rinse the mixers brewer and valves at least twice a day Clean the outside of the machine including the selection panel When cleaning pay attention to the following Clean the machine and parts with a damp clean cloth or paper tissue Put the cleaned p...

Page 20: ...bucket from the machine and empty it 3 Clean the waste bucket with water 4 Put the waste bucket back again 5 Insert the service key and turn it a quarter turn 6 Press button 9 on the service panel to reset the waste counter to 0 7 Turn the service key a quarter turn and remove it 8 Close the machine door Use plastic bags in the waste bucket for hygiene reasons 4 5 3 Cleaning drip tray The drip tra...

Page 21: ...mber of times 7 Turn the service key a quarter turn and remove it 8 Close the machine door Note ensure that the jug or container is large enough to collect the rinsing water 4 5 5 Cleaning the brewing group automatically h The drink dispensed by the machine is very hot and may cause burns 1 Open the door and insert the service key 2 Place a jug of at least 1 5 L under the dispensing holder 3 Press...

Page 22: ... Extraction lid Wash your hands before continuing with this procedure 1 Open the door 2 Remove the closed ingredient containers from the machine Keep them in a clean and dry place 3 Detach the hoses from the mixing chambers 4 Detach the hoses from the dispensing pipes 5 Remove the dispensing pipes from the dispensing holder 6 Release the mixing chamber by pulling the green catch below it forwards ...

Page 23: ...eck the system for leaks 18 Turn the service key a quarter turn and remove it 19 Close the machine door 4 6 2 Cleaning the brewing group Remove the brewing group from the machine 1 Open the door and insert the service key 2 Detach the water supply to the coffee brewing group 3 Detach the water supply to the tea brewing group 4 Press button 5 on the service panel the brewing group opens 5 Remove th...

Page 24: ...Cleaning the brewing group The brewing group must not be washed in a dishwasher The filter may be cleaned and re used a maximum of three times After that it must be thrown away Mark the filter with a cross on the rear each time it is re used Figure 4 6 Removing the brewing group Figure 4 7 Cross on the rear ...

Page 25: ...iper arm is between the drive arms Replace the brewing group in the machine 1 Hang the brewing group in the suspension bracket 2 Pull and turn the lock pin upwards so that the brewing group is disabled 3 Fit the dispensing nozzle of the coffee brewing group 4 Fit the dispensing nozzle of the tea brewing group 5 Insert the espresso mixer holder if available 6 Insert the dispensing holder 7 Insert t...

Page 26: ...onnect the espresso mixer from the brewing group outlet 4 Detach the mixer chamber from the holder by rotating it towards you 5 Clean the parts in hot water and dry them carefully 6 Fit the cleaned parts and connect the hose 7 Switch on the supply with the service key and rinse by pressing button 1 on the service panel Check for leaks The funnel can be cleaned in a dishwasher Figure 4 10 Removing ...

Page 27: ...under the dispensing holder 3 Press button 1 on the service panel rinse brewing group 4 Select Monthly press Start 5 Empty a cleaning sachet into the mixing funnel for the coffee as well as the tea 6 Fit a clip on the discharge pipe of the tea mixing funnel 7 Press START 8 Once you hear the audio signal after 5 min remove the clip from the discharge pipe 9 Press START 10 Turn the service key a qua...

Page 28: ...ek WEEKLY CLEANING 1 Month MONTHLY CLEANING DAILY CLEANING 1 Day 8 9 7 5 6 4 2 3 1 14 15 13 11 12 10 8 9 7 5 6 4 2 3 1 5 6 4 2 3 1 8 9 7 2 3 8 10 9 Repeat steps Weekly cleaning 5 6 4 2 3 1 8 9 7 0 4 min 1 5 L 1 5 L 0 1 5 L 0 1 5 L 1 5 L 0 9 9 5 30 min 5 6 4 2 3 1 8 9 7 0 DAILY MONTHLY START DAILY MONTHLY START 9 000868626000 ...

Page 29: ...eset the fault message see Filling con tainers Empty waste bucket The waste bucket is full Empty waste bucket and clean it see Emptying waste bucket Rinse brewing group Rinse the brewing group see Cleaning the brewing group automatically Cleaning the brewing group Cleaning the brewing group manually see Cleaning the brewing group Empty drip tray The drip tray is full Empty drip tray see Cleaning d...

Page 30: ...s used to navigate back through the menu 5 1 3 User menu Operator Press on the service panel and enter the PIN code The standard PIN code for the user menu is 4321 Figure 5 1 esc enter Figure 5 2 MAIN MENU DRINK COUNTERS TIME DATE TEMPERATURE EXIT ENTER PIN 1 Menu subject Description Beverage counters reading the counter settings per drink resetting the counter settings Time date changing time cha...

Page 31: ...ter 1 Machine Identification 6 2 Water system 6 3 Sound level Measurements according to DIN 45635 with normal use Description Value Main voltage 230 V Frequency 50 Hz Capacity 2 31 kW Fuse 16 A Description Value Water connection G 3 4 outer ring Minimum water pressure 1 5 bar 150 kPa Maximum permitted water pres sure 8 bar 800 kPa 1 1 It the pressure is higher a pressure reducer must be installed ...

Page 32: ...lace the machine in a room in which the temperature may drop below 0 C This is to keep the water in the machine from freezing 6 5 Dimensions and weight Description Value Ambient temperature 5 40 C Figure 6 1 372 759 90 150 604 124 Description Value Height 759 mm Width 372 mm Depth 604 mm Weight when empty 38 kg Weight when full 42 5 kg ...

Reviews: