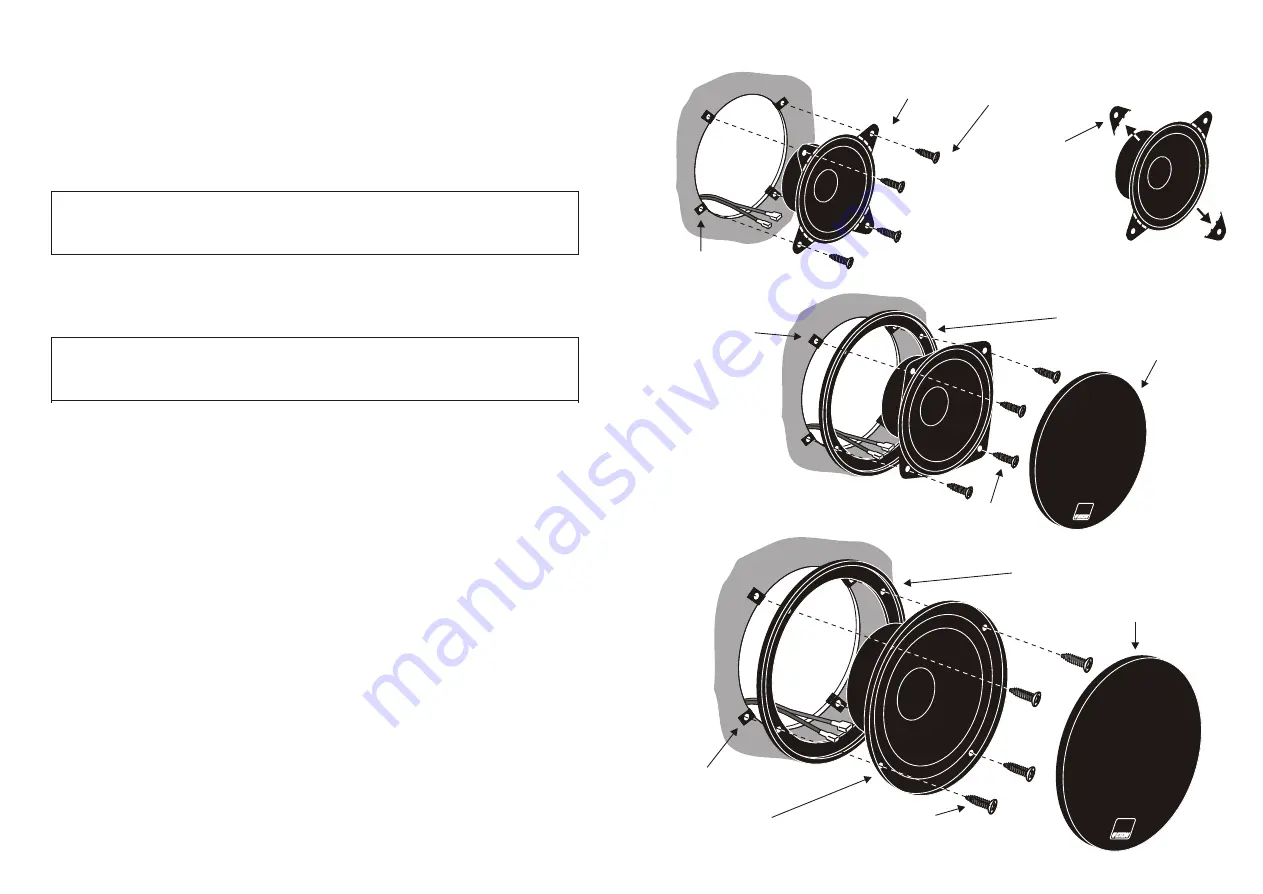
Einbau / Installation
PRX 170.2
Abbildung 1
Figure 1
Blechmutter
Tinnerman Nut
Blechschraube
Self-Threading Screw
Ring und Gitter
(Zubehör - nicht enthalten)
Ring and grille
(optional - not included)
Abbrechohren-
wenn nur Platz für
2 oder 3 Anschraub-
punkte ist.
Break
off
Ears-
if there is space for
2 or 3 mounting
holes only.
PRX 110.2
Blechmutter
Tinnerman Nut
Blechschraube
Self-Threading Screw
Ring und Gitter
(Zubehör - nicht enthalten)
Ring and grille
(optional - not included)
PRX 140.2
Blechmutter
Tinnerman Nut
Blechschraube
Self-Threading Screw
Caution: Use care when removing interior trim panels. Car manu-
facturers use a variety of fastening devices that can be damaged in the
disassembly process.
Installation
If it is not possible to install the loudspeaker in the original factory speaker
location, the most used position is the door panel.
1.
After choosing a location, carefully remove the trim panels. Be sure
that sufficient mounting depth is available and that no moveable
mechanical parts (window, window regulator handle) are restricted
in their functionality.
2.
Use the enclosed drilling template to cut a suitable hole in the trim
panel and, if necessary, in the sheet metal behind. Drill holes for the
fastening screws. Mount the parts as shown in
figure
1.
Attention: If sheet metal must be cut or removed contact your
authorized car dealer for professional advice. By damage to sup-
porting body structures the safety certificate may be withdrawn.
Whenever you run wires through sheet metal, use tape or grommets to properly
insulate the metal edges from cable jackets. This technique prevents chafing
and possible short circuits that could damage an amplifier or the loudspeakers.
1.
Follow the wiring diagrams
figures
2
to connect the loudspeaker
system to your automobile radio and possibly to an amplifier. Be very
careful of correct polarity of all connections.
(+ to +, - to -)
2.
Replace the automobile battery connector and test the loudspeaker
system.
ELECTRICAL INSTALLATION
3.
If you plan to use grilles or panels in front of the loudspeaker, ensure
that sufficient space is available for the path of the loudspeaker cone.
Should the distance not be sufficient, the cone could beat against the
grille or panel thus damaging the loudspeaker.


