7
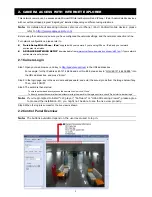
3. CAMERA CONFIGURATIONS
Users can further configure this network camera by accessing via Internet Explorer.
3.1 System configuration menu
Click “Config.” to enter the configuration page.
Note:
You need to be “Supervisor” to enter the system configuration page. If you’re not a “Supervisor”,
please re-log into the camera with the correct user name and password.
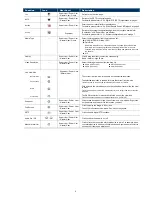
The functions are categorized into six menus: Network, Camera, Record Timer, Storage, Trigger and General.
For details about “Network”, please refer to “3.2 Network” at page 8.
For details about “Camera”, please refer to “3.3 Camera” at page 11.
For details about “Record”, please refer to “3.4 Record” at page 13.
For details about “Storage”, please refer to “3.5 Storage”’ at page 14.
For details about “Trigger”, please refer to “3.6 Trigger” at page 14.
For details about “General”, please refer to “3.7 General” at page 16.
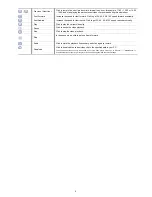
Main Menu
Sub-Menu
Reference
Network
Network
Configure network settings.
QoS
Limit the data flow for live streaming.
DDNS
Enter DDNS information when the network type is PPPOE or DHCP.
SNTP
Synchronize your camera time with the networked computer systems.
FTP
Enter the FTP information for event notifications when “FTP” is chosen in “Trigger”
→
“Trigger”.
Enter Email information for event notifications when “Email” is chosen in “Trigger”
→
“Trigger”.
Filter
Choose to permit or block the IP address(es) which can access this camera.
UPnP
*Suitable for Windows-based operating system.
Allow this camera to be detected among devices within the same network area for easy and
quick usage.
Bonjour
*Suitable for Apple Mac-based operating system.
Allow this camera to be detected among devices within the same network area for easy and
quick usage.
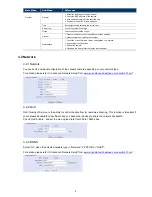
Camera Camera
1. Set the camera title.
2. Specify the display position of the camera title.
Video
Adjust video-related settings in different video format.
Color
Adjust the color performance.
Audio
Adjust the audio volume of the microphone and speaker.
Advance
Adjust the camera parameters if necessary.
Record
Record
Configure the record function.
Record Timer
Schedule human detection recording and external alarm recording.
Storage
Memory
Check the current storage capacity and clear all recorded data when needed.
Trigger
Trigger
1. Enable / disable the motion, alarm and PIR detection.
2. Set the motion detection area.
3. Configure how the camera reacts for any event.

