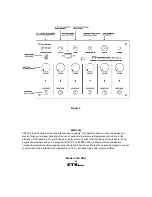
HPDA-6 Headphone Distribution Amplifier
The HPDA-6 is a 6 channel headphone distribution amplifier with an integrated recorder interface
and ETS pre-amplified microphone input.
ETS Microphone Input
Connect any ETS SM1 series microphone to this input. This input can also supply power to a
DNR-1 noise cancelling interface, SMM-X mixers and multiple microphones. Consult sales for
additional information.
ETS Microphone Input Level
Use this control to set the maximum allowable gain of the microphone.
Line Output Jack
This is a line level (0db) output of the ETS microphone input signal. This jack is typically
connected to the audio input of a recorder.
Recorder Switch
If you will be connecting a recorder to the HPDA-6, place this switch in the “IN” position. If an ETS
microphone is connected and the audio in/outs are connected to the recorder, you will be able to
hear live audio and the playback of recordings. If a recorder will not be connected, leave this
switch in the “Out” position.
Line Input Jack
This is a line level (0db) input. When the recorder switch is in the “IN” position, whatever signal
source is on this jack will be heard at the headphone output jacks. The ETS microphone input
cannot be heard unless a recorder is connected. This input is typically connected to the audio
output of a recorder.
Headphone Input Jack
This input accepts a headphone level input. It is typically connected to an ETS base station
output. If using this input, it is recommended that the volume control of the ETS base station be
set at 3/4 full clockwise and left alone. The volume of each connected headphone can then be
adjusted independently.
Power Input Jack
This input accepts 12-15vdc regulated or unregulated power at 500ma. The center pin (tip) is the
negative termination. Connecting a power supply with a center pin + will result in no power being
supplied to the HPDA-6 but it will not damage the unit.
Headphone Volume Controls
Each connected Headphone’s volume can be adjusted separately. Prior to plugging in a set of
headphones, be sure to set the volume control fully counter-clockwise.


