10
INSTALLING BATTERIES
CAUTION: USE PROTECTIVE GLOVES AND GOGGLES WHEN HANDLING BATTERIES, AVOIDING
ANY CONTACT WITH THE ACID INSIDE THE BATTERIES.
CAUTION: THE BATTERY CHARGER AND THE CONTROL BOARD ARE SET ACCORDING TO THE
TYPE OF BATTERIES SHOWN IN THE SHEET ATTACHED TO THE USER’S MANUAL.
IF YOU WANT TO MOUNT BATTERIES WITH A DIFFERENT AMPERAGE OR OF A DIFFERENT TYPE
(I.E. LEAD-ACID, AGM OR GEL) THE SETTING SHOULD BE DONE ON THE BATTERY CHARGER AS
WELL AS ON THE CONTROL BOARD ON THE MACHINE.CONTACT A RESELLER OR A TECHNICIAN
BEFORE MOUNTING THESE TYPES OF BATTERIES.
Refer to the specification sheet for battery types and sizes suitable for the machine.
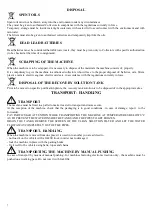
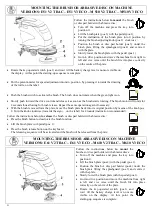
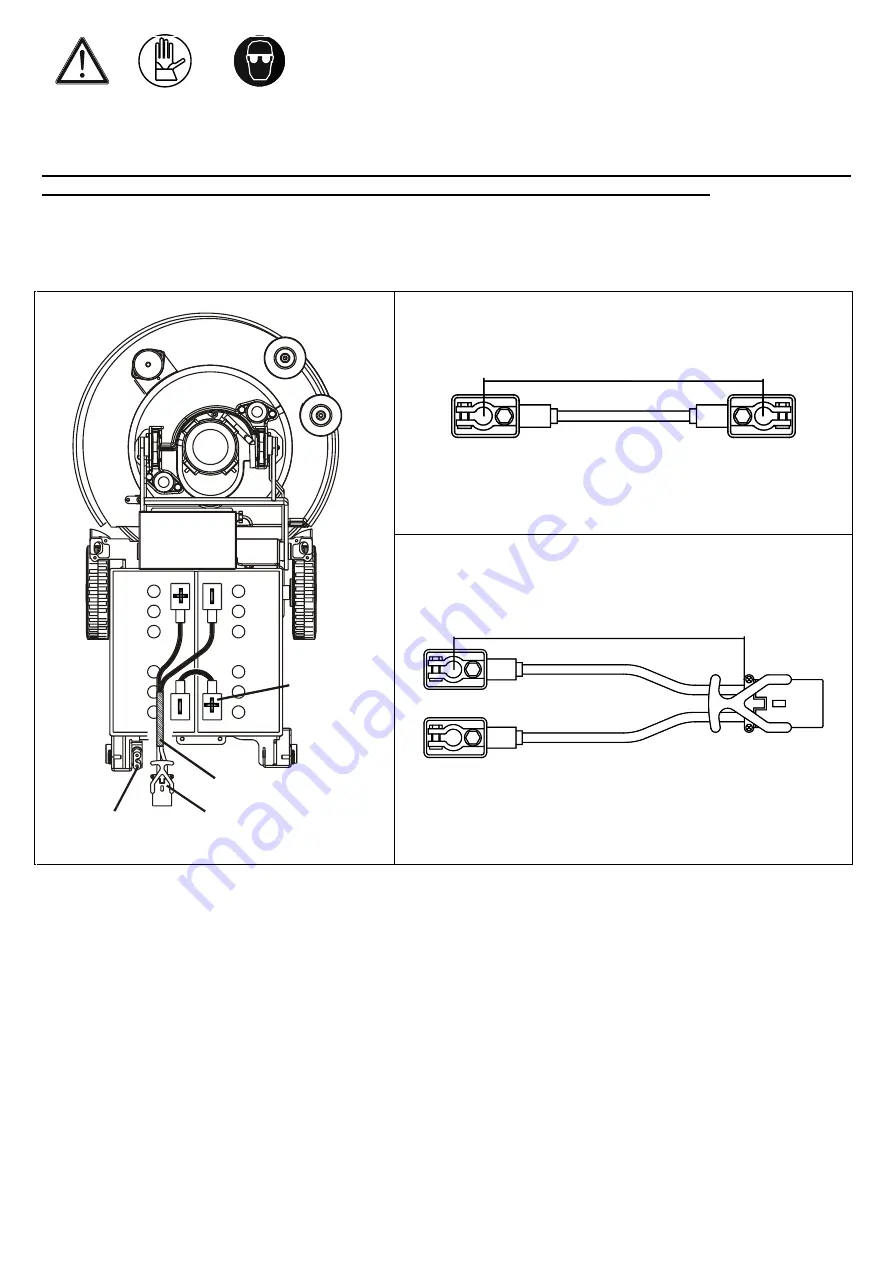
FIG.C
FIG.B
2
3
FIG. A
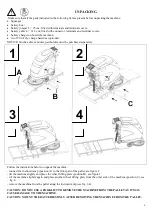
L=250mm
FIG.B
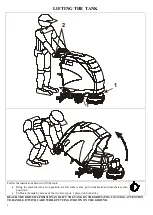
L=515 mm
FIG.C
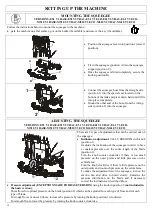
Follow the instructions below to mount the batteries to the machine:
park the machine on a flat surface, put on the brake (if available) and remove the key (if available);
Lift the tank following the instructions as indicated in the previous section of the present manual;
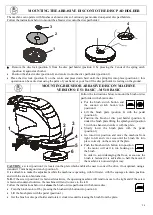
Place the batteries in the battery box. Make sure the poles are clean and apply a thin layer of petroleum jelly.
BE VERY CAREFUL NOT TO TURN OVER THE BATTERIES AS IT COULD CAUSE ACID TO LEAK
AND DAMAGE THE MACHINE.
Connect the jumper (fig. C) and the battery cable (fig. D) as indicated in figure B, make sure to tighten the screws on
the terminal clamps and place the terminal covers.
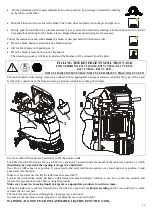
Connect the mobile connector (position 2 – fig. B) with the fixed connector (position 3 – fig. B) into the machine.


