


Bouffée de Vapeur et Vapeur Continuelle (horizontale et verticale)
Remarque:
Avant d’utiliser l’appareil pour la première fois, il est important de purifier
l’intérieur du fer en laissant la vapeur s’échapper librement pendant une minute. Ceci
permet d’éliminer les impuretés laissées dans l’appareil pendant sa fabrication
IMPORTANT:
Si le vaporisateur de vapeur pour vêtements/fer n’a pas été réglé à
la bonne température pour produire de la vapeur, des gouttelettes d’eau pourraient
s’échapper de la semelle.
DIRECTIVES D’UTILISATION
AVERTISSEMENT!
ÉVITEZ d’orienter le fer vers le visage, vers vous ou
vers qui que ce soit pendant l’usage ou le réglage de la vapeur. Des brûlures
ou blessures graves pourraient survenir.
16
Remarque:
Pour un maximum de vapeur, le cadran de commande de la température
doit être réglé à « • • • ».
1.
Assurez-vous que l’appareil est débranché.
2.
Remplissez-le d’eau en suivant les instructions de remplissage à la page 15.
3.
Branchez l’appareil.
4.
Réglez le cadran de commande de la température dans la région « vapeur »,
c.-à-d. « • • • ». (Voir la page 15 pour le réglage de la température.)
5.
Le voyant s’allumera.
6.
Une fois la température désirée atteinte, le voyant s’éteindra.
7.
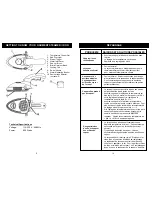
Une fois le voyant éteint, appuyez sur le bouton de vapeur pour produire un fort
jet de vapeur. Pour prévenir que de l’eau suinte de la semelle, ne tenez pas le
bouton de vapeur enfoncé pendant plus de 5 secondes. Voir les illustrations ci-
dessous.
8.
Lorsque vous utilisez la fonction de vapeur continue, appuyez sur le bouton de
vapeur et relâchez-le. Le débit de vapeur commencera peu de temps après
que vous ayez relâché le bouton. Pour maintenir un débit de vapeur constant,
appuyez et relâchez le bouton de vapeur encore une fois dès que le débit de
vapeur commence à ralentir.
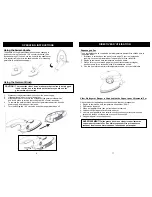
Vapeur verticale
Bouffée de vapeur
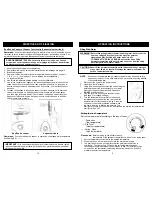
OPERATING INSTRUCTIONS
Setting the Iron Temperature
Please note:
Before starting to iron delicate fabrics, it is best to first test the
temperature of the garment steamer/iron on a hem or an inside seam.
1.
Set the temperature control dial to the desired temperature.
2.
Stand the unit on its heel and connect it to the main power supply.
3.
The pilot light will come on to indicate that the garment steamer/iron is
heating up. The light will go “Off” when the set temperature has been
reached and the garment steamer/iron is ready to use. The pilot light will go
on and off as the thermostat is switching the heating element on and off to
maintain the selected temperature.
5
Filling With Water
WARNING!
Before filling the garment steamer/iron with water, be sure that the
unit is not plugged into the electrical outlet. The garment
steamer/iron may be filled with water while it is hot.
TO PREVENT THE RISK OF BURNS, use caution when filling
garment steamer/iron with water. Burns can occur from touching
hot metal parts, hot water or steam.
CAUTION:
Never fill the garment steamer/iron with fabric conditioner, starches
or any other liquid, as these will damage the steam mechanism. Do
not use contaminated water.
NOTE:
Because of the soleplate design, ordinary tap water may be used with this
appliance. However, in very hard water areas, we recommend using distilled
or demineralized water.
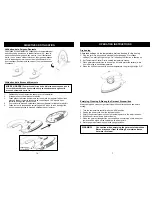
1.
Disconnect the unit from the power supply.
2.
Open the water inlet cover.
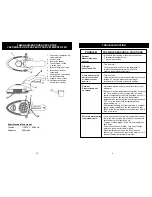
3.
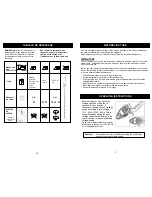
Using the measuring beaker provided and holding the
garment steamer/iron at a slight angle, pour water
slowly into the water filling inlet. See illustration.
DO NOT
overfill the tank.
4.
Plug the cord into a household electrical outlet
(see page 3 for voltage settings).
5.
Turn the temperature control dial to the desired
temperature setting and allow the iron to heat for
approximately 2 minutes before ironing. Place iron
on its heel (on a stable, protected surface) while
the iron is warming to desired temperature. The
pilot light will come on. When the iron has reached the desired temperature, the
pilot light will go “Off”.
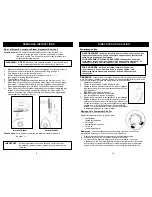
Set the temperature dial according to the type of fabric .
• Synthetics
(low temperature)
• • Silk, Wool
(medium temperature)
• • • Cotton, Linen
(high temperature)
Summary of Contents for Shark GI460N
Page 2: ......


