background image

ISSUE 1/Original version/OCT 2013 
 

4.


Never place hands, fingers, gloves or clothing near cutting area or rotating machine parts. 

5.


Remove adjusting keys or switches before turning the machine on. A wrench or a key that is 

left attached to a rotating part of the machine may result in personal injury. 

6.


Do not overreach. Keep proper footing and balance at all times. Proper footing and balance 

enables better control of the magnetic drilling machine in unexpected situations.  

7.


Use safety equipment. Always wear eye protection. Dust mask, non-skid safety shoes, hard 

hat, or hearing protection must be used for appropriate conditions. 

8.


Always use supplied safety chain during any work on non-horizontal components.  Mounting 

can release.  


MACHINE USE AND CARE 

1.


When using the machine on non-horizontal surfaces, you must use cutting paste. Do not use 

oil because the oil can drip into the motor unit. 

2.


During machine operations, the annular cutter must be cooled and lubricated with good 

quality cutting or lubrication oil. Remove the slug from the annular cutter after each hole. 
Caution, the slug may be hot! 

3.


Use clamps or other practical way to secure and support the work piece to a stable platform. 

Holding the work by hand or against your body is unstable and may lead to loss of control. 

4.


Do not use machine if switch does not turn it on or off. Any tool that cannot be controlled 

with the switch is dangerous and must be repaired. 

5.


Disconnect the plug from the power source before making any adjustments, changing 

accessories, or storing the tool. Such preventive safety measures reduce the risk of starting 
the tool accidentally.  

6.


Store idle Magnetic drilling machines out of reach of children and other untrained persons. 

Tools are dangerous in the hands of untrained users. 

7.


Maintain machines with care. Keep cutting tools sharp and clean. Properly maintained tools, 

with sharp cutting edges are less likely to bind and are easier to control. 

8.


Check for misalignment or binding of moving parts, breakage of parts, and any other 

condition that may affect the machine operation. If damaged, have the tool serviced before 
using. Many accidents are caused by poorly maintained tools. 

9.


Use only accessories that are recommended by Euroboor BV for your model. Accessories that 

may be suitable for one machine, may become hazardous when used on another machine. 


SERVICE 


Tool service must be performed only by qualified repair personnel. Service or maintenance 

performed by unqualified personnel could result in a risk of injury. 


When servicing a tool, use only identical replacement parts. Follow instructions in the 

Maintenance section of this manual. Use of unauthorized parts or failure to follow 
Maintenance Instructions may create a risk of electric shock or injury. 


When using this machine, you MUST wear ear and eye protection.  


Summary of Contents for ECO.50

Page 1: ...USER MANUAL ECO 50 Magnetic Drilling Machine SERIAL NO ____________ DATE OF PURCHASE __________ E U R O B O O R FOR PROFESSIONALS BY PROFESSIONALS...

Page 2: ...ls and products to help you be more productive Before operating your new magnetic drilling machine please read all instructions rst These include the Operator s Manual and Warning Label on the unit it...

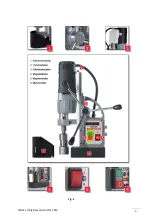
Page 3: ...ISSUE 1 Original version OCT 2013 3 3 Fig 1...

Page 4: ...he directives of the European Community Class of protection I Product with basic insulation and exposed touchable conductive parts additionally connected to the protective earth conductor mm Millimete...

Page 5: ...gs 2 Avoid body contact with grounded surfaces such as pipes radiators ranges and refrigerators There is an increased risk of electric shock if your body is grounded 3 Do not expose magnetic drilling...

Page 6: ...switch does not turn it on or off Any tool that cannot be controlled with the switch is dangerous and must be repaired 5 Disconnect the plug from the power source before making any adjustments changi...

Page 7: ...nto the work piece before drilling Do not perform any design assembly or construction activities on the work piece while the machine is turned on Before turning on the machine make sure the accessory...

Page 8: ...nd month of manufacturing and identification number is engraved on the frame magnet and the motor unit Example 050 12 11 001 Model type Year of Manufacture Month of manufacture Identification number P...

Page 9: ...ifications as per ISO 4871 Sound emission Measured A weighted sound power level LwA re 1 pW in decibels 108 Measuring uncertainty KwA in decibels 3 A weighted emission pressure power level measured at...

Page 10: ...nforced with an additional steel plate in order to guarantee the magnetic holding power Check the machine for possible damage Before using the machine you must carefully check protective devices or sl...

Page 11: ...L GUARD FIG 1 The guard protecting against chippings and accidental contact must always be mounted during operation 1 Hold the guard in front of the magnet aligning the slots in the guard with the hol...

Page 12: ...l the magnet is placed on Paint or coating of the material the magnet is placed on Metal chips oil or other dirt under the magnet If the LED indicator see page 13 lights up GREEN the magnet is generat...

Page 13: ...ll be lit red The LED indicator Fig 2 2 will be lit GREEN if generated magnetic force is sufficient When LED indicator turns RED there is not enough magnetic force and it is not safe to work To deacti...

Page 14: ...m stop drilling regularly refill the holes of the spindle and continue drilling 8 Apply less pressure when the drill cuts through the material 9 Turn the arms to put the motor in highest position and...

Page 15: ...he 5 self locking set screws at the left side Tighten screws in series until the gear rack moves freely in the dove tail guide but does not allow the motor to wobble Cleaning WARNING Blow dirt and dus...

Page 16: ...machines operation must be checked to ensure that all components are working correctly Replace any defective parts immediately This prevents properly function parts from being damaged CARBON BRUSHES B...

Page 17: ...justing all setting nuts and screws 3 Operate the slide up and down a few times to test the movement and make any further necessary adjustments Try to ensure that all the screws are exerting a uniform...

Page 18: ...r guide not mounted straight Dirt between spindle and triangular guide Motor starts running when magnet switch is turned on Damage or defective relais in control unit Motor making a rattling sound Gea...

Page 19: ...there is machine failure and the problem cannot be saved with one of the above solutions PROTECTING THE ENVIRONMENT Separate collection This product must not be disposed of with normal household waste...

Page 20: ...net switch 33 020 0001 Control Unit 220v 020 0002 Control Unit 110v 34 020 0037 Cable clamp 35 050 0101 Motorunit 220v 050 0102 Motorunit 110v 36 050 0586 Cable housing 37 050 0587 Screw PKVZ4 8x35 51...

Page 21: ...ISSUE 1 Original version MARCH 2013 21 21 EXPLODED VIEW of ECO 50...

Page 22: ...ISSUE 1 Original version MARCH 2013 22 22...

Page 23: ...netic Drilling Machine Type ECO 50 Ratings and principal 230 240V 50 60Hz Class I Characteristics ECO 50 1250W N0 380 690 min Applicable EC Directives Machinery Directive 2006 42 EC Relevant standard...

Reviews: