GB
7
6
Recommendation
To allow you to easily level your wine cabinet, it is fitted with 2 adjustable feet at the front.
Carry out final levelling of your cabinet (spirit level recommended).
WAIT 48 HOURS BEFORE PLUGGING IN YOUR APPLIANCE
When moving your cabinet, never tilt it more than 45°, and always on its side (on the opposite side of
the flexible lead).
Some important facts about wine
Your ARTEVINO wine cabinet has been designed to guarantee optimal storage and/or serving conditions
for your wine.
Wine is a complex product. It develops very slowly and requires specific conditions in order to reach its
full potential.
All wines are stored at the same temperature. Only their serving temperatures differ.
This being the case, just like the natural cellars of wine producers, it is not so much the absolute value of
the aging temperature that is important but its consistency. In other words, whatever temperature your
cabinet is set at (between 50 and 57°F), your wine will be stored in ideal conditions provided that this
temperature does not fluctuate.
IN ANY EVENT, IF YOU NOTICE A HUMIDITY OR TEMPERATURE FAULT INSIDE YOUR WINE
CABINET, BE AWARE THAT ONLY PROLONGED EXPOSURE TO ABNORMAL CONDITIONS
IS HARMFUL TO YOUR WINES.
Power supply
For your personal safety, the wine cabinet must be correctly earthed.
Ensure that the socket is correctly earthed and that your installation is protected by a circuit breaker.
All work must be carried out by a qualified electrician.
Installing your wine cabinet
• When unpacking your cabinet, check that it is not damaged (signs of impact, buckling, marks).
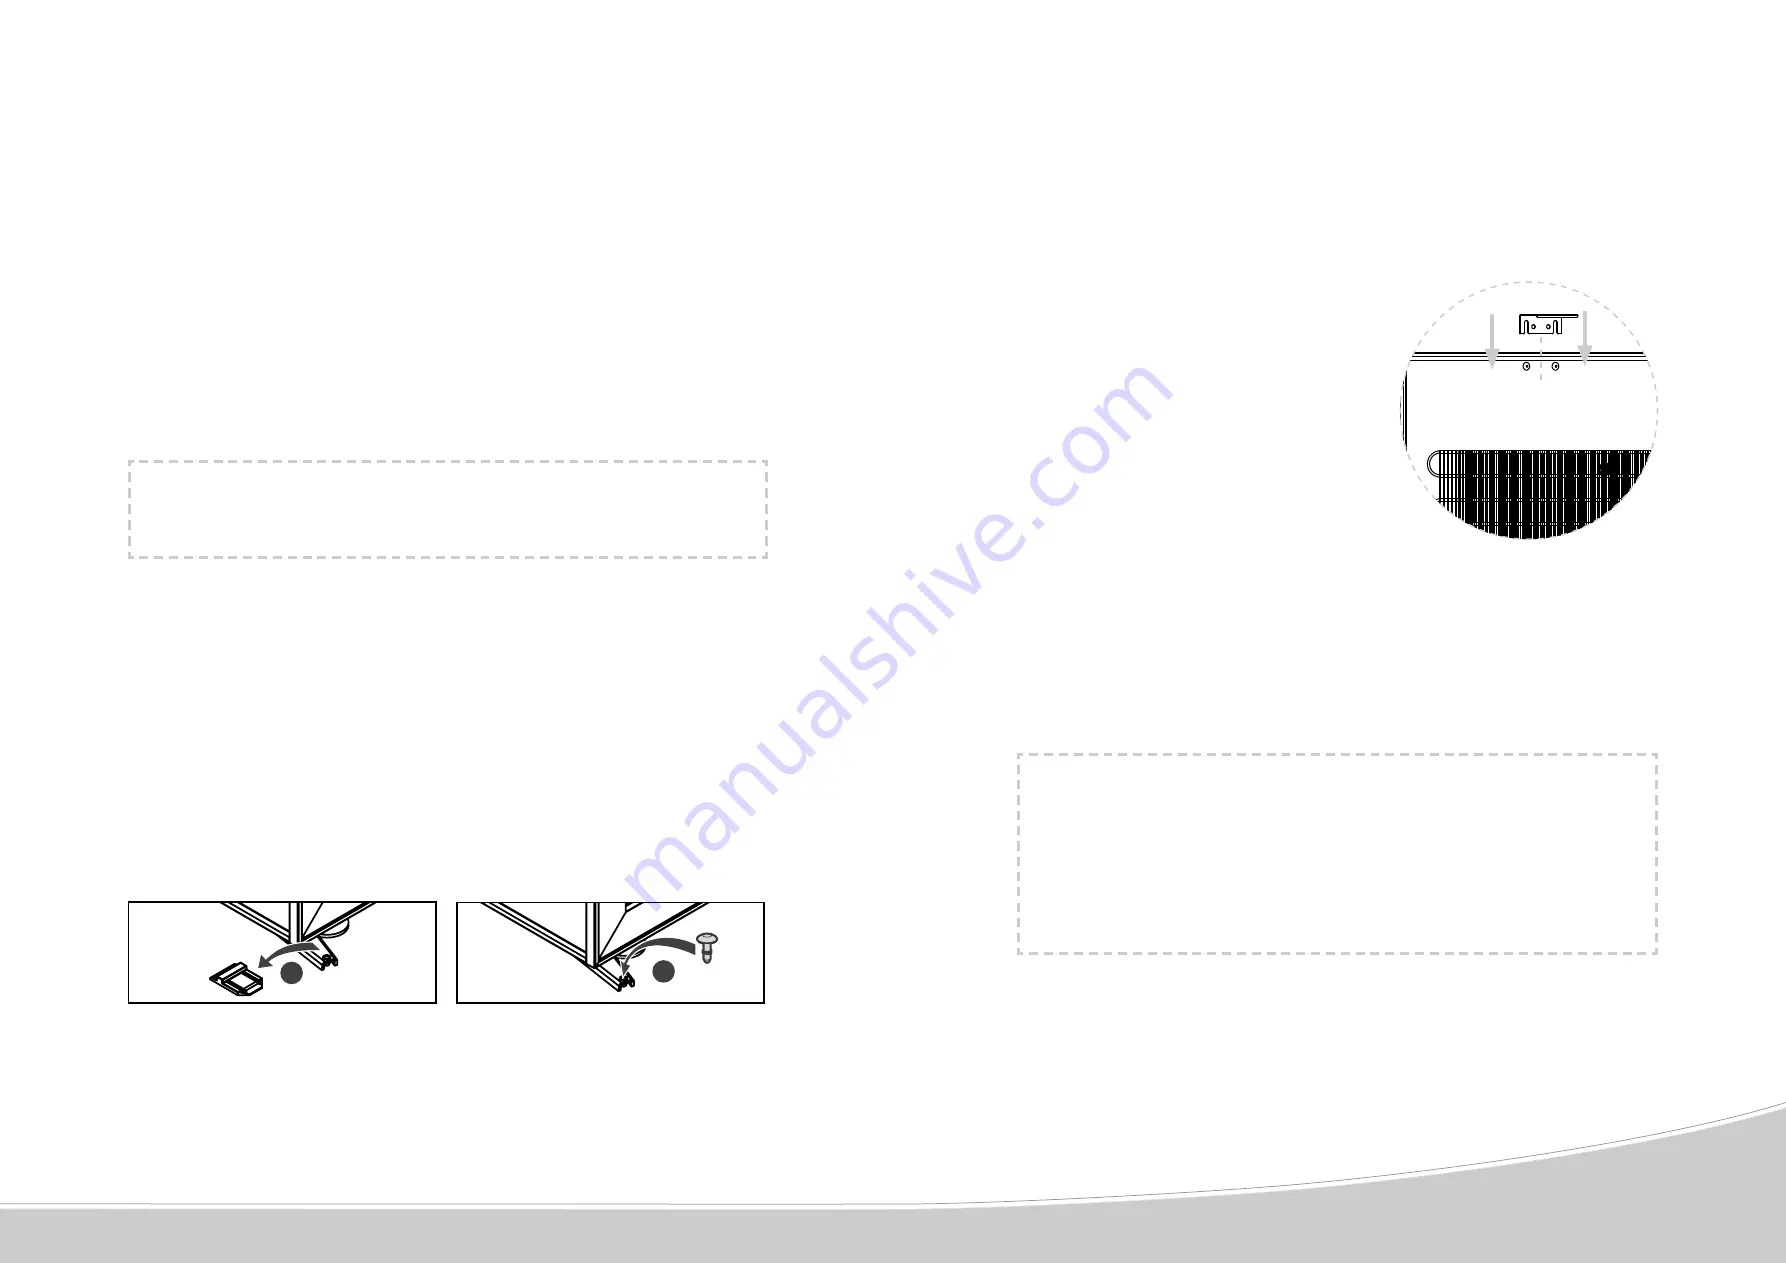
• Remove the protective elements found inside and outside your cabinet including the lower hinge
protector (see diagram (1))
• Fit the cap (see diagram 2), found in the accessories bag, used for sealing the hole in the lower hinge.
• Open the door and check that the various elements are intact.
• Arrange the electric power lead so that it does not come into contact with any
of the cabinet’s components.
• Install the rear spacer at the back of the cabinet (see diagram).
This allows a space of 7 cm to be maintained between the wall and the rear of the cabinet. This space
allows your cabinet’s power consumption to be optimised.
• Place the 2 caps in the 2 holes at the top of the cabinet,
ensuring that you do not push them all the way in.
• Slide the rear spacer between the caps and the wall of the
cabinet, then push the 2 caps all the way in.
• Place your cabinet in the desired location.
The location that you choose for your cabinet must:
- be open to the outside and well ventilated (not in an
enclosed cupboard, for example),
- allow there to be a minimum space of 7 cm between the
wall and the back of the cabinet,
- not be close to any source of heat,
- not be too damp (utility room, laundry room, bathroom...),
- have a flat, stable floor,
- be supplied with standard accessible power (outlet that complies with standards in force in your country,
earthed with circuit breaker).
It is forbidden to use an extension cord or adaptor.
Installing two cabinets side by side
N.B.: If you are placing two cabinets side by side, ensure that you leave a gap of one to two cm between each cabinet.
1
2


