23
EN
Unpacking
•
When delivered, check the outside of your cabinet for signs of damage
(impact, buckling...).
•
Open the door and check that the inside of your appliance is intact
(walls, Main du Sommelier supports, hinges, bottle shelf...).
•
Remove the protective elements inside your cabinet.
If there is a problem contact your EuroCave retailer.
Installation
Transport your cabinet to its intended location.
It must:
•
be open to the outside to allow circulation of air (not enclosed in a
cupboard...),
•
not be too damp (laundry room, utility room, bathroom...),
•
have a flat, stable floor,
•
be supplied with power (standard outlet, 16A, earthed with circuit
breaker, 30 mA* (* not applicable to some countries).
Precautions
•
Do not place your cabinet in an area liable to flood.
•
Do not place your cabinet close to a source of heat or in a location
where it will be subject to direct sunlight.
•
Prevent water from splashing on any part of the rear of the appliance.
•
Position your appliance so that there is a minimum gap of 5 – 10 cm
between the wall and the rear wall of your cabinet.
•
If installing under a work surface, leave a minimum gap of 5 cm all around
the appliance, including underneath the work surface. Provide an air
vent on the work surface (recommended).
•
Arrange the power cable so that it is accessible and does not come into
contact with any of the appliance’s components.
•
Slightly tilt the cabinet backwards in order to adjust the front feet
(adjust them by screwing or unscrewing), in order to level your cabinet
(use of a spirit level recommended).
•
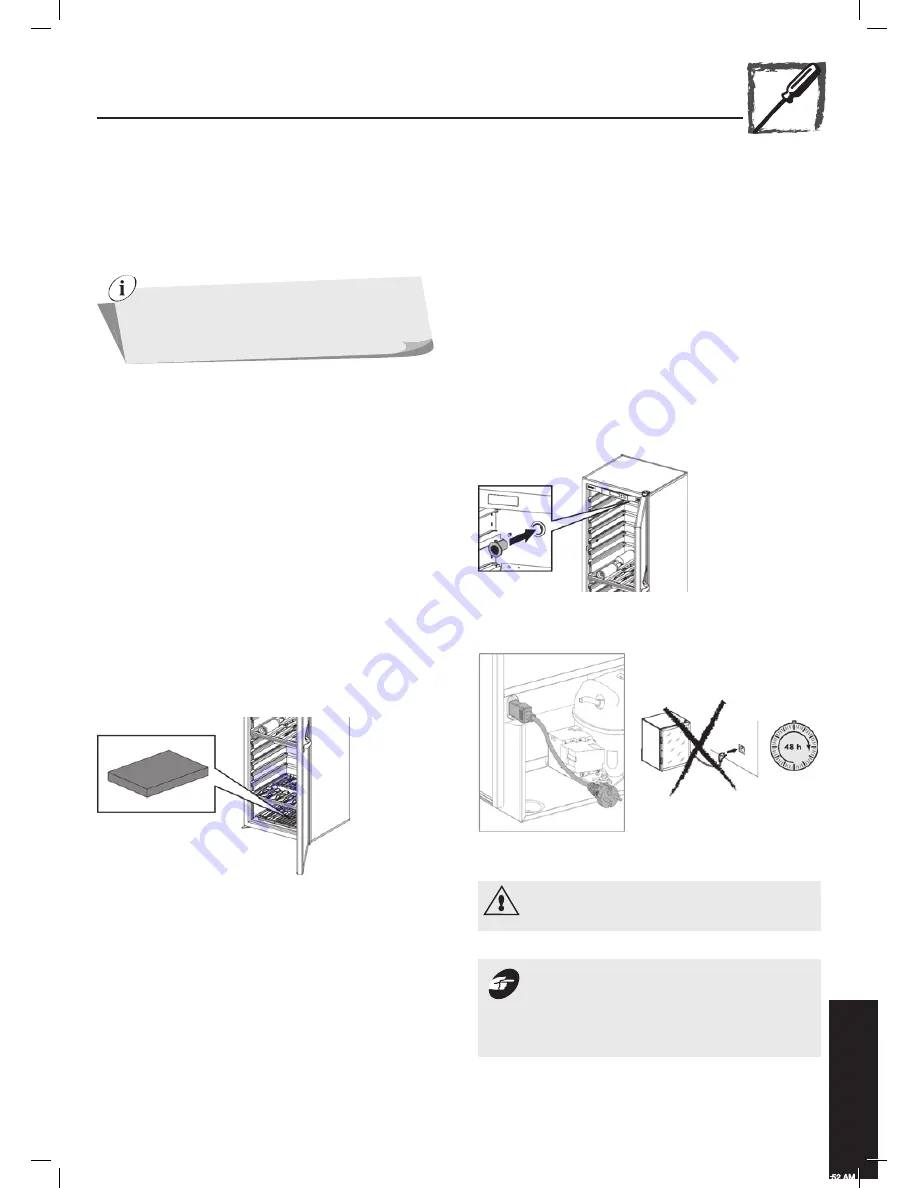
Place the humidity cartridge (located in the “accessories” box of your
cabinet – only for 1-temperature models) at the bottom of the cabinet,
in the tray under the rack (see diagram below). For 2-temperature
models, the cartridge is replaced by a clay cylinder (Hygro ++ cylinder)
to be positioned on a shelf between the bottles). When using for the
first time, fully immerse the cartridge or cylinder in water for a few
minutes until it is saturated with water then allow to drain thoroughly.
•
Take the charcoal filter from the “accessories” box and insert (via the
inside of the cabinet) in the breather hole located on the top left-hand
side (see diagram below).
•
Take the power cable (located in your cabinet’s “accessories” box) and
plug it into the connector, located on the bottom left-hand side of the
rear of the cabinet (see diagram below).
•
When using the appliance for the first time, the charcoal filter alarm will
display. Reset the filter meter to 365 (see chapter 7, § VI).
N.B: the LEDs on the control panel must only be replaced by
a qualified electrician.
5 - i
nstallating
your
Wine
caBinet
When moving the cabinet, do not tilt it mor
e than
45° and always on its side, on the side of the po
wer
cable.
A wine cabinet must be designed so that the bottles do not
come into contact with the back wall. If this occurs, the
condensation created on the wall could run onto the shelves
and damage the bottle labels. Furthermore, contact with the
cold wall could create a frost point, which is harmful to wine.
N 83V2-0511.indd 23
23/06/11 11:52 AM


