25
battery compartment.
4. Remove the front section of the housing.
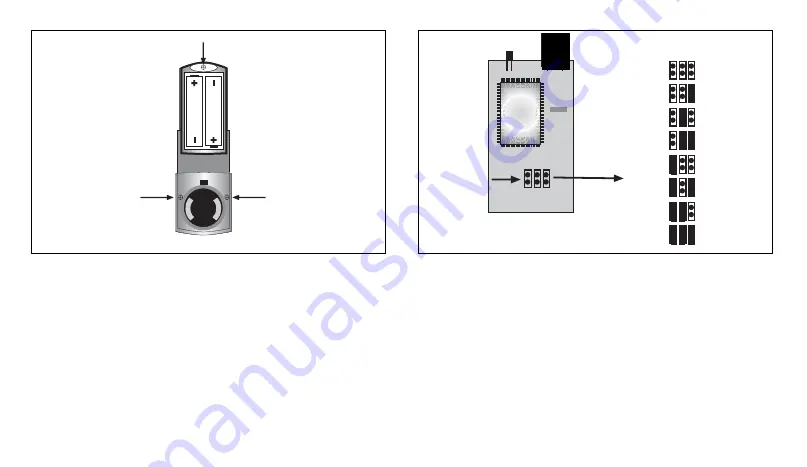
5. Now set the jumpers according to the addressing table below.
The black areas represent jumpers set in the relevant place
(1, 2, 3).
Unscrew
the screw
Unscrew
the screw
Unscrew
the screw
6. When finished, close the housing screwing both housing ele-
ments together with the three screws.
7. Insert the batteries paying attention to correct polarity, insert the
outside sensor in its mounting and attach the protective cap
again.
4.2 Installation / Removal of the outside sensor
Using the enclosed fixture it is easy to install the outside sensor to
3 2 1
3 2 1
Adresse
8
7
6
5
4
3
2
1
Nur
ASH
2000
ASH
2000
only
Address
Coding
field
Summary of Contents for 53166
Page 21: ...21 GB Instructions for use ...
Page 35: ...35 F Mode d emploi ...
Page 77: ...77 NL Gebruiksaanwijzing ...
Page 91: ...91 ...
Page 92: ...42051 5436 0403 EUROCHRON Be connected Postfach 100 D 78701 Schramberg ...


