SETTING THE TIME
Make sure the timer is not in the timer mode. To set the time, the time
must be shown on the display. This is indicated by the lettering "CLOCK".
Confi rm, if necessary, with the button "CLOCK/TIMER" (N).
Keep the "CLOCK/TIMER" button pressed for 3 seconds, to enter the time setup
mode. The time display then starts to fl ash. A short signal tone is emitted.
Use the "HR" button (G) to set the current hour.
Use the "MIN" button (H) to set the current minutes.
Use the "SEC" button (I) to set the current seconds.
Press the "CLOCK/TIMER" (N) to confi rm the settings and to exit the time setting
mode.
The time is now set.
During the setup, the buttons "HR" (G)", "MIN" (H) and "SEC" (I) can
also be kept pressed during setting, to start a fast mode of the value to
be set.
SETTING 12H OR 24H
Press the "MIN 12/24 HR" button (H), to choose between the 12h and the 24h display.
In the 12h display, the letters "AM" before the "Time display" (A) indicate the fi rst
half of the day. The lettering (pm) denotes the second half of the day.
STOPWATCH
Press the button "ST/SP MEMORY" (K) in the time display mode, to start the
stopwatch.
Press the button "ST/SP MEMORY" (K) in the time display mode again, to stop the
stopwatch.
By pressing the key “CLEAR” (M) the stopwatch can be reset (only functions
when the stopwatch is stopped).
COUNTDOWN MODE
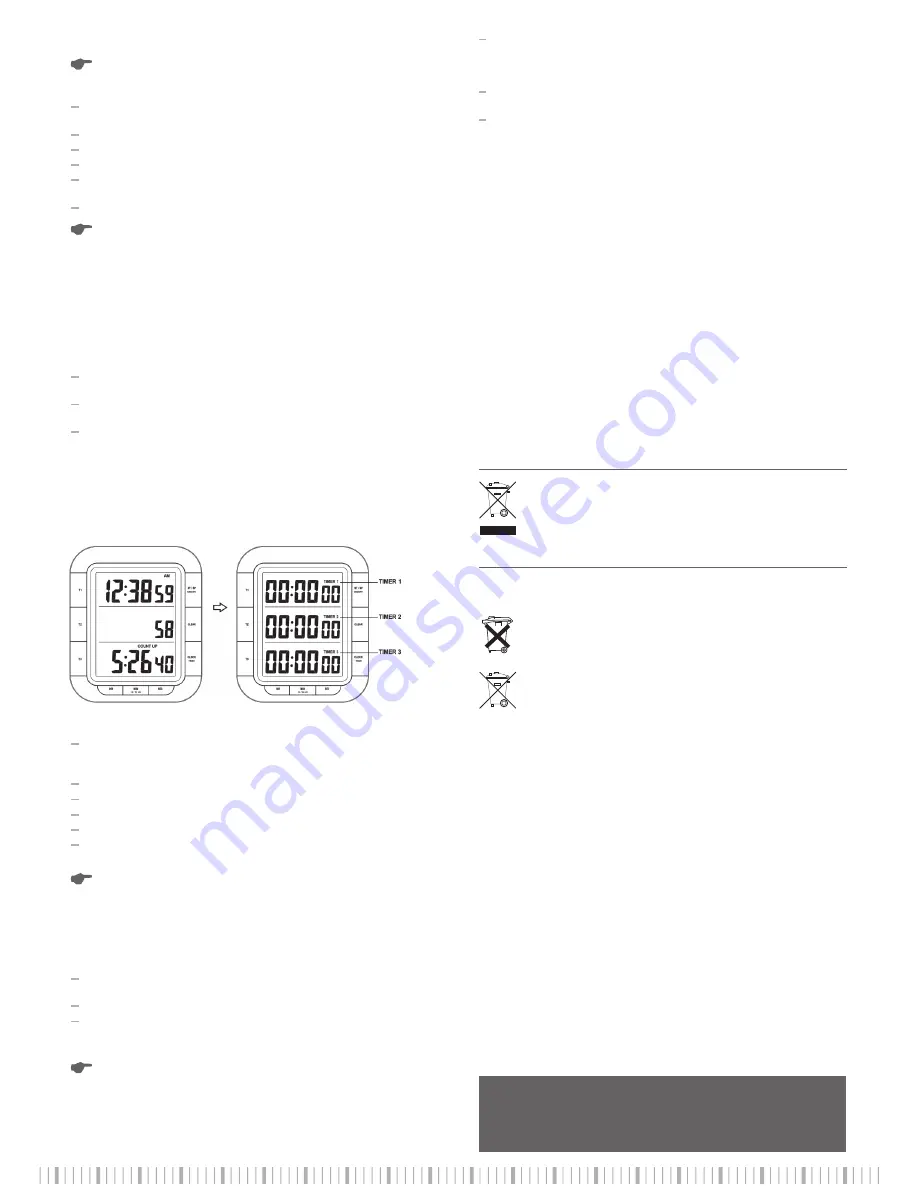
Press the button "CLOCK TIMER" (K) in the time display mode, to enter the count-
down mode. "Fig. 1" shows the time display mode on the left and the "Countdown
Mode" on the right.
Fig. 1
SETTING THE COUNTDOWN TIMER
Press and hold down the button "T1" (B), "T2" (D) or "T3" (F) for 3 seconds. The
respective timer time then starts fl ashing and a short confi rmation sound is emit-
ted.
Use the "HR" button (G) to set the hours.
Use the "MIN" button (H) to set the minutes.
Use the "SEC" button (I) to set the seconds.
Press the "CLEAR" button (M), to reset the settings (0:00:00).
Press down the button "T1" (B), "T2" (D) or "T3" (F) for 3 seconds to confi rm the
settings. The timer display stops fl ashing. A confi rmation sound is emitted.
Info:
The maximum countdown that can be set is 19 hours, 59 minutes and 59
seconds.
3 countdowns can be set. These can be started and stopped simultaneously
or individually.
STARTING COUNTDOWN, RESET, PAUSE
By pressing the appropriate timer button (T1, T2 or T3) the respective countdown
is started.
Press the timer button again (T1, T2 or T3), in order to pause the countdown.
To start all of the set countdown timers simultaneously, press the button "ST/SP
MEMORY" (K). By pressing this button again, all of the countdowns are paused
simultaneously. (This function is not available, if a timer is active).
Press the "CLEAR" (M) button, during the countdown pause to set the
countdown values to 00:00:00. If a countdown is active, it cannot be
reset.
If the countdown is activated, the time display mode can also be changed.
This is done by pressing the key “CLOCK/TIMER” (N).
As soon as the countdown has run down, a signal sound is emitted for about 1
minute. Furthermore, the appropriate expired countdown will fl ash in the display,
with the lettering "TIME´S UP". The time elapsed since starting the timer is also
displayed.
To deactivate the alarm sound, press the button "ST/SP MEMORY" (K) or the
respective timer button (T1, T2 or T3).
To reset the timer, press the key “CLEAR” (M).
MEMORY FUNCTION
By pressing the "ST/SP MEMORY" (K) (for all timers), or the respective timer button
(T1, T2 or T3), after the expiry of a countdown (and following confi rmation) the last
time for the countdown timer set can be called again.
As a result, the countdown time set last is shown in the display, with the lettering
"MEMORY".
DELETING SETTINGS (RESET)
All previous settings can be deleted. To do this, a so-called RESET needs to be done.
To perform a reset, press the key RESET (O) with a sharp object. The timer briefl y
shows all of the display segments. Afterwards, a short sound confi rms it is ready
for use.
MAINTENANCE AND CLEANING
Except for replacing the battery as described, the device is maintenance-free.
To clean the outside of the product, a dry, soft and clean cloth is suffi cient. Do not
use any aggressive cleaning agents.
Clean the product very carefully, otherwise you may scratch it. Do not press too
strongly on the display as this may cause damage.
DISPOSAL
A) GENERAL:
Please dispose of the product, when it is no longer of use, according to
the current statutory requirements.
B) BATTERIES AND RECHARGEABLE BATTERIES
As the end user, you are legally obliged
(Battery Ordinance)
to return all used bat-
teries and rechargeable batteries;
it is prohibited to dispose of them in the house-
hold waste
.
Contaminated batteries/rechargeable batteries are labelled with these
symbols to indicate that disposal in the domestic waste is forbidden. The
designations for the heavy metals involved are:
Cd
= Cadmium,
Hg
=
Mercury,
Pb
= Lead.
You can return used batteries/rechargeable batteries and button cells
free of charge to any authorised disposal station in your area, to our
stores or to any other store where batteries/storage batteries/button
cells are sold.
You thus fulfi l the legal requirements and make your contribution to protecting the
environment!
TECHNICAL DATA
Voltage source:
2 x 1.5V micro battery (type: AAA)
Max. set countdown time:
19 hours, 59 minutes, 59 seconds
Min. time interval:
1
second
Dimensions:
approx. 103 x 121 x 20 mm
Weight:
approx. 140 g
These operating instructions are a publication by Conrad Electronic SE, Klaus-Conrad-Straße 1,
D-92240 Hirschau (www.conrad.com). All rights including translation reserved. Reproduction by any
method, e.g. photocopy, microfi lming, or the capture in electronic data processing systems require
the prior written approval by the editor. Reprinting, also in part, is prohibited. These operating instruc-
tions represent the technical status at the time of printing. Changes in technology and equipment
reserved.
© Copyright 2011 by Conrad Electronic SE.


