background image


00054564, Version 1.3 

17/27

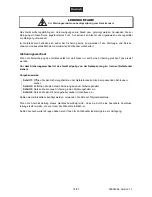
If the device has been exposed to drastic temperature fluctuation (e.g. after transportation), do not switch it 
on immediately. The arising condensation water might damage your device. Leave the device switched off 
until it has reached room temperature. 
 
Please make sure that there are no obvious transport damages. Should you notice any damages on the A/C 
connection cable or on the casing, do not take the device into operation and immediately consult your local 
dealer. 
 
This device falls under protection-class I. The power plug must only be plugged into a protection class I 
outlet. The voltage and frequency must exactly be the same as stated on the device. Wrong voltages or 
power outlets can lead to the destruction of the device and to mortal electrical shock. 
 
Always plug in the power plug last. The power plug must always be inserted without force. Make sure that 
the plug is tightly connected with the outlet. 
 
Never let the power-cord come into contact with other cables! Handle the power-cord and all connections 
with the mains with particular caution! Never touch them with wet hands, as this could lead to mortal 
electrical shock. 
 
Never modify, bend, strain mechanically, put pressure on, pull or heat up the power cord. Never operate next 
to sources of heat or cold. Disregard can lead to power cord damages, fire or mortal electrical shock. 
 
The cable insert or the female part in the device must never be strained. There must always be sufficient 
cable to the device. Otherwise, the cable may be damaged which may lead to mortal damage. 
 
Make sure that the power-cord is never crimped or damaged by sharp edges. Check the device and the 
power-cord from time to time. 
 
If extension cords are used, make sure that the core diameter is sufficient for the required power 
consumption of the device. All warnings concerning the power cords are also valid for possible extension 
cords. 
 
Always disconnect from the mains, when the device is not in use or before cleaning it. Only handle the 
power-cord by the plug. Never pull out the plug by tugging the power-cord. Otherwise, the cable or plug can 
be damaged leading to mortal electrical shock. If the power plug or the power switch is not accessible, the 
device must be disconnected via the mains. 
 
If the power plug or the device is dusty, the device must be taken out of operation, disconnected and then be 
cleaned with a dry cloth. Dust can reduce the insulation which may lead to mortal electrical shock. More 
severe dirt in and at the device should only be removed by a specialist. 
 
There must never enter any liquid into power outlets, extension cords or any holes in the housing of the 
device. If you suppose that also a minimal amount of liquid may have entered the device, it must immediately 
be disconnected. This is also valid, if the device was exposed to high humidity. Also if the device is still 
running, the device must be checked by a specialist if the liquid has reduced any insulation. Reduced 
insulation can cause mortal electrical shock. 
 
There must never be any objects entering into the device. This is especially valid for metal parts. If any metal 
parts like staples or coarse metal chips enter into the device, the device must be taken out of operation and 
disconnected immediately. Malfunction or short-circuits caused by metal parts may cause mortal injuries. 
 

HEALTH HAZARD!

Never look directly into the light source, as sensitive persons may suffer an
epileptic shock (especially meant for epileptics)!


Keep away children and amateurs! 
 
Never leave this device running unattended. 
 

Summary of Contents for LED SLS-18 TCL

Page 1: ... Copyright Nachdruck verboten Reproduction prohibited Für weiteren Gebrauch aufbewahren Keep this manual for future needs BEDIENUNGSANLEITUNG USER MANUAL LED SLS 7 TCL LED SLS 18 TCL ...

Page 2: ...SAFETY INSTRUCTIONS 16 OPERATING DETERMINATIONS 18 DESCRIPTION OF THE DEVICE 19 Features 19 Overview 19 INSTALLATION 19 Overhead rigging 19 DMX512 control 21 Master Slave operation 21 Connection with the mains 22 OPERATION 22 Dimmer mode 23 Sound controlled mode 23 Auto mode 23 Static color mode 23 Other mode 24 DMX mode 24 DMX protocol 24 CLEANING AND MAINTENANCE 26 Replacing the fuse 26 TECHNICA...

Page 3: ...nde Hinweise beachten sind wir sicher dass Sie lange Zeit Freude an Ihrem Kauf haben werden Nehmen Sie das Gerät aus der Verpackung SICHERHEITSHINWEISE ACHTUNG Seien Sie besonders vorsichtig beim Umgang mit gefährlicher Netzspannung Bei die ser Spannung können Sie einen lebensgefährlichen elektrischen Schlag erhalten Dieses Gerät hat das Werk in sicherheitstechnisch einwandfreiem Zustand verlassen...

Page 4: ...tzleitung gelten auch für evtl Verlängerungsleitungen Gerät bei Nichtbenutzung und vor jeder Reinigung vom Netz trennen Fassen Sie dazu den Netzstecker an der Grifffläche an und ziehen Sie niemals an der Netzleitung Ansonsten kann das Kabel und der Stecker beschädigt werden was zu tödlichen Stromschlägen führen kann Sind Stecker oder Geräteschalter z B durch Einbau nicht erreichbar so muss netzsei...

Page 5: ...trahlung auch beim Transport in geschlossenen Wägen und Heizkörpern fern Die relative Luftfeuchte darf 50 bei einer Umgebungstemperatur von 45 C nicht überschreiten Dieses Gerät darf nur in einer Höhenlage zwischen 20 und 2000 m über NN betrieben werden Verwenden Sie das Gerät nicht bei Gewitter Überspannung könnte das Gerät zerstören Das Gerät bei Gewitter allpolig vom Netz trennen Netzstecker zi...

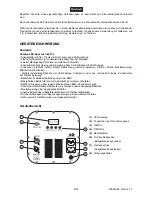
Page 6: ... und Einstellung über Control Board mit LED Anzeige Funktionen statische Farben RGB Farbmischung interne Programme Dimmer Strobe Musiksteuerung Mikrofonempfindlichkeit Weitere Einstellmöglichkeiten der LED Anzeige Anzeige an oder aus invertierte Anzeige Zurücksetzen auf Werkseinstellung Bedienbar im Standalone Modus oder über DMX Master Slave Betrieb für synchrone Abläufe bei mehreren Geräten DMX5...

Page 7: ... maschinentechnische Einrichtungen mindestens einmal jährlich durch einen Sachkundigen geprüft werden Vorgehensweise Das Gerät sollte idealerweise außerhalb des Aufenthaltsbereiches von Personen installiert werden WICHTIG ÜBERKOPFMONTAGE ERFORDERT EIN HOHES MAß AN ERFAHRUNG Dies beinhaltet aber beschränkt sich nicht allein auf Berechnungen zur Definition der Tragfähigkeit verwendetes Installations...

Page 8: ...nellverschlussglied ein und ziehen Sie die Sicherungsmutter gut fest Der maximale Fallabstand darf 20 cm nicht überschreiten Ein Sicherungsseil das einmal der Belastung durch Absturz ausgesetzt war oder beschädigt ist darf nicht mehr als Sicherungsseil eingesetzt werden Stellen Sie den Neigungswinkel über den Hängebügel ein und ziehen Sie die Feststellschrauben gut fest LEBENSGEFAHR Vor der ersten...

Page 9: ...en Gerätes Stellen Sie nun am MASTERGERÄT eines von den Standalone Modi ein Stellen Sie an jedem SLAVEGERÄT eine beliebige DMX Adresse sowie einen beliebigen DMX Kanal Modus ein Anschluss ans Netz Schließen Sie das Gerät über die beiliegende Netzanschlussleitung ans Netz an Die Belegung der Anschlussleitungen ist wie folgt Leitung Pin International Braun Außenleiter L Blau Neutralleiter N Gelb Grü...

Page 10: ...hl von 7 statischen Farben 1 rot 2 grün 3 blau 4 cyan 5 gelb 6 violett 7 weiß Flashgeschwindig keit zunehmend ist aus ist am langsamsten ist am schnellsten SONSTIG Display an aus LED Display immer an LED Display aus Display normal invertiert LED Display normal LED Display invertiert Vorgabewert Initialisierung des Vorgabewerts DMX Addressierung Stellt die DMX Startadresse ein DMX Kanal Belegung Da...

Page 11: ...e über die UP oder DOWN Tasten die gewünschte Farbe wählen Bei können Sie über die UP oder DOWN Tasten die gewünschte Flash Geschwindigkeit der statischen Farbe einstellen Sonstiger Modus Im diesem Modus stehen 3 Menüpunkte zur Auswahl Bitte drücken Sie jeweils die SET UP Taste um zu dieser Auswahl zu gelangen Bei und können Sie über die UP oder DOWN Tasten wählen ob das Display immer leuchtet ode...

Page 12: ...se ausgewählt haben können Sie nun einen DMX Kanal Modus auswählen 3 CH 4 CH 5 CH 6 CH Drücken Sie die SET UP Taste damit das Display anzeigt Wählen Sie den gewünschten Modus über die UP oder DOWN Tasten aus Die Werte der jeweiligen Kanal Belegungen entnehmen Sie bitte folgenden Tabellen des DMX Protokolls DMX Protokoll 3 Kanal Modus In diesem Modus ist die letztmögliche Startadresse 510 Kanal Wer...

Page 13: ...240 247 Musikgesteuert 1 Empfindlichkeit 0 255 zunehmend 24 248 255 Musikgesteuert 2 REINIGUNG UND WARTUNG Der Unternehmer hat dafür zu sorgen dass sicherheitstechnische und maschinentechnische Einrichtungen mindestens alle vier Jahre durch einen Sachverständigen im Umfang der Abnahmeprüfung geprüft werden Der Unternehmer hat dafür zu sorgen dass sicherheitstechnische und maschinentechnische Einri...

Page 14: ...leichen Typs ersetzt werden Vor dem Sicherungswechsel ist das Gerät allpolig von der Netzspannung zu trennen Netzstecker ziehen Vorgehensweise Schritt 1 Öffnen Sie den Sicherungshalter an der Geräterückseite mit einem passenden Schrauben dreher Schritt 2 Entfernen Sie die defekte Sicherung aus dem Sicherungshalter Schritt 3 Setzen Sie die neue Sicherung in den Sicherungshalter ein Schritt 4 Setzen...

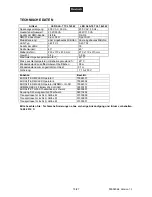
Page 15: ...eratur Ta 45 C Max Leuchtentemperatur im Beharrungszustand TC 60 C Mindestabstand zu entflammbaren Oberflächen 0 5 m Mindestabstand zum angestrahlten Objekt 0 1 m Sicherung T 1 A 250 V Zubehör Best Nr EUROLITE DMX LED Operator 1 70064501 EUROLITE DMX LED Operator 4 70064504 EUROLITE DMX LED Operator IR2DMX IR FB 70064512 SOMMER BXX 30 Binary 234 XLR XLR 30307457 EUROLITE TH 50S Theaterhaken schwar...

Page 16: ...m the Internet INTRODUCTION Thank you for having chosen a EUROLITE LED SLS 7 TCL or LED SLS 18 TCL If you follow the instructions given in this manual we are sure that you will enjoy this device for a long period of time Unpack your device SAFETY INSTRUCTIONS CAUTION Be careful with your operations With a dangerous voltage you can suffer a dangerous electric shock when touching the wires This devi...

Page 17: ...om time to time If extension cords are used make sure that the core diameter is sufficient for the required power consumption of the device All warnings concerning the power cords are also valid for possible extension cords Always disconnect from the mains when the device is not in use or before cleaning it Only handle the power cord by the plug Never pull out the plug by tugging the power cord Ot...

Page 18: ...vice must only be operated in an altitude between 20 and 2000 m over NN Never use the device during thunderstorms Over voltage could destroy the device Always disconnect the device during thunderstorms The symbol m determines the minimum distance from lighted objects The minimum distance between light output and the illuminated surface must be more than 0 1 meters This device is only allowed for a...

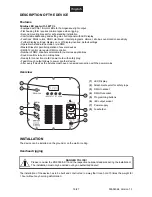
Page 19: ...annels selectable for numerous applications Sound control via built in microphone Ready for connection via IEC power cord with safety plug Feed through output allows to power another device After every 8 devices the fixtures must have a renewed connection with the power mains Overview 1 LED Display 2 Attachment eyelet for safety rope 3 DMX In socket 4 DMX Out socket 5 Programming buttons 6 IEC out...

Page 20: ...o be installed out of the reach of people If the device shall be lowered from the ceiling or high joists professional trussing systems have to be used The device must never be fixed swinging freely in the room Caution Devices in hanging installations may cause severe injuries when crashing down If you have doubts concerning the safety of a possible installation do NOT install the device Before rig...

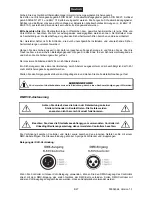
Page 21: ...nnect DMX controllers with other XLR outputs you need to use adapter cables Building a serial DMX chain Connect the DMX output of the first device in the DMX chain with the DMX input of the next device Always connect one output with the input of the next device until all devices are connected Caution At the last fixture the DMX cable has to be terminated Plug the terminator with a 120 resistor bet...

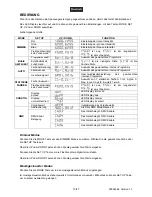
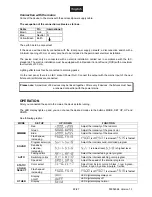
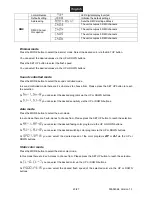
Page 22: ...f 8 devices may be linked together After every 8 devices the fixtures must have a renewed connection with the power mains OPERATION After you connected the spot to the mains the device starts running The LED display lights up and you can choose the desired mode via the buttons MODE SET UP UP and DOWN See following graphic MODE SET UP UP DOWN FUNCTION DIMMER Red Adjust the intensity of the red colo...

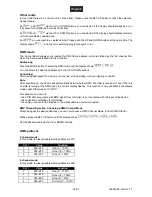
Page 23: ...from Please press the SET UP button to reach the selection At you can select the desired programs via the UP or DOWN buttons At you can select the desired sensitivity via the UP or DOWN buttons Auto mode Press the MODE button to select the auto mode In auto mode there are 3 sub menus to choose from Please press the SET UP button to reach the selection At you can select the desired fading color pro...

Page 24: ...now start operating it via your lighting controller Note After switching on the device will automatically detect whether DMX 512 data is received or not If there is no data received at the DMX input the control display flashes This function is only available if the display mode under Other was set to This situation can occur if the 3 PIN XLR plug cable with DMX signal from controller is not connec...

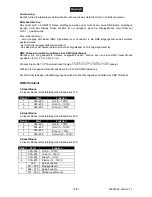
Page 25: ...0 Blue 0 255 0 100 Green 0 255 0 100 Red 0 255 0 100 2 16 31 Red No function No function No function 3 32 47 Green 4 48 63 Blue 5 64 79 Cyan 6 80 95 Yellow 7 96 111 Purple 8 112 127 White 9 128 135 Color fading 1 Speed 0 255 slow fast 10 136 143 Color fading 2 11 144 151 Color fading 3 12 152 159 Color fading 4 13 160 167 Color fading 5 14 168 175 Color fading 6 15 176 183 Color fading 7 16 184 19...

Page 26: ...y a skilled installer and any safety problems have to be removed Disconnect from mains before starting maintenance operation DANGER TO LIFE We recommend a frequent cleaning of the device Please use a soft lint free and moistened cloth Never use alcohol or solvents There are no serviceable parts inside the device except for the fuse Maintenance and service operations are only to be carried out by a...

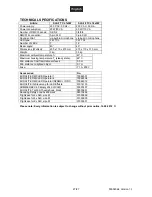
Page 27: ...perature Ta 45 C Maximum housing temperature TC steady state 60 C Min distance from flammable surfaces 0 5 m Min distance to lighted object 0 1 m Fuse T 1 A 250 V Accessories No EUROLITE DMX LED Operator 1 70064501 EUROLITE DMX LED Operator 4 70064504 EUROLITE DMX LED Operator IR2DMX IR RC 70064512 EUROLITE IR Steuerung für LED Effekte 51914130 SOMMER BXX 30 Binary 234 XLR XLR 30307457 EUROLITE TH...

Reviews: