www.eurolube.com
205245 R1
EUROLUBE EQUIPMENT
PART NO / ART.NR. 10400, 10422, 10452, 10471, 10472, 10491
PRE-SET METER / MÄTARE FÖRINSTÄLLBAR
SER
V
IC
E G
U
ID
E
2
0
1
-1
1
O
R
IG
INAL
MA
NU
AL
1
General
Digital pre-set oil meter, featuring a mechanism which,
when activated, automatically shuts off the valve when
the desired volume is reached.
WARNING!
Do NOT use solvents or other explosive fluids.
Never point a control valve at any portion of your body or
another person. Accidential discharge of pressure and/
or material can result in injury. Read these instruction
carefully before installation, operation or service.
DO NOT EXCEED MAXIUMUM PRESSURE
Allmänt
Digital förinställbar oljemätare, med en mekanism som när
den aktiveras, automatiskt stänger ventilen när önskad
volym uppnås.
VARNING!
Pumparna får EJ användas för pumpning av
bensin eller andra kemikalier. Rikta aldrig utloppsmun-
stycke mot någon kroppsdel eller någon annan person.
Vätska kan lätt tränga in igenom hud och förorsaka skador.
Läs dessa intruktioner innan pumpen installeras, används
eller vid service.
ÖVERSKRID EJ MAX ARBETSTRYCK
PART NO / ART.NR
10400, 10422, 10452, 10471, 10472, 10491
Inlet thread / inloppsgänga
1/2” BSP (F/Inv.)
Wetted parts materials / material i kontakt med vätska
Acetal, stainless steel, NBR, aluminum, brass, zinc plated steel /
Acetal, rostfritt stål, NBR, aluminium, mässing, förzinkat stål
Meter type / typ av mätare
Oval gear / ovalhjul
Flowrate / flödeshastighet
1-30 l/min (0.25 - 7.5 US gal/min)
Maximum pressure / max arbetstryck
100 bar (1450 psi)
Temperature range / temperaturområde
-10 a 50 ºC (14 a 122 ºF)
Accuracy (oil) / noggrannhet (olja)
±0,5 %
Accuracy (coolant solutions) / noggrannhet (kylarvätska)
±1 %
Viscosity range / max viskositet
Up to 2000 mPa.s
Display / display
LCD with double row digits /
LCD-display med dubbla rader
Units / enheter
Litres, gallons, quarts, pints
Batteries / batterier
4 x AA 1.5V
Weight (with nozzle and batteries) / vikt (med utloppsslang och batterier)
2.1 kg (4.6 lb)
Dimensions (without nozzle hose or tube) / mått (utan utloppsslang eller rör)
297 x 89 x 155 mm (11.7” x 3.5” x 6.1”) (length x width x height)
TECHNICAL DATA / TEKNISKA DATA
INTRODUKTION
• Only use the unit for the purposes for which it is intended.
• This unit has not been approved for use in commercial transactions.
• Do not alter or modify the unit.
• It is mandatory to respect the polarity of batteries and follow its order of place-
ment as indicated in the batteries cover.
• If a leakage is detected in the batteries protect your eyes and skin. Cover the
batteries housing with a cloth before opening it to avoid that acid get sprayed
onto your skin or eyes. If acid should spray into your eyes, rinse immediately
with clear water for several minutes. Consult a doctor immediately afterwards.
• Do not mix different battery brands.
• Do not mix new batteries with old ones.
INSTALLATION
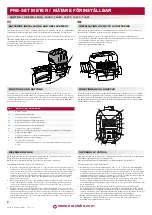
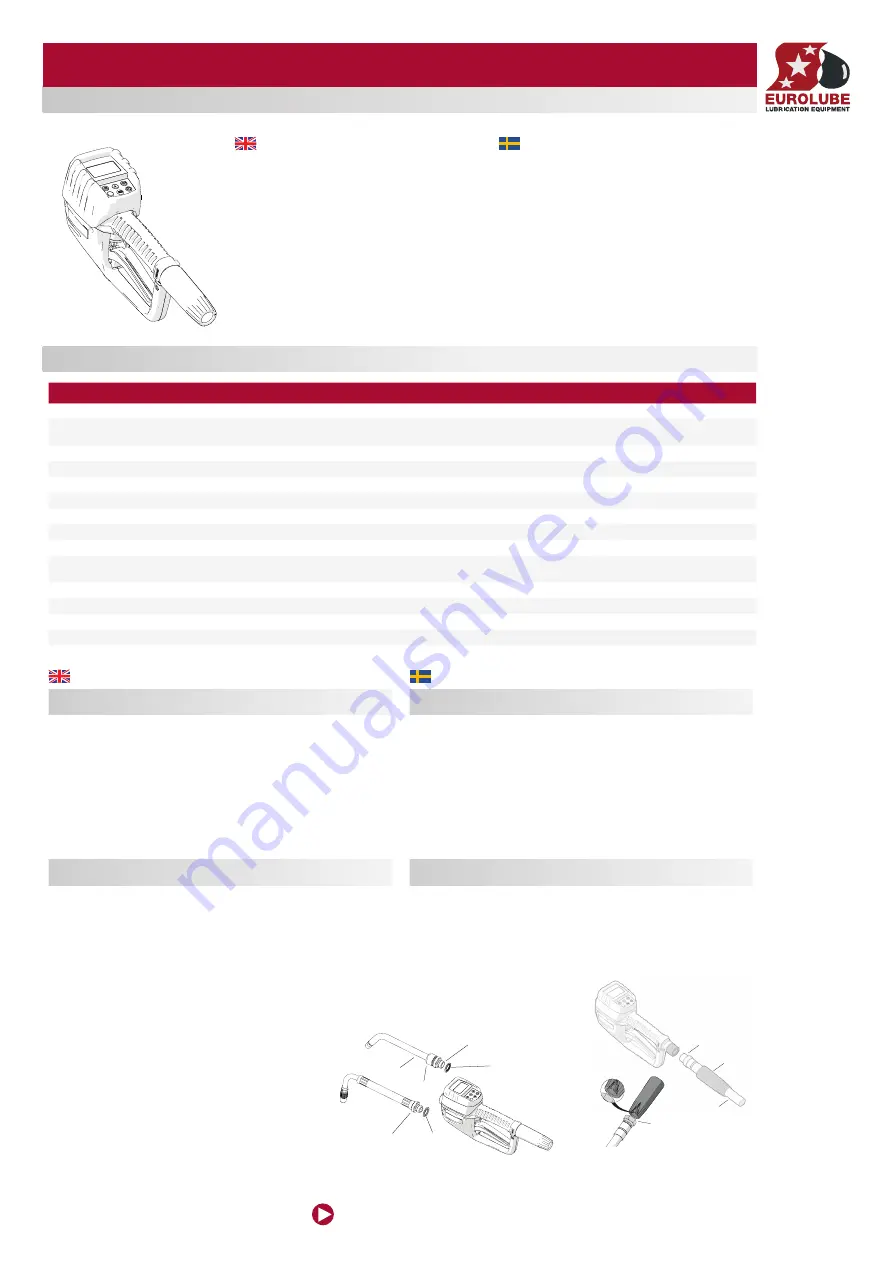
Mount the outlet hose or tube with the 1/2” bonded seal provided. Tighten the outlet
nut (1a) firmly to prevent leakage. If using a rigid nozzle, first tighten the nut (1b),
place in proper position the nozzle tube (2) and then tighten the nut (3) to secure it.
Before connecting the hose to the gun, you must assemble the swivel cover (4) into
the hose (5). This cover is compatible with 1/2” hoses. Depending on the type of
hose end (6) it may be necessary to open the groove at the end of the swivel cover to
allow it to enter through the hose fitting.
To connect the hose, hold the hose end (6) stationary while turning the swivel end (7)
of the swivel until the connection is tight.
UNDERHÅLL
• Använd endast enheten för de ändamål den är avsedd för.
• Denna enhet är inte godkänd för användning i kommersiella transaktioner.
• Ändra eller modifiera inte enheten.
• Det är viktigt att observera batteriernas polaritet och följa dess placeringsord-
ning som anges i batteriluckan.
• Om ett läckage upptäcks i batterierna skydda ögon och hud. Täck batterihöljet
med en trasa innan du öppnar det för att undvika att syra sprutar på din hud
eller i ögon. Om syra skulle komma upp i ögonen, skölj omedelbart med rent
vatten i flera minuter. Kontakta läkare omedelbart efteråt.
• Blanda inte olika tillverkare av batterier.
• Blanda inte nya batterier med gamla.
INSTALLATION
Montera det utloppsslang- eller röret med den medföljande gummistålbrickan. Dra åt
muttern (1a) ordentligt för att förhindra läckage. Om ett utloppsrör används, dra först
åt muttern (1b), rotera utloppsröret (2) i rätt läge och dra sedan åt låsmuttern (3).
Innan slangen ansluts till ventilen måste svivelskyddet (4) monteras på slangen (5).
Detta skdyd är kompatibelt med 1/2”-slangar. Beroende på typen av slangände (6)
kan det vara nödvändigt att öppna skåran i änden av skyddet så att det kan passera
över slangens anslutning.
För att ansluta slangen, håll slangänden
(6) stilla samtidigt som du vrider svivelns
svivelände (7) tills anslutningen är tät.
1 a
1 b
2
3
1
1
6
4
7
5


