16
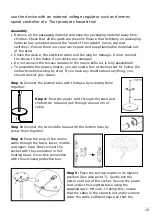
device can be placed in the highest position, but
avoid excess cable in the stand.
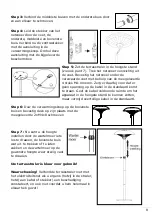
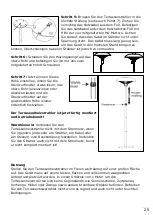
Step 6: Push the heating head onto the top tube
and fix it in position using the supplied 2x M4x8
screws.
Step 7: You can now set the
height of your terrace heater by
loosening the swivel nut a little,
pulling out or letting it drop and
then fastening the swivel nut
again at the desired height.
Your terrace heater is ready for use.
Warning! Do not connect the terrace heater to the
mains if you observe any damage (whether to the
heater, cable or plug), and do not connect it before you
have fully assembled it!
Use
Place the terrace heater outdoors in a large open space. Ensure that the floor is
sturdy, flat and fully horizontal. There must be no objects such as branches,
parasols, tarpaulins, curtains, furniture or any flammable objects whatsoever within
a radius of 1 meter around the terrace heater. Do not use the terrace heater when
it is raining or in wet conditions.
Check for every use:
- if the device doesn’t show signs of damage.
- whether the device is still securely firmed. Wind, rain or gravity can eventually
loosen the attachments.
- that the socket that you want to use:
* is earthed;
* gives out the correct voltage (220/240V~50Hz);
* has at least a 16 A fuse;
* is secured with a 30 mA earth switch;
* is located in a safe, dry place.
When everything is as it should be, you can place the plug in the socket and then
press one or both switches, whereupon the terrace radiator will begin to work.
Switch I pressed = 900 Watts
Switch II pressed = 1200 Watts
Switch I + II pressed = 2100 Watts
During the first couple of minutes after connection, two dark dots will be visible on
the surface of the heating elements. This is perfectly normal and does not affect its
operation. When you use the device for the first time (or for the first time in a long


