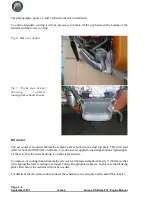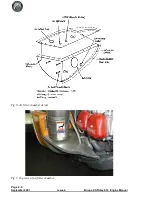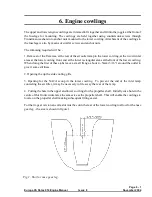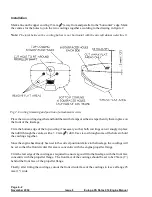
Now mark a line, on both cowlings, 13 mm from and parallel to their rear edges. Mark the hole
centres according to figure 2 and drill through with a 1/8" drill and use clecos to hold them in place.
Enlarge the holes joining the two cowlings together to 4.8 mm (3/16"), except for the rearmost hole
each side, and install MS21047-3 anchor nuts (10 in total) to the inside of the lower cowling with
TAPK33BS countersink rivets.
The remaining holes should also be opened to 4.8 mm and MS21047-3 anchor nuts installed to the
inside of the fuselage using countersink rivets. As the thickness of the fuselage where the anchor nuts
are to be located will vary depending on their position a selection of 3.2 mm diameter countersink
rivets are provided. Use the shortest rivet that you can for attaching each anchor nut into the fuselage.
Countersink the outside face of all the holes of the upper cowling and the rearmost holes only of the
lower cowling, except the upper rear holes, to allow the Tinnerman washers to lie flat against the
cowling surface. The cowlings may now be fitted using the AN507C-1032R12 screws.
Shorter MS24693-C272 screws may be used for joining the two cowlings together and these may be
long enough to be used in some places securing the cowlings to the fuselage; however, note that the
lower inboard screws need to be longer than the rest.
Page 6 - 3
Europa XS Rotax 914 Engine Manual
Issue 8
November 2004
Summary of Contents for Rotax 914
Page 14: ...INTENTIONALLY BLANK Page 2 6 November 2007 Issue 10 Europa XS Rotax 914 Engine Manual ...
Page 28: ...Page 5 4 November 2004 Issue 8 Europa XS Rotax 914 Engine Manual Fig 2 Fuel system ...
Page 32: ...INTENTIONALLY BLANK Page 6 4 November 2004 Issue 8 Europa XS Rotax 914 Engine Manual ...
Page 40: ...INTENTIONALLY BLANK Page 8 6 September 2002 Issue 5 Europa XS Rotax 914 Engine Manual ...
Page 44: ...INTENTIONALLY BLANK Page 9 4 September 2002 Issue 5 Europa XS Rotax 914 Engine Manual ...

