7
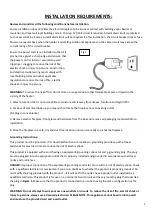
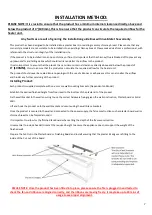
PLEASE NOTE: It is crucial to ensure that the product has a minimum internal clearance directly above and
below the product of 4"(100mm), this is to ensure that the product can circulate the required airflow for the
heater unit.
Any faults as a result of ignoring the installation guidelines will invalidate the warranty.
This product has been designed to be installed into a plaster board, or existing masonry chimney breast. Please note that any
corner style models are not suitable to be installed into an existing chimney breast. Please seek advice from a professional, with
reference to the structural integrity of the installation site.
If the product is to be installed into an open chimney or flue, it is important that the chimney/flue is blocked off to prevent any
up/down drafts and falling debris which could restrict and alter the airflow to the product.
It is also important to ensure that the product has a minimum internal clearance directly above and below the product of
4" (100MM),
this is to ensure that the product can circulate the required airflow for the heater unit.
The product should never be sealed into an opening with the use of silicones or adhesives as this can also alter the airflow
and hinder any further servicing of the product.
Installing Product:
Each product is supplied complete with one or more wall mounting brackets. (Dependent on Model)
Establish the desired finished height from floor level to the bottom of the plaster kit of the product.
Fix the wall bracket to the wall ensuring to use the correct hardware fixings given the wall construction, Plaster board or Solid
Wall.
Lift and hook the product onto the wall bracket and secure using the wall brace brackets.
Once the product is secured to the wall and connected to the power supply, the false construction such as plaster board wall or
chimney breast can be formed around it.
It is important to allow for the finished face board when setting the depth of the frame construction.
It is essential to include header/Lintel at the required height to ensure the appliance does not support the weight of the
finished wall.
Prepare the Cut-Out in the Plasterboard or Finishing Board and install ensuring that the plaster kit edges are fitting to the
inside of the Cut-out of the board.
INSTALLATION METHOD:
PLEASE NOTE: Once the product has been fitted into place, please ensure the fire is plugged in and tested to
check the fan and ribbons are aligned correctly, and the ribbons are moving freely. It may take up to 20 mins of
usage to see proper alignment.
Summary of Contents for E1560
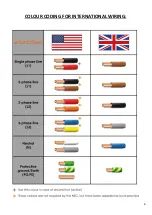
Page 6: ...6 COLOUR CODING FOR INTERNATIONAL WIRING ...
Page 8: ...8 3 SIDED INSTALLATION GUIDE ...
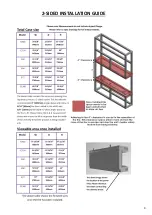
Page 9: ...9 2 SIDED INSTALLATION GUIDE ...
Page 10: ...10 1 SIDED INSTALLATION GUIDE ...
Page 26: ...26 ...
Page 32: ...32 ...
Page 38: ...38 ...

