background image


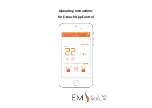
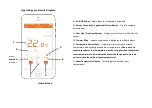
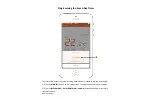
A). On & Off Button - Single press to turn product on and off. 

B). Setup / Seven-day Programmable Timer Button  - Used to navigate 
timer options. 

C). Heat High / Heat Low Buttons  - Single press to select 1 or 2Kw of heat 
output. 

D). Dimmer Slide  - Increase or decrease the brightness of flame effect. 

E). Temperature Control Keys  - Single press to increase or decrease 
temperature when setting desired room temperature. (Please note: to 
activate the heater the temperature must be set higher than the ambient 
room temperature to de-activate the heater the temperature must be 
set lower than the ambient room temperature). 

F). Room Temperature Display  - This displays the desired room 
temperature.  

Operating your Electric Fireplace 

Home Screen 

Labeled 
(COMMON)  
on Android. 

Summary of Contents for Electric Modern Compton 1000

Page 1: ...r your safety always comply with all warnings and safety instructions contained in this manual to prevent personal injury or property damage Please note This product is only suitable for well insulated spaces Esuites 170420 SUITES MODELS Compton2 Compton 1000 UL E54813 UL E228455 UL E140692 UL E54813 August 2018 ...

Page 2: ...ect panel Do not run the cord under carpeting Do not cover cord with throw rugs runners or the like Arrange cord away from traffic area and where it will not be tripped over Do not locate the heater immediately below a fixed socket outlet Do not insert or allow foreign objects to enter any ventilation or exhaust opening as this may cause an electric shock or fire or damage to the heater To prevent...

Page 3: ...the fireplace near an existing outlet for plug in convenience 3 Remove electric fireplace front glass and hardware from the box and remove all packaging materials before installation 4 Store the fireplace in a safe dry and dust free location until you are ready to install the fireplace Grounding Instructions This product must be grounded If it should malfunction or breakdown grounding provides a p...

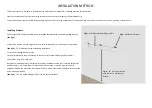
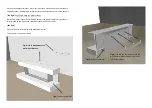
Page 4: ...l to the bottom of the hearth of the product See Fig 2 33 Dimension is used as standard installation Ensure the mounting bracket is level Fix the wall bracket to the wall ensuring to use the correct hardware fittings given the wall construction drywall or solid wall Note When installing bracket to drywall the bracket should be secured to at least two solid studs behind the wall Use a stud finder t...

Page 5: ... product is secured to the wall connect the power supply to the product inlet located on the right hand side underneath the hearth section See Fig 5 Connect the power socket into the wall power outlet The product is now ready to use Fig 4 Lift Hook the product onto the wall mount bracket using x3 slots in the rear of the product Fig 4 Lift Hook product to wall mount bracket Fig 5 Power supply inle...

Page 6: ...Operating Instructions for E touch App Control ...

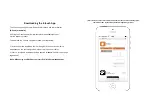
Page 7: ...screen shots used in this manual are taken from OS operating system there will be some slight variations for Android operating systems 1 Access either the Apple App store or Google Play on your device this is dependent on the operating system of your smart phone or tablet 2 Search locate and download the App entitled e touch look for the orange logo above Note When using a tablet filter your searc...

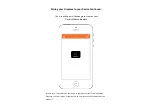
Page 8: ...DD your Electric Modern product simply click the button at the top right of the screen Pairing your Fireplace to your Device Note Fireplace pairs to your device via Bluetooth Ensure that your Bluetooth setting is activated on your device before attempting to pair Only one device can be paired to the fireplace at any given time ...

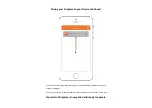
Page 9: ...or your Electric Modern fireplace Please note To enable the E touch app to find discover your Electric Modern fireplace the smart phone or tablet must be no more than 3 feet away from the product Pairing your Fireplace to your Device Continued ...

Page 10: ... Electric Modern product the above screen will appear 6 To connect to your Electric Modern fireplace simply click on the Electric fire icon Pairing your Fireplace to your Device Continued Your electric fireplace is now paired and ready to operate ...

Page 11: ...fect E Temperature Control Keys Single press to increase or decrease temperature when setting desired room temperature Please note to activate the heater the temperature must be set higher than the ambient room temperature to de activate the heater the temperature must be set lower than the ambient room temperature F Room Temperature Display This displays the desired room temperature A B C D E F O...

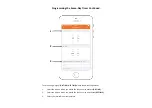
Page 12: ...m the seven day programmable timer please follow the steps below 1 Click the TIME SET button on the home screen The options above image will appear 2 Click the WEEK MODE OS or COMMON Android button and the timer summary screen will appear see next page 2 ...

Page 13: ...o switch Off D Target Gear Set the heater to switch on Heat Low or Heat High E Target Temperature Set your desired room temperature The heater will deactivate once the interior thermostat has reached this target temperature F Repeat Select what day s you would like the program to repeat A B C D E F Programming the Seven Day Timer Continued ...

Page 14: ...ming program ON TIME OFF TIME please follow the steps below 1 Select the time on which you would like the heater to activate ON TIME 2 Select the time on which you would like the heater to de activate OFF TIME 3 Select your desired room temperature 1 2 3 ...

Page 15: ...activated your timing program this can be bypassed by pressing the HOLIDAY button on the home screen 4 5 6 Programming the Seven Day Timer Continued Troubleshooting 1 E touch app will not connect to product Ensure that the rocker power switch is in the on position on your product and re scan for the product using the app Ensure that the smart phone or tablet is within range of the product 3 feet 2...

Page 16: ...fety feature to safe guard against further damage to the product If the airflow is restricted the heater will automatically turn off This is can occur due to incorrect installation or obstruction To reset the heater function Please note that both the fire effect fan and heater fan omit a low decibel noise both of which are normal operating characteristics Isolate from the mains power supply Leave ...

Page 17: ...ENGTH A 10 1 4 B 14 5 8 C 9 1 16 D 7 5 16 E 7 1 2 F 15 3 8 Compton2 Compton 1000 LOG LAYOUT LOG SET Please Note The images shown are suggested log layouts the log sets can be arranged to personal preference ...

Page 18: ...valent to the original product A replacement product part assumes the remaining warranty of the original product or ninety 90 days from the date of replacement or repair whichever provides longer coverage for you When a product or part is exchanged any replacement item becomes your property and the replaced item becomes the property of European Home Nothing in the above shall be deemed to imply th...

Reviews: