28
JVF-M2 Series Outdoor Gas Fireplace
IGM2S-190417
INDEX
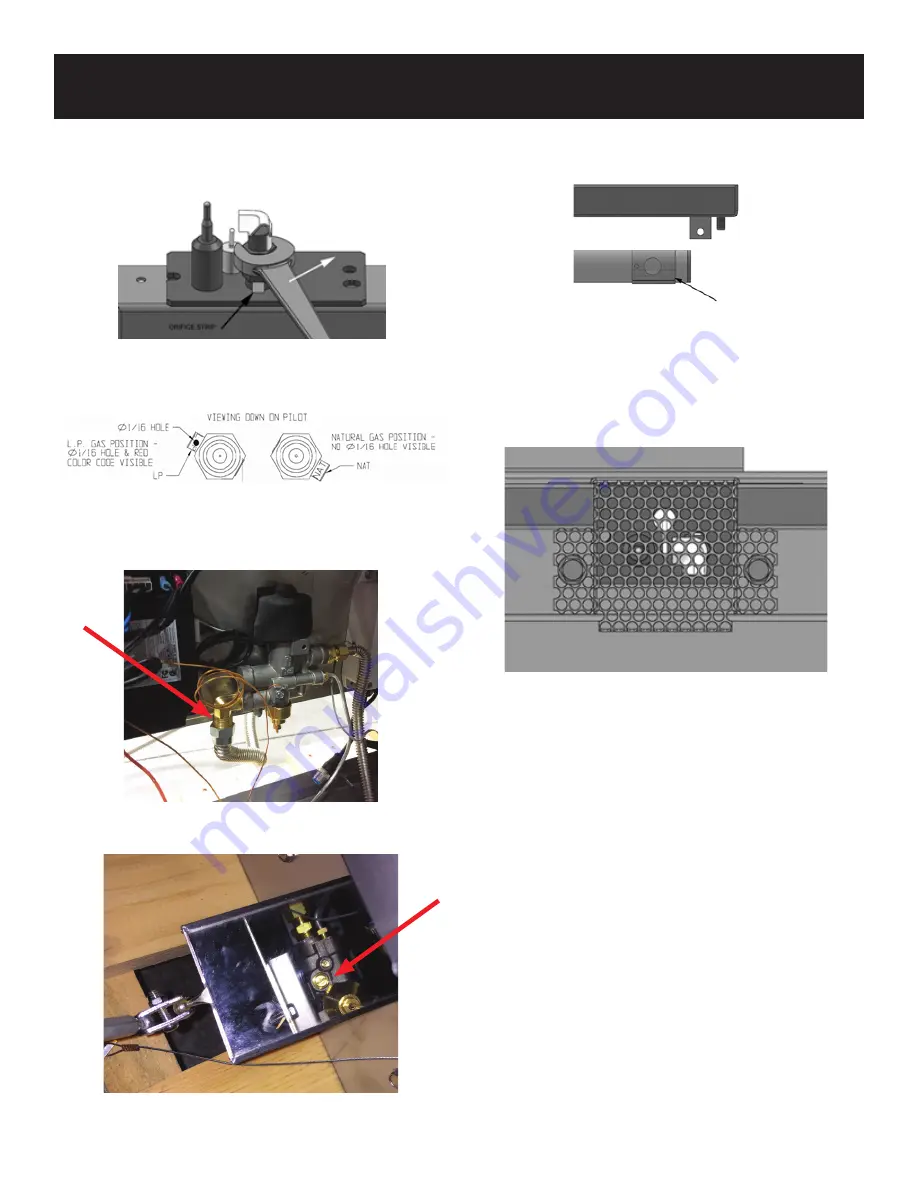
16. Remove the #8 screws and air shutters from the burner
inlet tubes.
17. Slide the Spider Screen over the burner inlet tubes so
that it covers the air inlet holes and screw holes.
18. Replace the Pilot Shields and install the burners using
the same fasteners. The assembled burner should have the
same relationship as shown below.
19. The burner must be connected to a propane supply
cylinder and leak tested. Open the propane supply cylinder
and apply a leak test solution to the Regulator/Hose and
the 1/2” Female Flare x 3/8” Male Flare fittings. The leak test
solution can be made by adding 1 teaspoon dishwashing
liquid to 1/2 cup of tap water. If bubbles appear, shut the
propane cylinder valve and tighten the connection. When
there are no leaks at the valve inlet, light the burner and
apply the leak test solution to the orifice fittings and the
corrugated manifold tube.
20. Fill out the information on the conversion label and
attach it to the burner base to the right of the control
panel. Reattach the burner to the bottom of the case.
21. Connect the Regulator/Hose to the propane cylinder
and verify that the burner lights and performs properly.
12. To convert the Pilot from natural gas to propane, turn
the pilot barrel 1/4 turn counter clockwise with a 7/16” wrench.
Take care not to damage the metal orifice strip.
13. Slide the orifice strip so that LP is showing and tighten
the pilot barrel. Reattach pilot guards.
14. Remove existing NG line from gas valve and install the
1/2” female flare x 3/8” male flare connector and the regulator
hose on the valve inlet and tighten.
15. On gas valve, screw min rate screw all the way in for LP
airflow.
APPENDIX A


