7
BEFORE YOU BEGIN
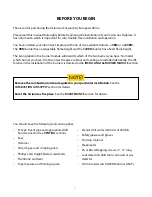
• 8” Type B vent pipe and appropriate draft
hood connector (see
VENTING
section)
• Saw
• Hammer
• Wire stripper and crimping pliers
• Phillips and straight-blade screwdrivers
• Plumb line and level
• Tape measure and framing square
• Electric drill and assortment of drill bits
• Safety glasses and gloves
• Framing material
• Manometer
• #6 or #8 self-tapping screws, ½” - 3/4” long
• Leak detection fluid (non-corrosive) or gas
detector
• 24V AC-rated switch (24VBM burner ONLY)
Remove the combustion air door required in your particular installation.
See the
COMBUSTION AIR SUPPLY
section for details.
Reset the Vision Gas Fireplace.
See the
MAINTENANCE
section for details.
NOTE!
You should have the following tools and supplies:
Thank you for purchasing the Vision Gas Fireplace by European Home.
Please read this manual thoroughly before beginning the installation of your Vision Gas Fireplace. It
has information which is important for safe, trouble-free installation and operation.
You have ordered your Vision Gas Fireplace with one of two available burners; a
VBM
or a
24VBM
.
The
VBM
burner has an adjustable flame height and the
24VBM
burner has a fixed flame height.
The listing label on the burner module will identify which of the two burners you have. No matter
which burner you have, the Vision Gas Fireplace cabinet and venting are installed identically. The dif-
ference in the installation of the burners is detailed in the
INSTALLING the BURNER MODULE
section.

