background image


Document ID: 39080005 

Rev: A 

Technical Support: 1-800-626-6912 

       Page 15 of 20 


E

UROPEAN 

T

OUCH 

M

OTOR 

S

YSTEM


L

OCKING 

C

AP


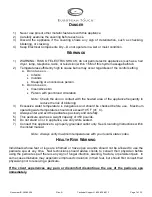
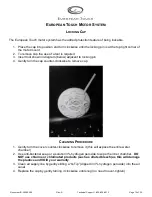
The European Touch motor system has the added protection feature of being lockable. 
 

1.  Place the cap into position and turn clockwise until the locking pin is at the top right corner of 

the motor mount 

2.  To remove cap the use of a tool is required 
3.  Insert tool shown in diagram (below) adjacent to locking pin 
4.  Gently turn the cap counter-clockwise to remove cap 


C

LEANING 

P

ROCEDURE


1.  Gently turn the cover counter-clockwise to remove it (this will expose the entire water 

chamber) 

2.  Use anti-bacterial soap or a solution 3% hydrogen peroxide to wipe the inner chamber.  

DO 

NOT use chlorine or chlorinated products (such as diluted bleach) as this will damage 
the plastics and VOID your warranty


3.  Clean air supply line by gently sliding a “Q-Tip” (dipped in 3% hydrogen peroxide) into the air 

canal 

4.  Replace the cap by gently turning it clockwise until snug (no need to over-tighten) 

Summary of Contents for PORTABLE SPA

Page 1: ......

Page 2: ...expenses incurred by the Customer or any third party including labor or material during investigation removal or reinstallation of the Pedicure Spa or any defective components or parts To any damage t...

Page 3: ...not limited to obligations or liabilities arising out of breach of contract or warranty negligence or other tort or any theory of strict liability with respect to the Pedicure Spa or parts or compone...

Page 4: ...WNERS MANUAL For PORTABLE SPA IMPORTANT INFORMATION Serial Number Work Order Number Installed by Installation Date The serial number and work order number are located on or near the UL label under the...

Page 5: ...ALTH RISK WARNING 7 PEDICURE SPA SPECIFICATIONS 8 PORTABLE SPA OPERATING INSTRUCTIONS 9 ELECTRICAL OUTLET 9 FILLING AND RUNNING THE PETITE SPA 9 DRAINING THE PORTABLE SPA 10 PEDICURE PRODUCT GUIDELINE...

Page 6: ...CST After hours calls are recorded and attended to the next business day IMPORTANT SAFETY INSTRUCTIONS When using an electrical appliance basic precautions should always be followed including the foll...

Page 7: ...isk of blistering 3 Excessive water temperature is dangerous and should be checked before use Maximum operating water temperature should not exceed 105 F 41 C 4 Always enter and exit the pedicure spa...

Page 8: ...mps 60 Hz GFCI Protected X Caution Pedicure spa must conform to all local and national electrical codes Construction Linear Low Density Polyethylene LLDPE self contained pre plumbed Pipe Free Technolo...

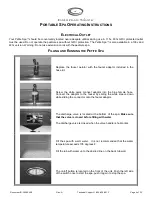
Page 9: ...adaptor included in the hose kit Screw the white quick connect adaptor into the blue female hose Connect the adaptor to the faucet by sliding the white sleeve down while sliding the connector onto the...

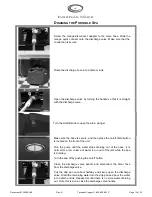
Page 10: ...sure the hose is secure and then press the on off drain button is located on the front of the unit Run the pump until the water stops draining out of the hose It is normal for a low volume of water to...

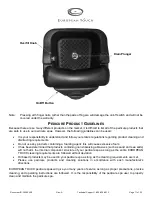
Page 11: ...roducts containing a foaming agent this will cause excessive foam It has been determined that products containing non dissolving abrasives such as sand and sea salts will not harm the internal compone...

Page 12: ...tes 2 Submerged Pipe Free Cover in container of EPA registered disinfectant for at least 10 minutes OR spray Pipe Free Cover to saturate with EPA registered disinfectant and lay inside basin for a min...

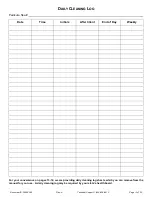
Page 13: ...AILY CLEANING LOG Pedicure Spa Date Time Initials After Client End of Day Weekly For your convenience on pages 13 14 we are providing daily cleaning log sheets which you can remove from the manual for...

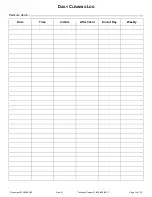
Page 14: ...Document ID 39080005 Rev A Technical Support 1 800 626 6912 Page 14 of 20 DAILY CLEANING LOG Pedicure Spa Date Time Initials After Client End of Day Weekly...

Page 15: ...below adjacent to locking pin 4 Gently turn the cap counter clockwise to remove cap CLEANING PROCEDURE 1 Gently turn the cover counter clockwise to remove it this will expose the entire water chamber...

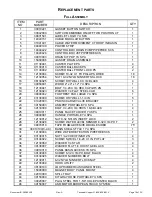
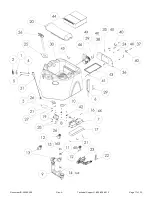
Page 16: ...FOOTREST PAD LARGE YU SPA 1 21 03130009 SCREW DRYWALL 1 1 4 IN 5 22 01020003 PS DISCHARGE VALVE BRACKET 1 23 39150003 ASM PDP PORTABLE YU SPA 1 24 39130008 BOLT 1 4 20 X 3 4 HHCS 18 8 BLACK 4 25 3901...

Page 17: ...Document ID 39080005 Rev A Technical Support 1 800 626 6912 Page 17 of 20...

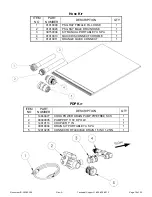
Page 18: ...Y MALE DRAIN HOSE 1 3 39150004 KIT MANUAL PORTABLE YU SPA 1 4 01010013 QUICK DISCONNECT CHROME 1 5 01010011 ORANGE QUICK CONNECT 1 PDP KIT ITEM NO PART NUMBER DESCRIPTION QTY 1 14040477 CORD POWER DRA...

Page 19: ...Document ID 39080005 Rev A Technical Support 1 800 626 6912 Page 19 of 20 HISTORY AND NOTES...

Page 20: ...EUROPEAN TOUCH 8301 W Parkland Court Milwaukee WI 53223 Phone Number 1 414 357 7016 Toll Free 1 800 626 6912 Fax 1 414 357 6360 Web Site www europeantouch com Email info europeantouch com...

Reviews:

Related manuals for PORTABLE SPA