EMPTYING THE IRON
1. Always empty iron after each use.
2. When finished using the iron, turn
the variable steam selector to “0”
and the temperature control dial to
“MIN”.
3. Unplug the iron from the electrical
outlet.
4. Set variable steam selector to
“MAX”.
5. Turn the iron upside down over the
sink with the tip pointing downward
and allow the water to flow from the
opening.
6. Set variable steam selector to “0”.
7. Allow iron to cool in an upright
position before storing.
WARNING!
Use caution
when emptying the iron.
Burns may occur from
touching hot metal surfaces,
hot water or steam.
STORAGE
1. Always turn the variable steam
selector to “0” after you have
emptied the water tank.
2. Allow the iron to cool down.
3. Always store the iron in the upright
position to protect the soleplate.
4. From time to time, clean the exterior
of the iron with a damp cloth and
wipe dry.
5. If you use spray starch, wipe the
soleplate occasionally with a soft
damp cloth to prevent the build-up of
deposits.
6. If the iron has not been used for a
few weeks, hold the iron horizontally
and allow to steam for 2 minutes
before ironing.
In order to remove calcium and built-up
particles, the self-cleaning system should be
run at least once a month.
• Fill the filling flask provided to the
half-full mark and then pour into the water
reservoir.
• Set the variable steam selector to the no
steam position.
• Insert the electrical plug into the wall
socket.
• Set the temperature control dial to the
maximum temperature.
• Wait until the temperature light goes off
and steam iron has reached the
temperature.
• Remove the plug from the wall socket.
• Hold the steam iron horizontally over a
sink.
• Hold the variable steam selector to “Self-
Clean” position. Hot water and steam will
be emitted from the soleplate. Swing the
steam iron lightly back and forth gently to
allow lime and dust particles to come out.
SELF CLEANING
• When the water reservoir is empty,
shift the variable steam selector from
“Self-Clean” position to “0”.
• Stand the iron upright and insert the
plug into the wall socket to let the iron
heat up again.
• Move the iron over a clean cotton
cloth to clean the soleplate and let the
remaining water on the soleplate
evaporate.
CONSIGNES D’UTILISATION
Cet appareil est à USAGE
DOMESTIQUE SEULEMENT et peut
être branché à une prise polarisée de
120 V CA. N’utilisez aucun autre type
de prise.
AVERTISSEMENT !
AFIN D’ÉVITER
LES BRÛLURES, soyez prudent
lorsque vous remplissez le fer d’eau.
Toucher les pièces métalliques, l’eau
ou la vapeur chaudes peut entraîner
des blessures.
REMARQUE:
La conception de la
plaque de ce fer permet d’utiliser de
l’eau du robinet. Cependant, dans les
zones d’eau très dure, l’utilisation d’eau
distillée ou déminéralisée est
recommandée.
MISE EN GARDE
: Ne remplissez
jamais le fer de revitalisant à tissu,
de fécule ou autre solution qui
pourraient endommager le
mécanisme de vapeur. N’utilisez pas
d’eau contaminée.
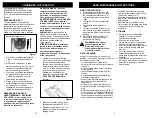
1. Ouvrez le couvercle de l’entrée
d’eau. Tenez le fer à un angle léger,
versez l’eau doucement dans
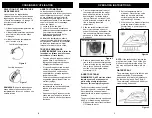
l’entrée d’eau. Consultez la figure 2.
Remplissez le réservoir au niveau
« MAX » à l'aide du godet. Lorsque
le fer est debout, le réservoir
transparent vous permet de
déterminer la quantité d'eau.
NE
FAITES PAS DÉBORDER
le
réservoir.
REPASSAGE À SEC
Tous les réglages du contrôle de
température peuvent être utilisés pour le
repassage à sec. Faites glisser le
contrôle de température jusqu'en haut.
(Fig. 1) Ceci bloque le débit de vapeur,
même s’il y a de l’eau dans le réservoir.
1. Tournez le contrôle de température
« MIN » et le contrôle de vapeur à
« 0 ».
2. Branchez le cordon dans la prise
électrique polarisée de 120 V CA. Le
témoin de température s’illumine,
indiquant que le fer réchauffe.
3. Tournez le contrôle de température
au réglage désiré (consultez le
« Guide de repassage » pour la
sélection de température).
4. Placez le fer sur son pied (sur une
surface stable et protégée) pendant
qu’il réchauffe. Lorsque la
température désirée est atteinte, le
témoin de température s’éteint.
Figure 1
REPASSAGE À VAPEUR
AVERTISSEMENT !
NE DIRIGEZ
PAS LE FER vers un visage, vers
vous, ou vers quelque’un lors que
vous utilisez ou réglez la vapeur.
Vous pourriez ainsi causer de graves
brûlures ou blessures.
2. Branchez le cordon dans la prise
électrique polarisée de 120 V CA.
3. Réglez la température •• ou ••• et
glissez le contrôle de vapeur au
réglage désiré.
Figure 2
14
AVERTISSEMENT !
Avant de
remplir le fer d’eau, assurez-vous
qu’il n’est pas branché à la prise
électrique. Le fer peut être rempli
d’eau pendant qu’il est chaud.
Pour le repassage à sec :
0
USER MAINTENANCE INSTRUCTIONS
7
Summary of Contents for Shark IR420C
Page 2: ......


