Part 3: Modem Configuration
Step 12:
E
nable DHCP on the PC:
- From Start menu select Control Panel , select Network
and Sharing Center, then select Change Adapter Settings
- Double click on the active Local Area Connection
- Click on Properties
- Double click on Internet Protocol Version 4
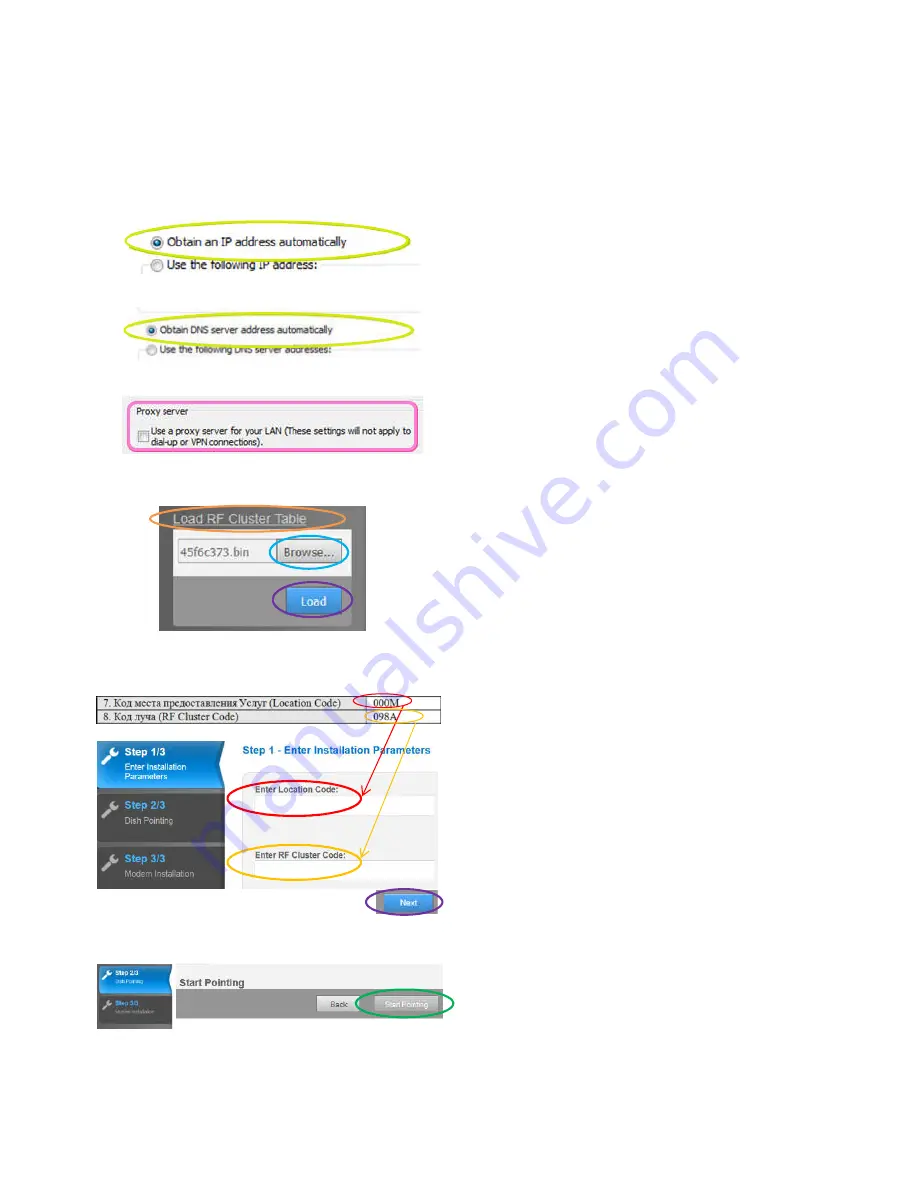
- Verify
‘Obtain an IP address automatically’
is selected
(fig. 5) and verify
‘Obtain DNS server address
automatically’
is selected (fig. 6)
Step 13:
Disable PROXY on the PC:
-
From Start menu select Control Panel
- Select Internet Option
- Click the Connections tab and select LAN Settings
- Verify that
‘Use a proxy server for your LAN’
is not
selected (fig. 7)
Step 14:
Connect the ethernet cable between modem
and PC and plug the modem to the power supply
Step 15:
Identify on the Contract Form the Location
Code & RF Cluster Code (fig. 9)
Step 16:
Open a browser on the PC and type:
http://sky.manage
Step 17:
Load in the modem the RF Cluster Table with
the bin file provided in a CD included in the kit (fig. 8):
- Click on
LOAD RF Cluster Table
(left bottom corner)
-
Browse
the files from the CD and select the bin file
45f6c373.bin
- Click on
LOAD
- Check ‘Import Succeeded’ message and then Click on OK
Step 18:
Enter
Location Code
&
RF Cluster Code
on
modem page ‘Step 1/3’, then click
NEXT
(fig. 9)
Step 19:
Click on
‘Start Pointing’
(fig. 10) and then the
Transceiver will start to generate Audio Tones
Figure 5
Figure 6
Figure 7
Figure 10
Figure 9
Figure 8
CONTRACT FORM


