background image

TS

108

TS

107


2


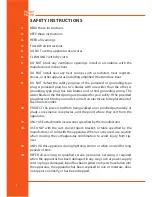
SAFETY INSTRUCTIONS

1. 

READ these instructions.

2. 

KEEP these instructions.

3. 

HEED all warnings.

4. 

FOLLOW all instructions.

5. 

DO NOT use this apparatus near water.

6. 

CLEAN ONLY with dry cloth.

7. 

DO NOT block any ventilation openings. Install in accordance with the 

manufacturer’s instructions.

8. 

DO NOT install near any heat sources such as radiators, heat registers, 

stoves, or other apparatus (including amplifiers) that produce heat.

9. 

DO NOT defeat the safety purpose of the polarized or grounding-type 

plug. A polarized plug has two blades with one wider than the other. A 

grounding type plug has two blades and a third grounding prong. The 

wider blade or the third prong are provided for your safety. If the provided 

plug does not fit into your outlet, consult an electrician for replacement of 

the obsolete outlet.

10. 

PROTECT the power cord from being walked on or pinched particularly at 

plugs, convenience receptacles, and the point where they exit from the 

apparatus.

11. 

ONLY USE attachments/accessories specified by the manufacturer.

12. 

USE ONLY with the cart, stand, tripod, bracket, or table specified by the 

manufacturer, or sold with the apparatus. When a cart is used, use caution 

when moving the cart/apparatus combination to avoid injury from tip-

over.

13. 

UNPLUG this apparatus during lightning storms or when unused for long 

periods of time.

14. 

REFER all servicing to qualified service personnel. Servicing is required 

when the apparatus has been damaged in any way, such as power-supply 

cord or plug is damaged, liquid has been spilled or objects have fallen into 

the apparatus, the apparatus has been exposed to rain or moisture, does 

not operate normally, or has been dropped.

Summary of Contents for ThunderStorm TS107

Page 1: ...EVE AUDIO PRODUCT MANUAL TS108 TS107 JAN 2016...

Page 2: ...into your outlet consult an electrician for replacement of the obsolete outlet 10 PROTECT the power cord from being walked on or pinched particularly at plugs convenience receptacles and the point whe...

Page 3: ...e environment or human health from uncontrolled waste disposal recycle it responsibly to promote the sustainable reuse of material resources To return your used device please use the return and collec...

Page 4: ...the product and void the products warranty The use of AC Plug Adapters is cautioned because it can allow the product to be plugged into voltages in which the product was not designed to operate If the...

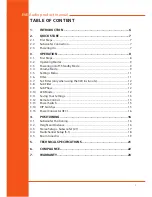
Page 5: ...u 11 3 6 Filter 11 3 7 Sat Filter only when using the XLR ins outs 12 3 8 Sub Filter 12 3 9 Sub Phase 12 3 10 LED Mode 12 3 11 Saving Your Settings 13 3 12 Remote Control 13 3 13 Power Switch 15 3 14...

Page 6: ...ble when applying the bass reflex port design The passive radiator is on the bottom side of the subwoofer All subwoofers of the ThunderStorm series are the ideal extension for the two three and four w...

Page 7: ...Slave system connect the signal source to the SC203 inputs and the dedicated SC203 Sub out to the Unbalanced in on the subwoofer rear panel While doing this all output levels should be as low as poss...

Page 8: ...devices signal sources active monitors etc Balanced XLR pin assignment 1 Shield 2 hot 3 cold Unbalanced XLR pin assignment 1 3 Shield 2 Signal The rear side also offers an unbalanced RCA input connect...

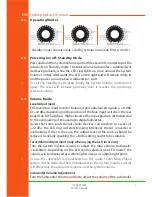
Page 9: ...the Max Input switch on the rear panel see DIP Switches Higher levels at the input produce distortion due to the overloading of the analog to digital converter Given that some professional studio dev...

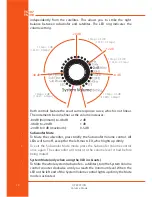
Page 10: ...lume increases 80 dB minimum to 48 dB 2 dB 48 dB to 20 dB 1 dB 20 dB to 0 dB maximum 0 5 dB Subwoofer Mute To Mute the subwoofer press briefly the Subwoofer Volume control All LEDs will turn off excep...

Page 11: ...olume control to choose the filter phase or LED mode desired The blinking LED indicates the function selected while the steady on LED indicates the value assigned to that function Press the System Vol...

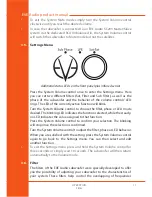
Page 12: ...e no effect on the satellites signal 3 8 Sub Filter The Sub Filter is a low pass filter that allows you to set the upper frequency limitofthesubwoofer Itcanbesetfrom60Hzupto140Hz Werecommend setting i...

Page 13: ...the lighting of two adjacent LEDs The level ranges from 60 dB to 10 dB taking 0 dB as reference point 3 11 Saving Your Settings All settings on the front and rear panels are automatically saved The l...

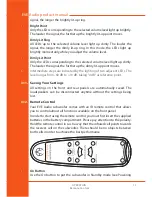
Page 14: ...connected to an EVE Audio SC203 Master Slave system via the dedicated RCA Unbalanced in use the Pure Satellite button to mute the subwoofer Mute function see Subwoofer Mute System Volume Buttons only...

Page 15: ...y all audio sources 3 14 DIP Switches On the rear panel of your EVE Audio subwoofers you will find four DIP Switches These allow you to secure your subwoofer settings to prevent them from being change...

Page 16: ...to be the problem proceed as follows Turn the subwoofer off Disconnect it from the power grid Detach the IEC connector from the unit Remove the fuse Change the fuse The replacement fuse should comply...

Page 17: ...stics of the room In live rooms you will be forced to reduce the distance while in dead rooms the distance to the loudspeakers can be larger 4 3 Stereo Setup Subwoofer 2 1 In case the subwoofer is con...

Page 18: ...nt panels are pointed towards the listening position all angles of the stereo triangle should be 60 The subwoofer should be placed on the ground between both satellites Considering that low frequencie...

Page 19: ...ace the center monitor directly in front of the listening position i e right in the center between both front satellites The rear satellites should form an isosceles triangle with the listening positi...

Page 20: ...is manual However we have put together a short bibliography for you Recording Studio Design by Philip Newell ISBN 0 240 51917 5 Home Recording Studio Build it like the Pros by Rod Gervais ISBN 1 59863...

Page 21: ...inf 6dB inf 6dB Subwoofer Volume inf 6dB inf 6dB Switchable Sat Filter Flat 80Hz Flat 80Hz Variable Subwoofer Filter 60 140Hz LFE Mode 60 140Hz LFE Mode Volume Lock Yes Yes Filter Lock Yes Yes Auto s...

Page 22: ...15 of the FCC Rules These limits are designed to provide reasonable protection against harmful interference in a residential installation This equipment generates uses and can radiate radio frequency...

Page 23: ...and Stenz Managing Director EVE Audio 7 WARRANTY The manufacturer warranty is valid for a period of two 2 years after the date of purchase The warranty covers repair costs labor and spare parts produc...

Page 24: ...Germany 4 9 3 0 6 7 0 4 4 1 8 0 4 9 3 0 6 7 0 4 4 1 8 8 info eve audio com www eve audio com facebook com EveAudio twitter com EveAudio Jan 2016 EVE Audio All rights reserved EVE Audio reserves the ri...

Reviews: