background image

4

Child Requirements

• 

1.8 to 10 kg (4 to 22 lbs) 

• 

43 to 73 cm (17 to 29 in.) and 

top of child’s head is at  

least 2.5 cm (1 in.) below the 

top of the child restraint  

seat back (see pages 19


and 28).

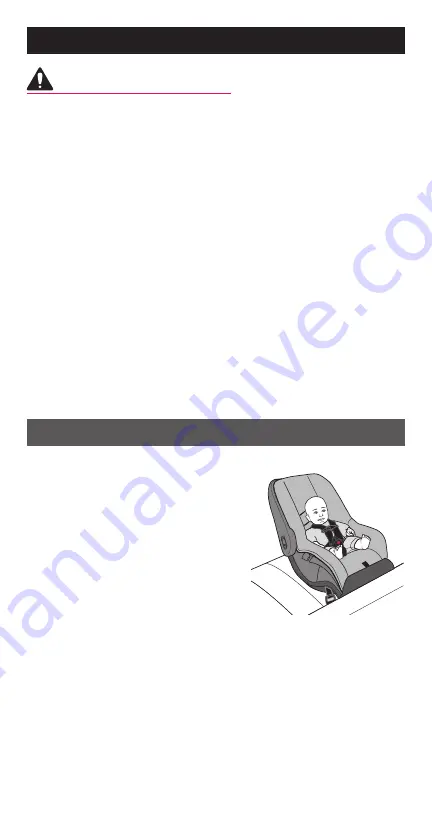
This child restraint is designed for use by children in 

rear-facing 

orientation only. To use this child restraint 

properly, children 

MUST


meet the size and age 

requirements below. In addition, Evenflo recommends 

consulting with your child’s physician before allowing 

your child to transition from a 

rear-facing

 to 

forward-

facing

 child restraint.

The American Academy of Pediatrics (AAP) 

recommends keeping children 

rear-facing

 for as long 

as possible, until they reach the maximum height or 

weight for their child restraint in 

rear-facing

 orientation.* 

Additionally, some states’ laws require children to be 

rear-facing

 until age 2. Accordingly, you will see this 

guidance reflected in the Child Requirements on the 

following pages. Please review any applicable local, 

state or provincial laws related to child passenger safety 

before installing and using this Car Seat.

*Pediatrics. 2018;142(4):e20182460

WARNING!

DEATH or SERIOUS 

INJURY can occur.

IMPORTANT:

 Once your child exceeds any of the size 

requirements above, you 

MUST

 discontinue use of this 

child restraint.

Important Information

Summary of Contents for 36412407

Page 1: ...o Company Inc 25701668 10 21 Rear facing with Base 1 8 to 10 kg 4 to 22 lbs 43 to 73 cm 17 to 29 in See page 4 for complete requirements Para instrucciones en Espa ol llamar al 1 800 233 5921 NurtureM...

Page 2: ...the commonly used term safety seat no restraint system can prevent all injuries in all crashes Many properly restrained adults and children are injured in motor vehicle crashes including relatively m...

Page 3: ...ist Installation with Convenience Base 27 Proper Installation WITHOUT the Convenience Base 28 Installing the Carrier without the Convenience Base 29 Checklist Installation without Convenience Base 33...

Page 4: ...The American Academy of Pediatrics AAP recommends keeping children rear facing for as long as possible until they reach the maximum height or weight for their child restraint in rear facing orientatio...

Page 5: ...rn infants who weigh less than 2 26 kg 5 lbs at birth before their first car trip to check for breathing difficulties or heart rate problems when traveling in a rear facing Child Restraint Newborn inf...

Page 6: ...ual must be followed carefully If there is a conflict between the two the vehicle owner s manual regarding child restraint installation must be followed This child restraint MUST ALWAYS face the rear...

Page 7: ...d restraint installation If the rear seat of your vehicle is equipped with side air bags refer to the following information for proper usage Vehicles built prior to the 2002 model year DO NOT use this...

Page 8: ...hild restraint on forward facing vehicle seats DO NOT use on vehicle seats which face the rear or side ONLY use this child restraint on vehicle seats with backs that lock into place Some child restrai...

Page 9: ...estraint in a seating position with door mounted seat belts DO NOT use this child restraint in a vehicle with seat belts that automatically move along the vehicle frame when the door is opened These s...

Page 10: ...at belt release button away from the child restraint or move the child restraint to a different location Failure to adjust the harness snugly around the child may result in the child striking the vehi...

Page 11: ...ightened by feeding seat belt webbing into retractor Lap Shoulder Belt with Locking Latch Plate The lap portion of this belt does not loosen once the belt is buckled The vehicle belt is tightened by p...

Page 12: ...wer Anchor Bars from the outside seating positions are 28 51 cm 11 20 in apart LATCH UAS typically offers an easier and more consistent installation However this child restraint can be safely installe...

Page 13: ...straint if it moves more than 2 5 cm 1 in side to side or front to back at the belt path on the child restraint If you cannot tightly secure the child restraint try again or move it to another locatio...

Page 14: ...er on soft surfaces and suffocate the child NEVER place this child restraint near the edges of counter tops tables other high surfaces or in shopping carts The child s movements can cause the child re...

Page 15: ...or U S Customers Child restraints could be recalled for safety reasons You must register this restraint to be reached in a recall Send your name address and the restraint s model number and manufactur...

Page 16: ...andle Harness Straps Harness Slots Adjuster Strap Buckle Release Canopy Chest Clip Convenience Base Release Handle Child Restraint Features Front View Back View Seat Pad Buckle Strap Slots Splitter Pl...

Page 17: ...toring Lower Anchor Connectors 1 When the lower anchor connector system is not in use you MUST securely store it on the base as shown above using the storage bars on the underside of the base A loose...

Page 18: ...ORTANT ALWAYS secure the child in the carrier Refer to Securing the Child in the Carrier on page 34 Position 1 Carry Travel ONLY use this position to carry your child or while traveling in a vehicle P...

Page 19: ...in below the top of the child restraint seat back IMPORTANT Once your child exceeds any of the size requirements above you MUST discontinue use of this child restraint At least 2 5 cm 1 in Harness st...

Page 20: ...the lower anchor connectors should be securely stored in the storage area located in the convenience base see page 17 Keep out of reach of children ALWAYS be sure that the lower anchor connectors are...

Page 21: ...e right anchor bar and the left hook to the left anchor bar DOUBLE CHECK that the hooks are fully engaged by pulling hard on the lower anchor connector strap Using your full weight push the base firml...

Page 22: ...22 Installing the Convenience Base with Lower Anchor Connectors 3 Adjust the base so that the level line is level with the ground and continue with Placing the Carrier in the Base on page 25...

Page 23: ...roperly secure the child restraint WARNING DEATH or SERIOUS INJURY can occur Installing the Convenience Base with the Vehicle Seat Belt Secure the convenience base to your vehicle seat by routing the...

Page 24: ...he seat belt again or use the lower anchors instead Pull the shoulder belt tightly to remove all slack from the lap portion of the vehicle seat belt and at the same time push down on the base using yo...

Page 25: ...side the child restraint before placing front edge of seat under base hook The carrier MUST be locked firmly into the base Check by lifting up on the back head end of the seat to make sure it is locke...

Page 26: ...ck comfortably and safely Failure to properly recline the child restraint could increase the child s risk of serious injury or death 2 With the handle in Position 1 squeeze the base release lever on t...

Page 27: ...he carrier pages 34 35 Harness straps MUST start as close as possible to but NEVER above the child s shoulders page 34 Both buckle tongues are fastened page 34 Chest clip is securely fastened and at a...

Page 28: ...to 73 cm 17 to 29 in and top of child s head is at least 2 5 cm 1 in below the top of the child restraint seat back IMPORTANT Once your child exceeds any of the size requirements above you MUST discon...

Page 29: ...go to http www NHTSA gov For Can adia n Models To register your child restraint return the registra tion card call 1 937 773 3971 or register on line at www even o c om registercarseatca nada WARNING...

Page 30: ...hich type of belt retractor is in the vehicle 2 LAP BELT ONLY Route the vehicle seat belt through the belt guides on the carrier LAP SHOULDER BELT In vehicles with a lap and shoulder belt route the LA...

Page 31: ...er on line at www even o c om registercarseat For recall information call the U S Government s Veh icle Safety Hotline at 1 888 327 4236 TTY 1 800 424 9153 or go to http www NHTSA gov For Can adia n M...

Page 32: ...32 5 Installing the Carrier without the Convenience Base Push down and rotate the handle to Position 1 or 3 when traveling in a vehicle page 18...

Page 33: ...straint to the vehicle seat Carrier is securely installed with vehicle seat belt page 30 The shoulder strap portion of the seat belt is lying across the vehicle seat back page 30 Locking clip is insta...

Page 34: ...rs 1 Facing the front of the buckle place the left buckle tongue on top of the right buckle tongue Then insert both tongues in the nested position into the buckle opening until you hear an audible cli...

Page 35: ...The harness straps must be snug against the child A snug strap should not allow any slack It lies in a relatively straight line without sagging It does not press on the child s flesh or push the child...

Page 36: ...se and remove the buckle tongues Push the release button and pull the chest clip apart To loosen the harness push down on the central front adjuster s metal hinge and pull harness straps Removing the...

Page 37: ...harness straps should always be as close as possible to but never above the child s shoulders 1 2 3 Changing the Harness Position Loosen the harness straps by pressing the harness release button while...

Page 38: ...te them correctly through their corresponding slots in the seat shell 5 6 Make sure the harness strap is installed completely on the splitter plate as shown then repeat steps 2 5 for other side Tighte...

Page 39: ...ap should always be as close as possible to but not under the child s bottom There are four positions in which to use the buckle strap based upon your child s comfort Changing the Buckle Strap Positio...

Page 40: ...the bottom of the carrier and push the anchor up through the slot to the top of the seat Insert the Buckle Strap anchor into the slot that is the closest to the child but not under the child s bottom...

Page 41: ...le Strap Position 3 For Newborn Mode place the anchor through the rear slot then feed it through the middle slot Make sure the anchor is completely through the middle slot and is lying flat against th...

Page 42: ...suggested in the chart below 1 2 To reposition waist straps from outer to inner slots loosen the harness straps by pressing the harness release button while pulling on the harness straps Push the Buc...

Page 43: ...or from the outer slot on bottom of the seat and push the anchor up through the slot to the top of the seat Repeat for other side Push the anchor down through the appropriate inner slot to the bottom...

Page 44: ...d contact ParentLink to obtain a Locking Clip If your vehicle is model year 1996 or newer it likely has a vehicle belt system that can be locked when tightened and will not require use of a Locking Cl...

Page 45: ...uckle tongue thread the locking clip onto the seat belt and slide it into place Buckle the seat belt with the locking clip in place If using a vehicle seat belt and installing the convenience base onl...

Page 46: ...or fall NEVER place this child restraint on beds sofas or other soft surfaces The child restraint can roll over on soft surfaces and suffocate the child NEVER leave the child in this carrier when the...

Page 47: ...de of the child restraint Using as an Infant Carrier Installing the Canopy CARRY AT YOUR SIDE using the handle as shown IMPORTANT Make sure that the handle is firmly locked on both sides and that the...

Page 48: ...hook and loop connector at rear of infant car seat At rear of seat unhook three hook connectors from seat shell Pull the two fabric slots from tabs near the handle Repeat on other side of infant car...

Page 49: ...trap and buckle through fabric slots and remove seat cover as shown At bottom of seat unhook harness straps from the splitter plate 1 2 Pull harness strap adjuster strap and buckle through fabric slot...

Page 50: ...s at the front of the seat Pull the two fabric slots onto the tabs near the handle Repeat on other side of infant car seat Reconnect the three hook connectors to the seat shell at rear of seat Reattac...

Page 51: ...t seat belt less than 9 kg 20 lbs use a rear facing child restraint and from 9 to 18 kg 20 to 40 lbs use a forward facing child restraint NOTE These FAA recommendations may vary from those applicable...

Page 52: ...belt through the belt slots on the carrier as shown below 2 3 Installing Child Restraint in Aircraft NOTE It may be necessary to move or fold the seat cover out of the way to access the belt guides Fa...

Page 53: ...firmly onto the aircraft seat while pulling on the excess seat belt strap to tighten Route the excess seat belt strap back through the belt slots as shown above Check your work Try to move the child r...

Page 54: ...ed clean with mild soap and water Allow harness to air dry Machine wash the seat pad separately in cold water delicate cycle Tumble dry 10 to 15 minutes on low heat To protect the child restraint from...

Page 55: ...the child restraint Canopy Head Foam Harness System Seat Pad Convenience Base Replacement Parts If you decide to obtain an additional base for your NurtureMax child restraint look for sku part number...

Page 56: ...f your local recycling center won t accept the padding you may dispose of it in the landfill IMPORTANT To prevent injury due to hidden damage lost instructions outdated technology etc discontinue use...

Page 57: ...ng these instructions store them in the carrier behind the seat pad as shown For future reference record the model number of your child restraint AND the date of manufacture below Model Number Date of...

Page 58: ...y is extended by Evenflo ONLY to the original Purchaser of the Product and is not assignable or transferable to subsequent purchasers or end users of the Product For warranty service contact Evenflo s...

Page 59: ...59 Notes...

Page 60: ...www evenflo com USA 1 800 233 5921 8 AM 5 PM E T Canada 1 937 773 3971 Mexico 800 706 1200...

Reviews: