Glass Kiln
General Operation Manual
North American Models
May 2015
Page
14
of
17
Lid Element Replacement
As with any repair, remove power from the kiln.
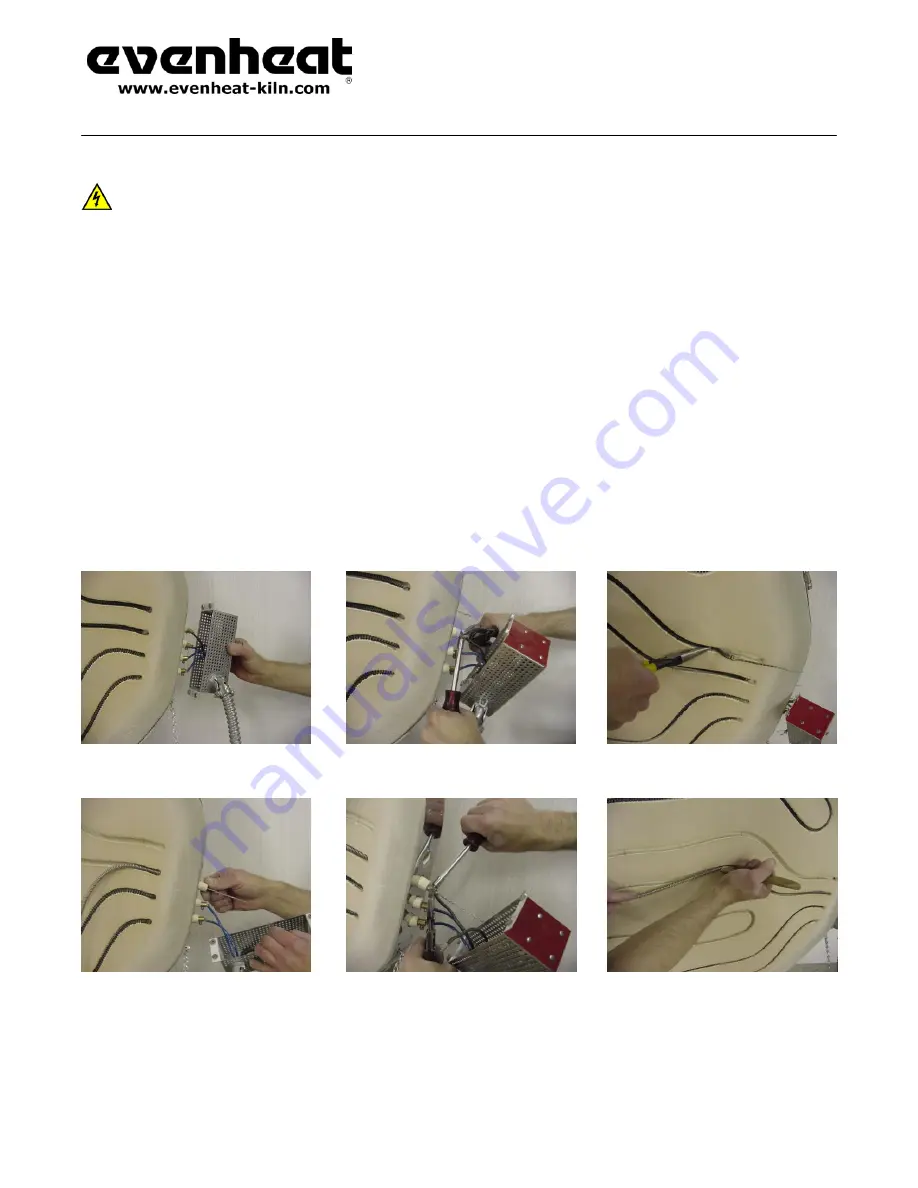
Figures 1 & 2
- Remove the red panel located on the lid. This panel houses the lid element ends. You will see the element ends protruding from the brick.
Locate the two element ends of the faulty element and remove the brass connectors and the black and/or blue wires from each. Make a note of which
wire connects to which element end.
The brass connectors are secured tightly. It’s recommended that you grasp the brass connector with pliers while
performing this procedure.
Figure 3
- Using long nose pliers remove the element from the lid groove. Go easy, the brick is fragile and will break if care is not given.
Figures 4, 5, 6, & 7
- Install the new element. Start by inserting one end through the brick. Pull the element end until snug and place cylindrical porcelain
insulator on. Install the brass connector and fully insert wire. Tighten the brass connector set screw. Be sure that the set screw is tight – this ensures a
good connection. Use wire cutters to snip off excess element ends.
Using a wooden spoon or similar devise, push the secured end of the element into the lid groove. Be careful not to destroy the groove edges. Continue
inserting the element until you’re about 3/4 of the way complete.
Figures 8 & 9
- Install the remaining end of the element through the brick as described in step 3. Once completed, finish inserting the element in the lid
groove.
It’s possible that the new element may be slightly longer or shorter than the lid groove. The element is quite pliable and you may physically stretch
or compress it to fit.
Double check that you have cut off all excess element leads at the brass connectors.
Re-install the red control panel back on the lid. When doing so, move wiring away from the brass connectors as it’s placed on.
Figure 1 Figure 2 Figure 3
Figure 4 Figure 5 Figure 6


