background image

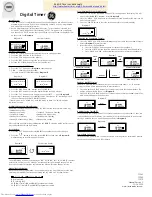
H. Disassembling 


Clutch the frame and Pull out   


I. Assembling 


Put operation panel and the frame together;   
Aim the pin to the hole of the module then press in 


J. Battery changing 

Change the new battery here, be aware of polarity   


Correct disposal of the products 


Within the European Union, this symbol indicates that the products must not be disposed in the 
household waste. Devices contain valuable recyclable materials that should be recycled for reuse 

Summary of Contents for EFP700ET

Page 1: ... security purposes it is also a great choice for smart home B LCD display and input buttons function Buttons Functions R Press to reset Manual ON OFF button change the current power status Also can clear and resume the setting during programming PROG Press to program setting browse RND Press to set Random function CD Press to set countdown OFF ON OFF mode and clock mode change Adjust button press ...

Page 2: ...9 MO WE FR 2 MO Only 10 TU TH SA 3 TU Only 11 SA SU 4 WE Only 12 MO TU WE 5 TH Only 13 TH FR SA 6 FR Only 14 MO TU WE TH FR 7 SA Only 15 MO TU WE TH FR SA 8 SU Only Programming procedure PROGRAM 1 ON When PROG is pressed 1 ON will flash then it comes to following operations a DAYS OF WEEK Press PROG button The LCD will flash the week day s selection options as noted above Press or to select your c...

Page 3: ...en Your timer is now set for a random ON OFF 2 This function allows for a random ON and OFF during 18 00PM to 6 00AM the next day The OFF period will be 26 42 minutes and ON period will be 10 26minutes randomly NOTE When in mode other settings will be disabled It repeats daily 4 Countdown Setting 1 In clock mode Press CD button to set countdown minute will be flashing on the LCD screen Press the o...

Page 4: ...ction mode change Press button to change the manual ON OFF mode and clock mode Product is default set by clock mode Press button once timer changes to manual ON OFF mode ON or OFF will be appeared on the LCD according to the current status no clock shows Press button or any 4 small buttons at the corner to switch ON OFF manually ONLY Press again it will return to clock mode If you want to change t...

Page 5: ...R button to the factory default mode shows as below E Specifications 1 Power Rating 230V 50Hz 8A 2 Resistive load 1800W max 3 Timer setting interval 1 minutes 4 Battery LR44 1 5VDC 2pcs F Cautions 1 Devices to be connected to the timer MUST NOT exceed the voltage and frequency ratings as in Specifications 2 Please ensure good connection of electrical appliances and timer 3 If the LCD shows nothing...

Page 6: ...hole of the module then press in J Battery changing Change the new battery here be aware of polarity Correct disposal of the products Within the European Union this symbol indicates that the products must not be disposed in the household waste Devices contain valuable recyclable materials that should be recycled for reuse ...

Page 7: ...ous manner and should be in accordance with applicable regulations 1 Please insert the batteries correctly according to the polarity and connected to the Battery and the device being characterized 2 Fully discharge the battery by operating this apparatus to a standstill 3 Remove the battery from the device 3 Dispose the batteries at an official collection point for chemical waste G Manufacturer Ev...

Reviews: