E V E R F O C U S E L E C T R O N I C S C O R P O R A T I O N
26
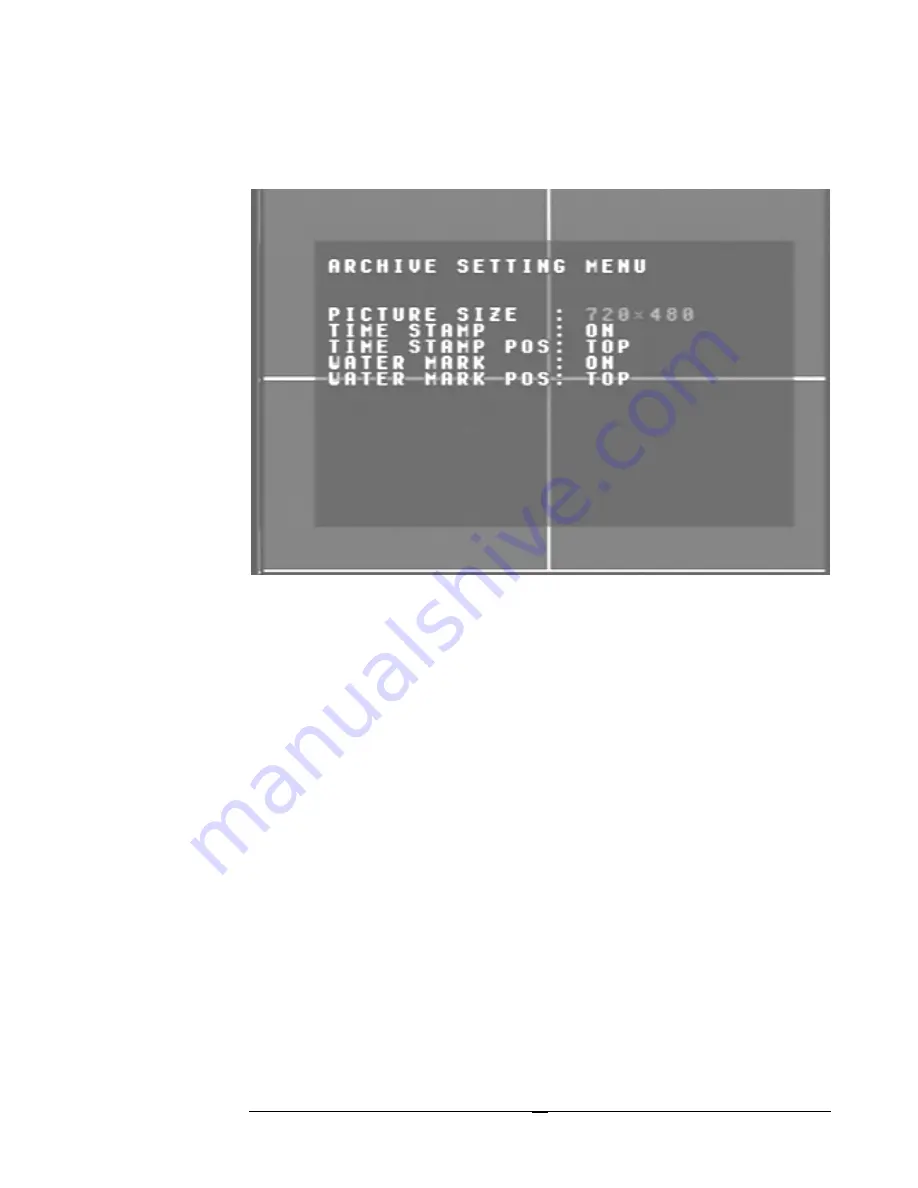
Archive Setting Menu
Diagram 9
Diagram nine is a screen shot of the Archive Setting Menu. This menu is for setting up
the way in which video is archived within the machine. In the Archive Setting Menu
the following fields are defined as follows:
¾
Picture Size: This field is to set the picture size for copying an image to a
Compact Flash card or through the network. Initial default is set to the
larger size 720 x 480 for NTSC or 720 x 576 for PAL. The smaller size is
352 x 240 for NTSC or 352 x 288 for PAL.
Please Note: To speed up refresh rate through the network set picture
size to 352 x 240 for NTSC or 352 x 288 for PAL.
To change this, simply use the arrow keys on the DVR which also
represent the channel 1-4 keys (These are the top four buttons). Use the
up and down arrow keys to make your selection.
¾
Time Stamp: This option is to turn the time stamp on or off when the
DVR is in record mode. The time stamp will appear when archiving
through the network or to a Compact Flash card. To change this, simply
use the arrow keys on the DVR which also represent the channel 1-4 keys
Summary of Contents for EDSR400H
Page 1: ...Instruction Manual E ED DS SR R4 40 00 0H H Volume 1 ...
Page 66: ...E V E R F O C U S E L E C T R O N I C S C O R P O R A T I O N 62 ...
Page 67: ...E V E R F O C U S E L E C T R O N I C S C O R P O R A T I O N 63 ...
Page 68: ...E V E R F O C U S E L E C T R O N I C S C O R P O R A T I O N 64 ...
Page 85: ...E V E R F O C U S E L E C T R O N I C S C O R P O R A T I O N 81 ...
Page 91: ...E V E R F O C U S E L E C T R O N I C S C O R P O R A T I O N 87 ...
Page 95: ...91 ...
Page 96: ...92 ...
Page 97: ...93 Remote Control Appendix A ...
Page 98: ...94 Time Lapse Mode Recording Time Appendix B ...
Page 99: ...95 ...
Page 100: ...96 Alarm Board Configuration Appendix C ...
Page 101: ...97 ...
Page 102: ...98 ...
Page 106: ......
Page 107: ......


