E V E R F O C U S E L E C T R O N I C S C O R P O R A T I O N
73
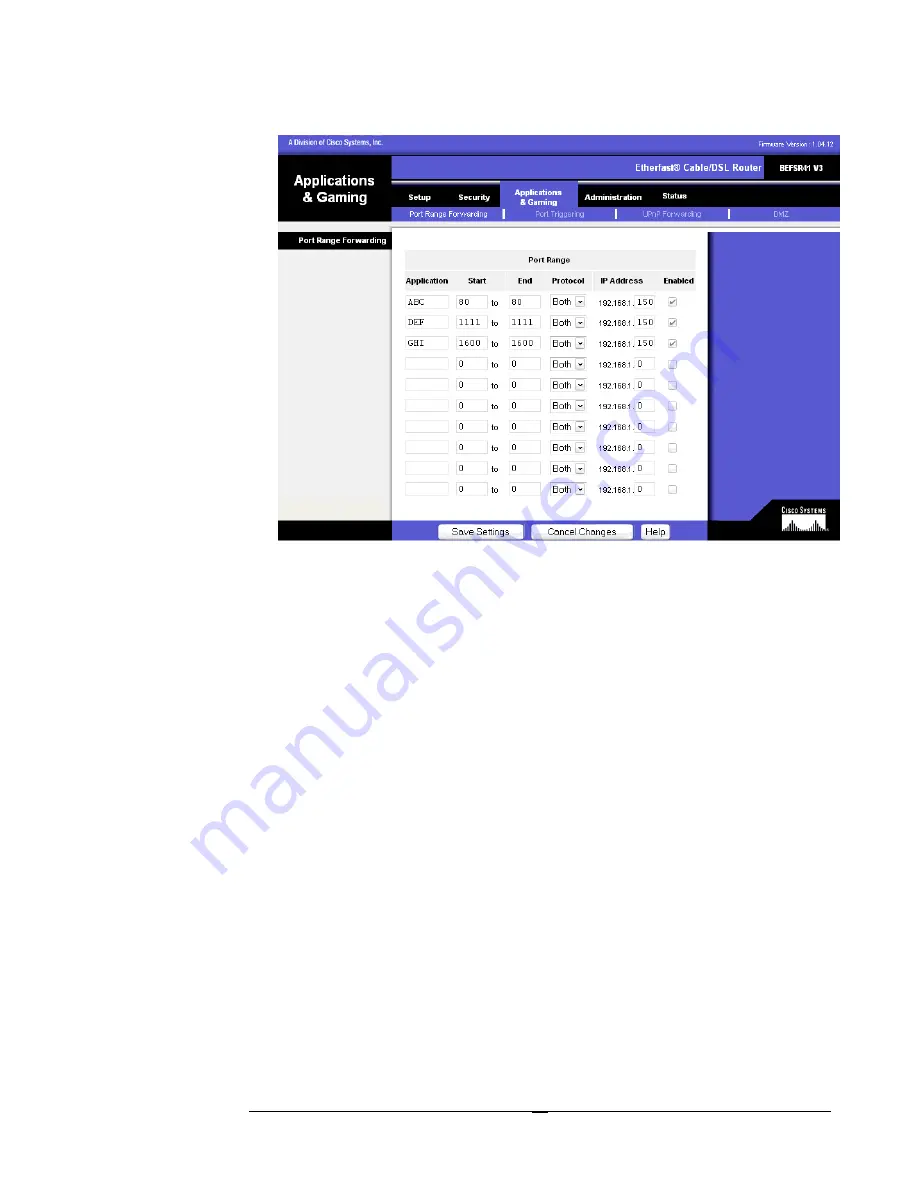
Application -
In this field, enter the name you wish to give the application.
Each name can be up to 12 characters.
Start/End -
This is the port range. Enter the number that starts the port
range under
Start
and the number that ends the range under
End
.
Protocol -
Enter the protocol used for this application, either
TCP
or
UDP
,
or
Both
.
IP Address -
For each application, enter the IP Address of the PC running
the specific application.
Enable -
Click the
Enable
checkbox to enable port forwarding for the
relevant application.
Change these settings as described here and click the
Save Settings
button to
apply your changes or
Cancel Changes
to cancel your changes.
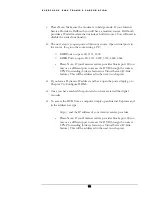
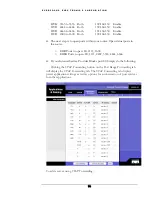
Example:
DVR 80 to 80
Both
192.168.1.50 Enable
DVR 1111 to 1111 Both
192.168.1.50 Enable
DVR 2222 to 2222 Both
192.168.1.50 Enable
Summary of Contents for EDSR400H
Page 1: ...Instruction Manual E ED DS SR R4 40 00 0H H Volume 1 ...
Page 66: ...E V E R F O C U S E L E C T R O N I C S C O R P O R A T I O N 62 ...
Page 67: ...E V E R F O C U S E L E C T R O N I C S C O R P O R A T I O N 63 ...
Page 68: ...E V E R F O C U S E L E C T R O N I C S C O R P O R A T I O N 64 ...
Page 85: ...E V E R F O C U S E L E C T R O N I C S C O R P O R A T I O N 81 ...
Page 91: ...E V E R F O C U S E L E C T R O N I C S C O R P O R A T I O N 87 ...
Page 95: ...91 ...
Page 96: ...92 ...
Page 97: ...93 Remote Control Appendix A ...
Page 98: ...94 Time Lapse Mode Recording Time Appendix B ...
Page 99: ...95 ...
Page 100: ...96 Alarm Board Configuration Appendix C ...
Page 101: ...97 ...
Page 102: ...98 ...
Page 106: ......
Page 107: ......


