5
③
L (LEFT)
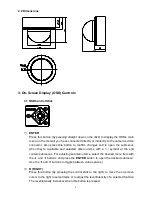
Press this button (by pressing the control stick to the left) to move the cursor to the
left to select items or to adjust the level/intensity of a selected function. The
level/intensity decreases when this button is pressed.
④
D (DOWN)
Press this button
(by pressing the control stick in the “down” direction) to scroll the
on-screen cursor downwards between menu items.
⑤
U (UP)
Press this button
(by pressing the control stick in the “up” direction) to scroll the
on-screen cursor upwards between menu items.
3.2 OSD Operation
PLEASE NOTE:
The OSD display shown in the image above is for reference only. The actual version will
look different, but will have the same wording and format.
1. Open the OSD menu
Press the ENTER button to open the OSD
’s main menu on your screen.
2. Scroll with the cursor buttons to select menu items
Use the
and
buttons to move the cursor up and down to scroll to the desired
menu items.
3. Toggle between the right-hand options (modes) of each menu item
Use the
and
buttons to change the modes of menu items and to access the
submenus of those modes (to adjust the parameters or values of submenu items
–
where applicable). Menu
items with a “<┘” symbol at the end contain submenus. (If
the right-
hand menu title is “
SET
”
, it means that there are no modes to choose from,
only a settings submenu for the left-hand main menu item.)
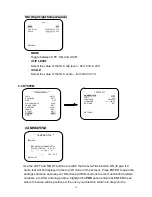
** MAIN MENU **
LENS
AUTO<
┘
EXPOSURE
SET<
┘
WDR
OFF
WHITE BALANCE
ATW<
┘
2DNR & 3DNR
SET<
┘
DAY/NIGHT
AUTO<
┘
IMAGE
SET<
┘
EFFECT
SET<
┘
SYSTEM
SET<
┘
EXIT<
┘


