Value IP Series Network Cameras – H265, 2MP / 5MP / 8MP
27
5.3.2
Record Schedule
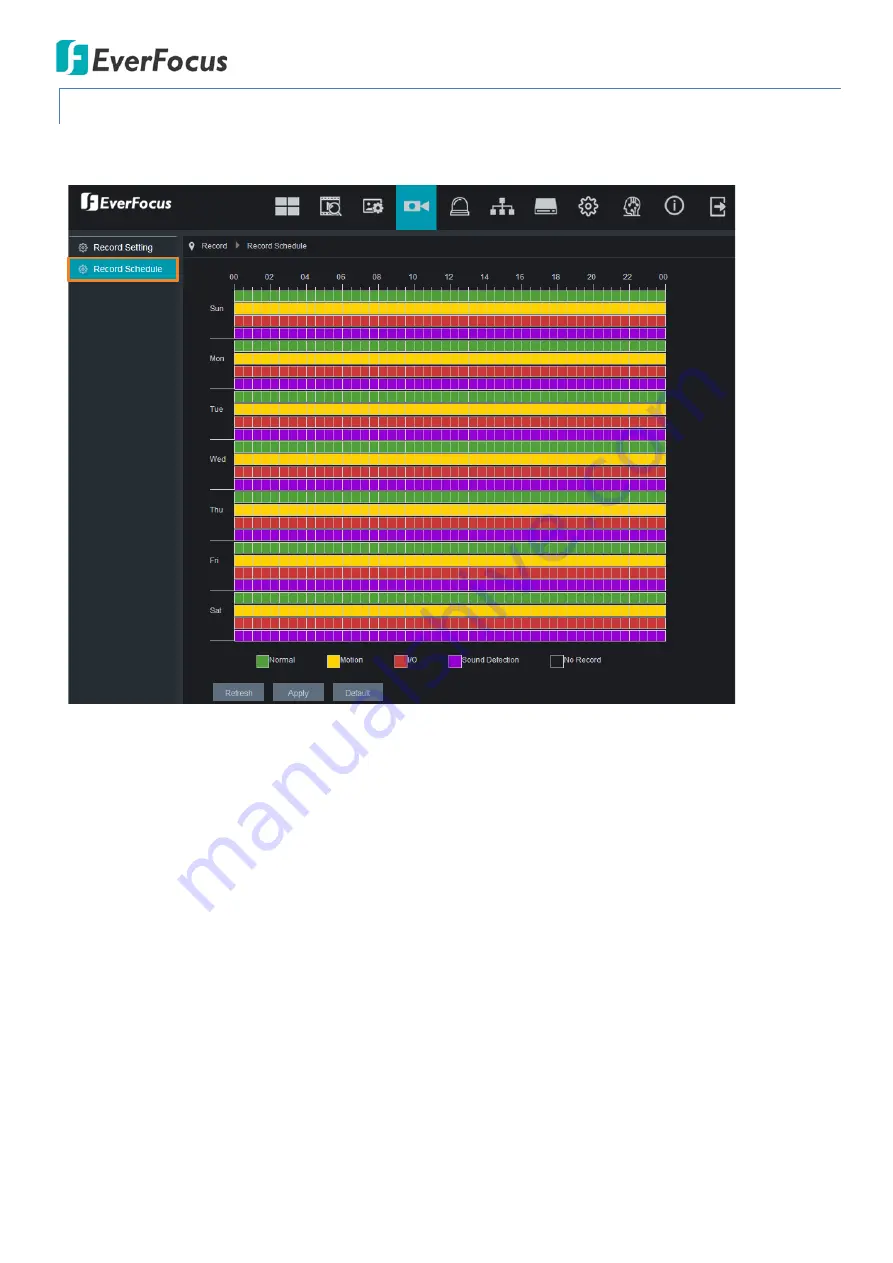
After setting up the Record settings, you can configure the record schedule on this page.
Normal:
Move your mouse cursor over the schedule time blocks. The first line of the time block on each day is
the Normal time blocks. Click and drag on the schedule time blocks to draw the blocks with green color, which
will be applied with normal recording function.
Motion:
Move your mouse cursor over the schedule time blocks. The second line of the time block on each day
is the Motion time blocks. Click and drag on the schedule time blocks to draw the blocks with yellow color,
which will be applied with motion recording function. Note that for this function to work, you will have to
configure the motion settings in advance (please refer to
5.4.1 Motion
).
IO:
Move your mouse cursor over the schedule time blocks. The third line of the time block on each day is the
IO time blocks. Click and drag on the schedule time blocks to draw the blocks with red color, which will be
applied with IO recording function. Note that for this function to work, you will have to configure the IO settings
in advance (please refer to
5.4.2 I/O
).
Sound Detection:
Move your mouse cursor over the schedule time blocks. The fourth line of the time block on
each day is the Sound Detection time blocks. Click and drag on the schedule time blocks to draw the blocks with
purple color, which will be applied with Sound Detection recording function. Note that for this function to work,
you will have to configure the Sound Detection settings in advance (please refer to
5.4.4 Sound Detection
).
Click
Refresh
to refresh the page; click
Apply
to save the settings; click
Default
to restore to the default settings.


