background image


8

The default setting is ON.   


¾


FL (Flickerless)   

 
When picture flicker fiercely, turn FL on, then the camera will stabilize the speed of electronic 
shutter at 1/100(S)(NTSC) or 1/120(S)(PAL) automatically, and reduce the flicker immediately. 

The default setting is OFF.


¾

IRIS Level Control (For Vari-Focal Lens Model) 

 
Brightness Level can be adjusted from the IRIS level VR while using the direct drive lens. 
•Turn counterclockwise to L to get darker picture. 

    •Turn clockwise to H to get brighter picture.

¾

Electronic Shutter (For Fixed Lens Model) 


ES ON: The camera continuously adjusts the shutter speed from 1/60 (NTSC), 1/50 (PAL) second 
to 1/100,000 second according to the luminance conditions of the scene.   
ES OFF: The shutter speed is fixed at 1/60 (NTSC),1/50 (PAL) second. 
Set ES OFF, when auto iris lens is used or flicker is observed under a very bright fluorescent lamp. 
Otherwise, turn ES on for optimum performance. 


Summary of Contents for EPD200A

Page 1: ...fields Install the camera away from TV radio transmitter magnet electric motor transformer audio speakers since the magnetic fields generate from above devices will distort the video images 2 Never d...

Page 2: ...ON OFF BLC ON OFF AGC ON OFF The dome camera uses a vari focal auto iris lens for discreet surveillance or close up viewing and it features with iris level volume control for the best viewing quality...

Page 3: ...ff switch Auto Gain Control On Off switch Flickerless On Off switch Auto White Balance Auto Auto IRIS DC Drive Gamma Correction 0 45 Sync Mode Internal Sync Power Source Two types 12VDC 24VAC 12VDC on...

Page 4: ...3 DIMENSION DIAGRAM a Conduit Size b 26mm 1 06 125mm 4 92 110mm 4 33 90mm 3 54 80mm 3 15...

Page 5: ...xed Lens Model IRIS LEVEL CONTROL BNC Pigtail Slot for Focusing and Testing Module BLC Back Light Compensation AGC Automatic Gain Control FL Flickerless BNC Pigtail Slot for Focusing and Testing Modul...

Page 6: ...4 Adjust lens camera position 5 Optional adjust camera setting on Dip Switch 1 Mount Camera a Pre install 26mm 1 06 EMT conduit pipe and wire video and power cables though conduit pipe Connect power a...

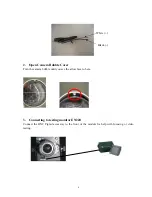
Page 7: ...le Cover Turn the camera bubble until you see the arrow face to here 3 Connecting to testing monitor EN220 Connect the BNC Pigtail accessory to the front of the module for help with focusing or video...

Page 8: ...ring towards or N as necessary to obtain the clear video image 3 Repeat steps 1 and 2 until the best image is obtained Once the lens setting finished tighten the zoom ring and the focus ring knobs CA...

Page 9: ...IS level VR while using the direct drive lens Turn counterclockwise to L to get darker picture Turn clockwise to H to get brighter picture Electronic Shutter For Fixed Lens Model ES ON The camera cont...

Page 10: ...us com Your EverFocus product is designed and manufactured with high quality materials and components which can be recycled and reused This symbol means that electrical and electronic equipment at the...

Reviews: