background image


37 

Issue: 1.0 

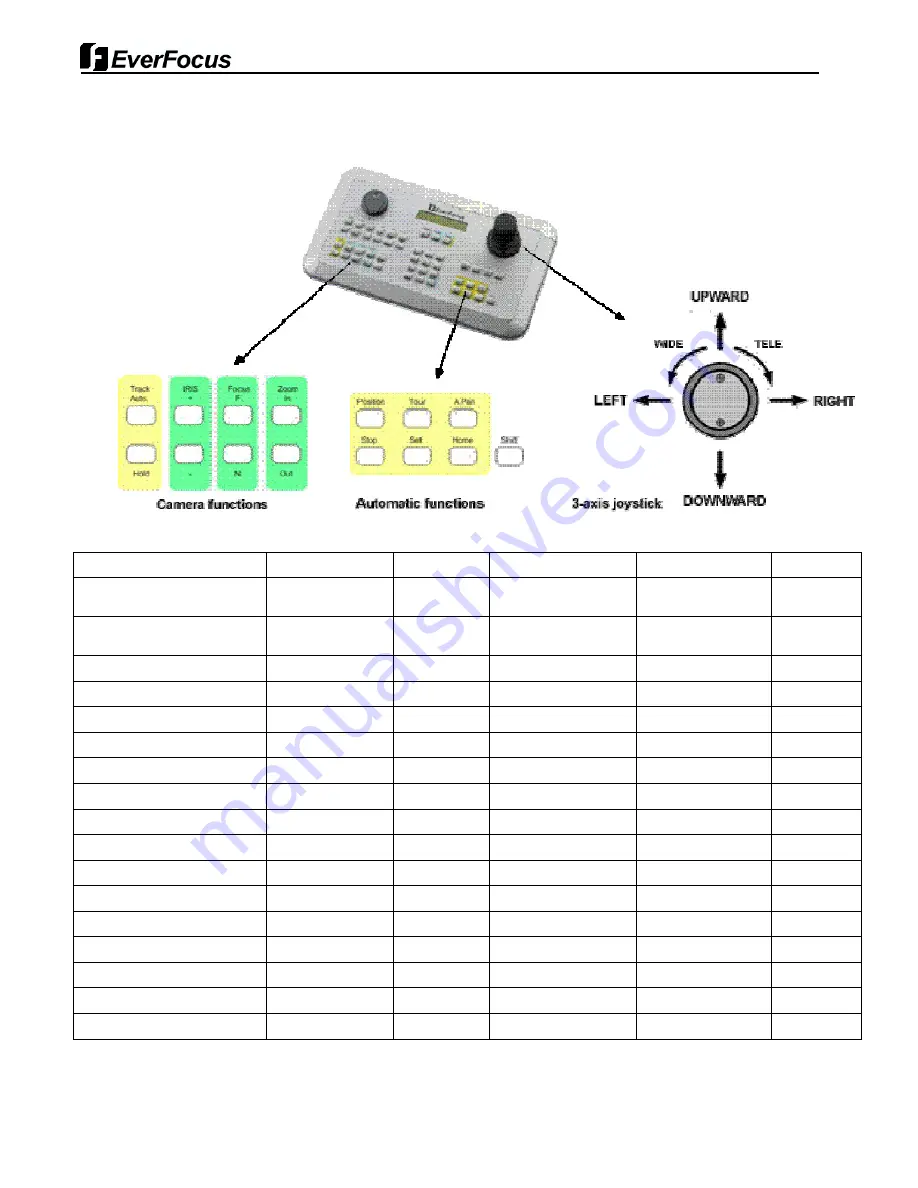
APPENDIX. RS-485 Function List 


Function 

Key 

Preset No. 

Operation 

e.g. 1 

e.g. 2 

MOVE to Preset 

Preset 

1~59, 

101~250 

No.+Go 

1+Go 


SET Preset 

Preset 

1~59, 

101~250 

No+Set 

14+Set 


Run FLIP 

Preset 

33 

No.+Go 

33+Go 


Run PAN ZERO 

Preset 

34 

No.+Go 

34+Go 


Scan Setup 

Preset 

60 

No.+Go 

60+Go 


SCAN 

Preset/Scan 

61~68 

No.+Go 

61+Go 

1+Scan 

Tour Setup 

Preset 

70 

No.+Go 

70+Go 


TOUR   

Preset/Tour 

71~78 

No.+Go 

71+Go 

1+Tour 

Pattern Setup 

Preset 

80 

No.+Go 

80+Go 


PATTERN 

Preset/Pattern 

81~88 

No.+Go 

81+Go 

1+Pattern 

ENT Key 

Preset 

90 

No.+Go 

90+Go 


Run HOME 

Preset 

91 

No.+Go 

91+Go 


CLR Key 

Preset 

92 

No.+Go 

92+Go 


ENT2 Key 

Preset 

94 

No.+Go 

94+Go 


MENU Key 

Preset/**Menu 

95 

No.+Go 

95+Set 

**Menu 

ESC Key 

Preset/ESC 

96 

No.+Go 

96+Go 


D. Zoom (Toggle) 

Preset 

97 

No.+Go 

97+Go 


**To go to OSD Main Menu, Press and hold [MENU] key for 2 seconds. 

Summary of Contents for EPH5212

Page 1: ...User s Manual Model EPH5212 HDcctv 12X IP66 Speed Dome ...

Page 2: ...8 2 3 Connection Interface and Wiring cables 9 2 4 Setting RS 485 Parameters 9 3 Program and Operation 14 3 1 Getting Started 16 3 2 Main Menu 17 3 3 System Setup Menu 17 3 4 Display Setup Menu 20 3 5 Camera Setup Menu 23 3 6 Dome Motion Menu 26 3 7 Preset Menu 29 3 8 Pattern Menu 30 3 9 Tour Menu 31 3 10 Auto Scan Menu 32 3 11 Alarm Menu 33 4 Troubleshooting 34 5 Specifications 36 5 1 General Spe...

Page 3: ...his manual carefully Keep these instructions Heed all warnings Follow all instructions Clean only with dry or damp soft cloth Install in accordance with the manufacturer s instructions Do not install near any heat sources such as radiators heat registers stoves or other apparatus that produce heat Protect the power cord and other cables from abrasion or being pinched particularly at the point wher...

Page 4: ...uipment has been tested and found to comply with the limits for a class A digital device pursuant to part 15 of the FCC rules These limits are designed to provide reasonable protection against harmful interference when the equipment is operated in a commercial environment This equipment generates uses and can radiate radio frequency energy and if not installed and used in accordance with the instr...

Page 5: ...o 8 areas flexible programming of functions and alarm actions mutli language support built in heater for operation down to 40 and much more in a compact package only 6 6 in diameter and weighing only 7 7 pounds PTZ module plus wall arm No major upgrade to the IT network is required to deploy this powerful technology HDcctv cameras communicate at digital speeds up to 1 5Gb s over existing or new co...

Page 6: ...re versions of the standard See www hidefcctv org for details 1 3 System Configuration 1 4 Termination Settings SW303 Refer to 2 4 Dome Camera Settings To prevent malfunctions and or interference with communication signals between the camera and controller the domes shaded with gray color at the end of line must have their terminations set to ON All other domes in the chain should have their termi...

Page 7: ...7 Issue 1 0 2 Installation and Connection 2 1 Package Contents ...

Page 8: ...operly to resist wind and snow ice loading After mounting the arm clip the safety cable to the arm pass the video and other wires through the arm there is an access port in the arm if connections will be made at that point Insert the dome housing into the arm rotate turn CW to lock then secure with the set screw Remove any packing foam inside the PTZ module verify switch settings then lock the hou...

Page 9: ...n PTZ cameras use the EDA997A Data Distributor 2 3 2 Connecting Video Jack Connect the silver video Jack BNC connector to the video input of the HDcctv DVR or other HDcctv device Optional Connect the yellow video to an analog monitor or other analog video equipment 2 3 3 Connecting Alarms Alarm In You can use external devices to trigger the dome camera to react to events Mechanical or electrical s...

Page 10: ...mera must have a unique address ID The default setting is 0 This corresponds to EVF 1 Pelco P ID 00 and Pelco D ID 01 Dome Camera ID Setting Rotary Switch SW301 SW302 X10 X1 SW301 SW302 2 4 2 Setting the analog video format and RS 485 protocol Analog Composite Video Dip Switch SW303 No1 Baud Rate bps Off NTSC ON PAL Dome Camera Protocol Setting Dip Switch SW303 No2 Protocol Off Pelco D P ON Others...

Page 11: ...11 Issue 1 0 3 Programming PTZ and Camera Functions and Options OSD Menu Structure Main Menu Title Operation Menu SW302 SW301 SW303 J302 ...

Page 12: ...12 Issue 1 0 Next Page Continue ...

Page 13: ...ation about features of the dome and commands as well as an operation method The symbols below mean some action of the joystick controller move joystick up and down move joystick left and right direction select or change settings Tele Wide move joystick clockwise or counter clockwise for zooming KEY press the defined key ...

Page 14: ... You shall check the saving state of each step at sub menu or edit menu after editing functions or changing settings You may save setting one function twice For example after the position or title of Preset is saved at Sub Menu the status of Preset Setup has to be saved at Preset Setup Menu again Notice To stop an action press ESC button or 96 Preset In that case the dome goes to manual mode or is...

Page 15: ...lected title return to the previous menu using Far button 3 2 Main Menu move joystick up and down for selecting an item move joystick left and right for moving an item Open Near move joystick right to select or save settings or go to edit pages Close Far move joystick to cancel or to exit current menu Back to previous menu without saving 3 3 System Setup Menu move joystick up and down for selectin...

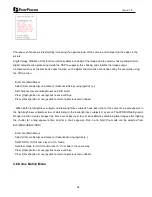
Page 16: ... joystick Move the joystick right for selecting Info in the sub menu of System Press Far button or use joystick to return to previous menu Back 3 3 2 Reboot Reboot the system if there are some anomalous problems to control or operate the domes Rebooting the system will recycle power of dome and camera without changing settings of dome Enter into Main Menu Select System using joystick and move to R...

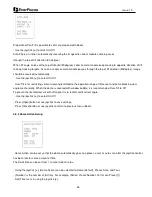
Page 17: ...terns SCAN Clear saved Scan items ETC Clear other setting value except items of Camera PTZs CAM status and saved data of PRESET TOUR PATTERN and SCAN 3 3 4 Entering a Password To prevent unauthorized changes to the dome settings the dome have the feature of password protection An unauthorized operator cannot access to any of the dome settings menus The password must be entered before programming T...

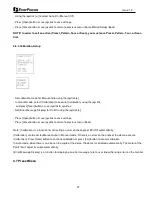
Page 18: ...etup and move to Language using joystick If you want to use another language select one from English Chinese Russian Spanish German Italian French Netherlandish 3 4 2 OSD Setup You can see only video or some character with video Each element is able to handle OSD setup allows you to program how labels are displayed on the monitor Labels are such as Title Dwell Time Zoom ratio Camera ID Operation M...

Page 19: ...ted in size according to zoom ratio Tele Wide Maximum 8 zones can be created Note that the tracking speed of displayed masks is proportional to the number of masks on the screen It is recommended that you set the size to at least twice the size of the object height and width so that the mask does not reveal the private zone during some motion Enter into Main Menu Select Display and Privacy Zone us...

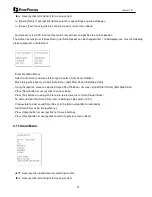
Page 20: ...oystick to return to previous menu Back 3 4 5 MD Motion Detection The dome camera can monitor the movement of image and it sends an alarm message with OSD and Alarm Out action The level for sensitivity can be changeable NOTE To stop alarm temporarily about 10sec press ESC button or 96 preset Set MD for Off MD using the joystick Set Alarm mode for OSD Alarm Out Both using the joystick Press Open bu...

Page 21: ... define how fast the dome will go from full wide zoom to the 12X optical zoom There are four modes Slow Normal and Fast And the default setting is Fast D Zoom allows the user to use Digital Zoom Default setting is Optical Zoom without Digital Zoom Enter into Main Menu Select Camera Setup and move to Focus Zoom using joystick Set Focus mode for Auto Manual or Semi Auto Set Zoom Speed for Fast Norma...

Page 22: ...ter into Main Manu Select Camera Setup and move to WB Setup using joystick Set WB mode for AWT Indoor Outdoor Onepush AWB or Manual Press Open button or use joystick to save settings Press Close button or use joystick to return to previous menu Back 3 5 3 AE Setup Auto Exposure Setup Shutter speed is the duration of the electronic shutter Set the shutter speed to operate automatically Auto or manu...

Page 23: ... X O Auto O Auto AGC Gain OFF Low Mid High X O High X DSS OFF X2 X64 O Off X X Bright 0 100 O 50 O 050 O 50 3 5 4 Day Night Setup The Day Night function improves the camera s sensitivity at night or when the brightness level of the ambient environment According to the luminance level Day Night filter is automatically switched Enter into Main Manu Select Camera Setup and move to Day Night Setup usi...

Page 24: ...ngs Press Close button or use joystick to return to previous menu Back When both high brightness subjects and low brightness subjects have been shot at the same time overexposure in the high brightness subjects or loss of dark detail in the low brightness subjects may occur The WDR Wide Dynamic Range function creates images free from over exposure or loss of dark detail by combining two images aft...

Page 25: ...scan to be performed when the power is re cycled or after alarm action The following settings are available Set the dome On default to resume its prior activity Use the joystick to select On Off Turbo Speed defines the pan and tilt speed only for manual operation of Pan Tilt Use the joystick to select On Off Preset Speed is possible to set preset speed with 3 options Fast Normal and Slow Use the j...

Page 26: ...on range of IR sensor and some blocking view angle mechanically When the dome is covered with window bubble it is recommended Over Tilt to Off To prevent horizontal view cut with tilt angle it is to restrict vertical view angle Use the joystick to select On Off Press Open button or use joystick to save settings Press Close button or use joystick to return to previous menu Back 3 6 3 Home Action Se...

Page 27: ... for On Off using the joystick Press Open button or use joystick to save settings Press Close button or use joystick to return to previous menu Back Note Calibration is a function for correcting an error on the angle of Pan Tilt automatically Calibration can be set for Manual Auto In Manual mode if there is an error on the angle of the dome execute Calibration Press Near button to continue calibra...

Page 28: ...Select Preset and Move left or right to select Preset Number Move the joystick right to edit a Preset Using the joystick move to a desired target Pan Tilt Zoom Press Near button or use joystick to save settings Press Far button or use joystick to return to previous menu Preset Edit Back To edit and clear the Preset Title refer to Editing a Title section 3 2 1 It is possible to clear saved Preset N...

Page 29: ...to program Pattern Enter into Main Manu Select Auto Scan and move left or right to select Pattern Number Move the joystick right to edit Pattern Using the joystick move to a desired target and press Near button to start programming Pattern Press Near button or use joystick to save settings Press Far button or use joystick to return to previous menu Pattern Setup Back To edit and clear Pattern Titl...

Page 30: ... action Preset Pattern or Scan you must save Preset Pattern or Scan first Enter into Main Manu Select Tour and Move left or right to select Tour Number Using the joystick move to each item Select an action number PRESET TOUR PATTERN and or SCAN with Tele button or clear item with Wide button and change mode using Near button It is possible to clear saved Tour No xxx in the Tour Setup Menu individu...

Page 31: ... the joystick right to edit Auto Scan Edit Start Point Edit Stop Point Using the joystick move to a desired target Pan Tilt Zoom at screen of Edit Start Point Edit Stop Point Press Near button or use joystick to save settings Press Far button or use joystick to return to previous menu Scan Setup Back To edit and clear the Scan Title refer to Editing a Title section 3 2 1 It is possible to clear sa...

Page 32: ... This is activated during a period of a selected dwell time when an alarm is triggered Momentary On When an alarm is triggered the dome camera will maintain alarm activation continuously until it is stopped manually 96 preset or and changing in alarm menu It is possible to clear saved Alarm No xxx pressing Wide button at a position of No xxx individually Press Open button or use joystick to save s...

Page 33: ...set the dome camera using the Dome configuration menus Main System Reboot Check that the connection of power cable and assembling status of dome camera Initialize the dome camera Main System Initialize The communication between controller and cameras is not working properly via 485 cable lines Check that RS 485 communication cable is not connected correctly Refer to 2 3 Connection Interface and Wi...

Page 34: ...uto or one touch holds focus after initial setting after movement Pan and Tilt Range and Speed Pan Speed up to 360 sec continuous 360 rotation Tilt speed up to 260 sec 180 range 90 digital auto flip for continuous tracking Maximum 0 75 seconds present recall time manual speed proportional to zoom ratio True Day Night Control Yes Auto IR cut filter removal Manual select always color or always B W E...

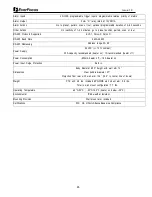
Page 35: ...0 99 Power Supply 24VAC 10 nominal 2 5A capacity recommended heater on 1A recommended heater off Power Consumption 850mA heater off 1 8A heater on Power Input Surge Protection Built in Dimensions Body diameter 6 55 height with wall arm 10 Clear bubble diameter 4 7 Projection from rear with wall arm 13 4 10 2 to center line of dome Weight PTZ unit 4 9 lbs included EPH WMB wall mount arm 2 8 lbs Tot...

Page 36: ...36 Issue 1 0 5 2 Dimensions Unit mm ...

Page 37: ...ur Setup Preset 70 Preset No Go Preset 70 Go TOUR Preset Tour 71 78 Preset No Go Preset 71 Go 1 Tour Pattern Setup Preset 80 Preset No Go Preset 80 Go PATTERN Preset Pattern 81 88 Preset No Go Preset 81 Go 1 Pattern ENT Key Preset 90 Preset No Go Preset 90 Go Run HOME Preset 91 Preset No Go Preset 91 Go CLR Key Preset 92 Preset No Go Preset 92 Go ENT2 Key Preset 94 Preset No Go Preset 94 Go MENU K...

Reviews: