EQ610x
8
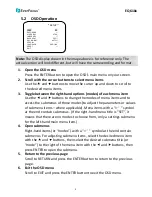
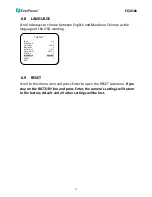
5.2 OSD Operation
Note:
The OSD display shown in the image above is for reference only. The
actual version will look different, but will have the same wording and format.
1.
Open the OSD menu
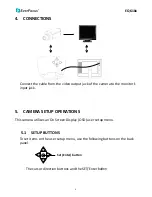
Press the ENTER button to open the OSD’s main menu on your screen.
2.
Scroll with the cursor buttons to select menu items
Use the
and
buttons to move the cursor up and down to scroll to
the desired menu items.
3.
Toggle between the right-hand options (modes) of each menu item
Use the
and
buttons to change the modes of menu items and to
access the submenus of those modes (to adjust the parameters or values
of submenu items – where applicable). Menu items with a “<
┘
” symbol
at the end contain submenus. (If the right-hand menu title is “SET”, it
means that there are no modes to choose from, only a settings submenu
for the left-hand main menu item.)
4.
Open submenus
Right-hand items (or “modes”) with a “<
┘
” symbol at the end contain
submenus. For adjusting submenu items, select the desired menu item
with the
and
buttons, then select the desired submenu title (or
“mode”) to the right of the menu item with the
and
buttons, then
press ENTER to open the submenu.
5.
Return to the previous page
Scroll to RETURN and press the ENTER
button to return to the previous
page.
6.
Exit the OSD menu
Scroll to EXIT and press the ENTER
button to exit the OSD menu.
** SETUP **
LENS
DC
EXPOSURE
<
┘
WHITE BAL.
ATW1
IMAGE ADJ.
<
┘
BACKLIGHT
OFF<
┘
DAY & NIGHT
AUTO<
┘
SPECIAL
<
┘
LANGUAGE
ENGLISH
RESET
<
┘
EXIT


