EZN7221/7260/7360
55
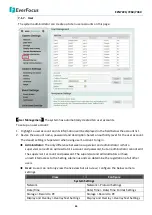
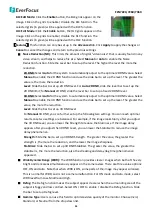
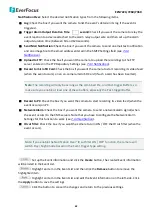
BLC Edit Mode:
Click the
Enable
button, the BLC grids appear on the
image. Click on the grids to enable / disable the BLC function. The
selected grids (in green) will be applied with the BLC function.
HLC Edit Mode:
Click the
Enable
button, the HLC grids appear on the
image. Click on the grids to enable / disable the HLC function. The
selected grids (in green) will be applied with the HLC function.
【
Features
】
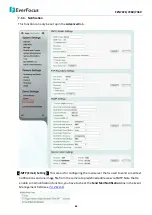
This function can only be set up in the
Advanced
tab. Click
Apply
to apply the changes or
Cancel
to cancel the changes and return to the previous settings.
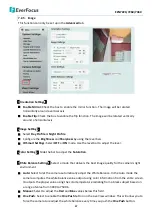
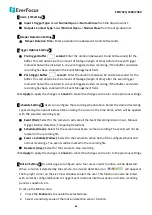
Noise Reduction (NR):
This limits the amount of digital “video noise” that is usually found in any
video stream, and helps to reduce file size. Select
Manual
or
Auto
to enable the Noise
Reduction function. Slide the Level bar to set up the level. The higher the level the more the
reduction.
2D DNR:
Select
Auto
for the system to automatically adjust to the optimal 2D DNR value. Select
Manual
to enable the 2D DNR function and use the slide bar to set up the level. The greater the
value is, the more the reduction.
Level:
Slide the bar to set up 2D DNR level. For
Auto 2D DNR
, slide the level bar to set up the
2D DNR limit; for
Manual
2D DNR, slide the level bar to set up a fixed 2D DNR level.
3D DNR:
Select
Auto
for the system to automatically adjust to the optimal 3D DNR value. Select
Manual
to enable the 3D DNR function and use the slide bar to set up the level. The greater the
value, the more the reduction.
Level:
Slide the bar to set up 3D DNR level.
For
Manual
3D DNR, you can further set up the following two settings. You can reach optimal
results once two settings are balanced. For example, if the image looks blurry after you adjust
the 3D DNR Level, you can lower the Strength to reduce the blurriness. If the image delay
appears after you adjust the 3D DNR Level, you can lower the Stabilizer to reduce the image
delay phenomenon.
Strength:
Slide the bar to set up 3D DNR Strength. The greater the value, the greater the
strength is, the more the reduction, and the lower the image sharpness.
Stabilizer:
Slide the bar to set up 3D DNR Stabilizer. The greater the value, the greater the
stabilizer is, the more the reduction, also the streaking and delay (lag time) phenomenon
appeared.
Wide Dynamic Range (WDR):
The WDR function provides clearer images when both of the very
bright and dark areas simultaneously appear on the camera view. There are three value options:
OFF, ON and Auto. Note that when WDR is ON, some parts of the image may appear solarized.
This is normal for WDR, and is not a camera malfunction. For ON mode and Auto mode, select
WDR level from Low, Middle and High.
Defog:
The Defog function makes the subject appear clearer when the surrounding area of the
subject is foggy and low contrast. Select ON / OFF to enable / disable the Defog function. Slide
the bar to set up Defog level.
Gamma Type:
Users can use this field to optimize video quality of the monitor. Choose Vivid,
Standard, or Neutral from the drop down list.


