background image

16

Temperature is not properly 

adjusted. 

Please look in the “initial Start 

Up” section. 

Door was open for an extended 

period. 

Open the door only as long as 

necessary. 

A large quantity of warm food was 

placed in the appliance within the 

last 24 hours. 

Turn the temperature 

regulation to a colder setting 

temporarily. 

The food is too warm. 

The appliance is near a heat 

source. 

Please look in the “installation 

location” section. 

Interior lighting does not 

work. 

Light bulb is defective. 

Please look in the “changing 

the Light Bulb “section. 

Heavy build-up of frost, 

possibly also on the door 

seal. 

Door seal is not air-tight(possibly 

after reversing the door). 

Carefully warm the leaking 

sections of the door seal with a 

hair dryer(on a cool setting). At 

the same time shape the 

warmed door seal by hand 

such that it sits correctly. 

Appliance is not level. 

Readjust the feet. 

The appliance is touching the wall 

or other objects. 

Move the appliance slightly. 

Unusual noises. 

A component, e.g. a pipe, on the 

rear of the appliance is touching 

another part of the appliance or the 

wall. 

If necessary, carefully bend the 

component out of the way. 

The compressor does not 

start immediately after 

changing the temperature 

setting. 

This is normal, no error has 

occurred. 

The compressor starts after a 

period of time. 

Water on the floor or storage 

shelves. 

Water drain hole is blocked. 

See the “cleaning and care” 

section. 

Changing the light bulb 

Warning! 

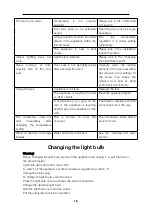
Before changing the light bulb, switch off the appliance and unplug it, or pull the fuse or 

the circuit breaker. 

Light bulb data: 220-240V, max. 15 W 

To switch off the appliance, set the temperature regulator to position “0”. 

Unplug the mains plug. 

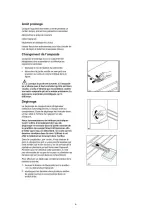
To change the light bulb, undo the screw. 

Press the light bulb cover as shown and slide it backwards. 

Change the defective light bulb. 

Refit the light bulb cover and the screw. 

Put the refrigerator back into operation.


Summary of Contents for EVBI630

Page 1: ...REFRIGERATOR Instruction Manual Everglades EVBI630 Read and retain these instructions for future reference...

Page 2: ...gle and or with signal words W Warning Caution Important Please observe the following carefully Supplementary information regarding operation and practical applications of the appliance appear after t...

Page 3: ...iption of the appliance 11 Starting up and temperature regulation 11 Interior accessories 12 Switching off the appliance 13 Cleaning and Care 14 Energy Saving tips 15 Trouble shooting 15 Changing the...

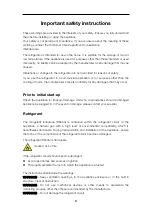
Page 4: ...initial start up Check the appliance for transport damage Under no circumstances should a damaged appliance be plugged in In the event of damage please contact your supplier Refrigerant The refrigeran...

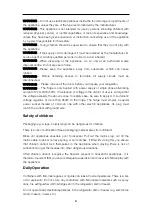
Page 5: ...of voltage in the district of user is so large that the voltage exceeds the above scope for safety sake be sure to apply A C Automatic voltage regulator of more than 350W to the fridge The fridge must...

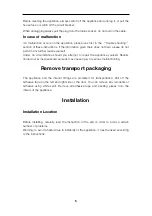
Page 6: ...attempt to repair the appliance yourself Repairs carried out by inexperienced persons may cause injury or serious malfunctioning Remove transport packaging The appliance and the interior fittings are...

Page 7: ...ications in the figure 1 Push the appliance into the housing until stop strip A touches the kitchen unit 2 Press in the joint covers between the appliance and the kitchen furniture only on the side wi...

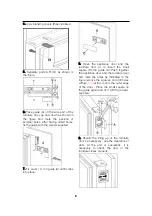
Page 8: ...8 Open the appliance door and the furniture door at 90 Insert the small square B into guide A Push together the appliance door and the furniture door and mark the holes as indicated in the figure remo...

Page 9: ...de B until it clips into place 11 Loose the screw G then adjust and fasten connecting bracket E to the kitchen furniture by screw F Tighten the screw G then put on the cover H The method of fixing the...

Page 10: ...air must be allowed to circulate in the lower rear section of appliances as poor air circulation can affect performance Built in appliances should be positioned away from heat sources such as heaters...

Page 11: ...r may be slightly different from this Instruction Manual However all functions and using methods remain the same Starting up and temperature regulation Insert the plug of the connection lead into the...

Page 12: ...rays are included with your appliance different models have different combinations You should always slide one of the full size glass storage shelves into the lowest set of guides above the fruit and...

Page 13: ...food out take the ice tray and drawers out or put them into the fresh food compartment temporarily then set the knob of the temperature regulator to position 0 where the compressor will stop working a...

Page 14: ...danger of electrical shock Hot vapors can lead to the damage of plastic parts The appliance must be dry before it is placed back into service Important Ethereal oils and organic solvents can attack pl...

Page 15: ...recting Malfunctions Spare parts butter cheese compartment egg holders door racks fruit and vegetable drawers storage racks A malfunction may be caused by only a minor fault that you can rectify yours...

Page 16: ...vel Readjust the feet The appliance is touching the wall or other objects Move the appliance slightly Unusual noises A component e g a pipe on the rear of the appliance is touching another part of the...

Page 17: ...e For disposal there are several possibilities a The municipality has established collection systems where electronic waste can be disposed of at least free of charge to the user b The manufacturer wi...

Page 18: ...voltage Malfunctioning because of improper usage dust fluff in and on the appliance amongst others blocking of air circulation as well as breaking of plastics rubber glass which other than by normal u...

Page 19: ...Everglades EVBI630 COMBI INTEGRABLE Mode d emploi Veuillez lire ce manuel et le conserver pour information...

Page 20: ...16 16...

Page 21: ...2...

Page 22: ...3...

Page 23: ...4...

Page 24: ...5...

Page 25: ...6...

Page 26: ...7...

Page 27: ...8...

Page 28: ...1780...

Page 29: ...10...

Page 30: ...ATTENTION Pour que l appareil fonctionne correctement il doit tre plac dans une pi ce avec une temp rature minimum de 15 C...

Page 31: ...allation comme les mauvais voltages Un mal fonctionnement cause d un usage impropre sur l appareil entre autres en bloquant la circulation d air ou en cassant le plastique le caoutchouc le verre qui a...

Page 32: ...Everglades EVBI630 INBOUW COMBI KOELKAST Instructiehandleiding Lees deze handleiding en bewaar deze voor naslag...

Page 33: ...16 16...

Page 34: ...2...

Page 35: ...AANWIJZINGEN...

Page 36: ...4...

Page 37: ...Ijsbakje ijsbakje...

Page 38: ...6...

Page 39: ...7...

Page 40: ...draairichting van de...

Page 41: ...9 1780...

Page 42: ...10...

Page 43: ......

Page 44: ...Storingen ten gevolge van o a ondeskundig gebruik stof pluisvorming in aan het apparaat w o verstoppingen van o a indien van toepassing luchtcirculatie filters als mede breuk in kunststof rubber glas...

Page 45: ...Everglades EVBI630 K HLSCHRANK Gebrauchsanweisung Bitte diese Betriebsanleitung aufmerksam lessen und zu Nachschlagezwecken aufbewahren...

Page 46: ...arndreieck bzw mit den Signalw rtern Warnung Achtung oder Wichtig gekennzeichnet Bitte beachten Sie die folgenden Anweisungen sorgf ltig Zus tzliche Informationen zum Betrieb und zu Verwendungsm glich...

Page 47: ...9 Beschreibung des Ger ts 10 Erste Inbetriebnahme und Temperaturregulierung 10 Zubeh rteile 11 Ausschalten des Ger tes 12 Reinigung und Pflege 13 Energiespar Tipps 14 Hilfe zur Probleml sung 14 Austa...

Page 48: ...der Hersteller keinerlei Haftung f r eventuelle dadurch entstehende Sch den Vor der ersten Inbetriebnahme berpr fen Sie ob das Ger t Transportsch den aufweist Ein besch digtes Ger t darf unter keinen...

Page 49: ...itte Entfernen Sie vor einer Entsorgung des K hlschranks s mtliche T ren WARNUNG Der K hlschrank wird mit Wechselstrom von 220 240V 50 Hz betrieben Sollten Spannungsschwankungen in Ihrer Umgebung so s...

Page 50: ...Anstrengungen zur Beseitigung des Fehlers Unter keinen Umst nden sollten Sie versuchen das Ger t selbst zu reparieren Reparaturen die von nicht qualifizierten Personen durchgef hrt werden k nnen zu V...

Page 51: ...ng 1 Schieben Sie das Ger t in das Geh use bis die Anschlagleiste A am K chenm bel anst t 2 Dr cken Sie die Zwischenblende zwischen dem Ger t und dem K chenm bel ein nur auf der Seite ohne Scharnier 3...

Page 52: ...deckung C in die F hrung A ein bis diese einrastet 8 Dr cken Sie die Ger tet r und die M belt r zusammen ein und zeichnen Sie die L cher ein siehe Abbildung Entfernen Sie die Winkel und bohren Sie die...

Page 53: ...rastet 11 L sen Sie die Schraube G stellen Sie den Verbindungsb gel E ein und befestigen Sie diesen mit der Schraube F am K chenm bel Ziehen Sie die Schraube G an und bringen Sie die Abdeckung H wiede...

Page 54: ...hlschrank R ckseite muss ausreichend bel ftet sein da eine mangelhafte Bel ftung die Ger teleistung beeintr chtigt Einbauger te m ssen von Hitzequellen wie z B Heizk rpern und direkter Sonnenstrahlun...

Page 55: ...ahme und Temperaturregulierung Schlie en Sie den Netzstecker an eine geerdete Steckdose an Wenn der K hlschrankbereich ge ffnet wird schaltet sich die interne Lampe ein Der Temperaturwahlknopf befinde...

Page 56: ...echt Eins tze geh ren als Zubeh r zu Ihrem K hlschrank dazu Die Zusammenstellung des Zubeh rs richtet sich nach dem jeweiligen Modell Einen der Glasb den sollten Sie immer in die untere Halterung ber...

Page 57: ...auen des Gefrierschranks erfolgt manuell Entfernen Sie vor dem Abtauen s mtliche Lebensmittel Entfernen Sie die Eisschale und Schubf cher Bringen Sie diese eventuell vor bergehend im K hlschrank unter...

Page 58: ...Dampfreiniger Die elektrischen Komponenten k nnten dadurch feucht werden was zu Stromsto gefahr f hrt Hei e D mpfe k nnen zudem die Plastikteile besch digen Das Ger t muss vor einer erneuten Inbetrieb...

Page 59: ...re Energieeffizienz erzielen l sst Andere Kombinationen k nnen zu einem h heren Energieverbrauch f hren 6 Sorgen Sie f r eine ordnungsgem e Lagerung der Lebensmittel Stellen Sie sicher dass das angege...

Page 60: ...he einer Hitzequelle Bitte schlagen Sie im Kapitel Aufstellungsort nach Die Innenbeleuchtung funktioniert nicht Lampe defekt Bitte schlagen Sie im Kapitel Gl hbirne austauschen nach Erhebliche Eisbild...

Page 61: ...lickger usche Wenn der Kompressor sich ein und ausschaltet ist ein Klickger usch zu h ren Brummen Der Kompressor macht sich bei Betrieb durch ein Brummger usch bemerkbar Blubbern Wenn das K hlmittel i...

Page 62: ...des Produkts Diese Kennzeichnung zeigt an dass dieses Produkt innerhalb der EU vom Hausm ll getrennt zu entsorgen ist Um m glichen Gefahren f r die Umwelt und die Gesundheit der Mitmenschen vorzubeug...

Page 63: ...annung Bei St rungen durch u a unsachgem ssen Gebrauch Staub Flusenbildung in am Ger t Behinderungen der Luftzirkulation Verstopfungen des Filters wenn vorhanden sowie ein Bruch im Kunststoff Gummi Gl...

Reviews: