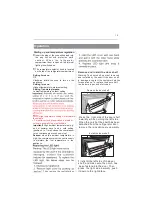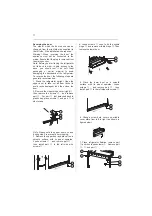
8. Screw out lower hinge, change it to the
near hole site, and then screw up.
9. Just remount to the step 7, change part
①
②
,
⑤
to left and part
to right and then
fix part
with screws
Finally install
①
④
.
part
③
.
11. Screw out the upper hinge axis, turn the
upper hinge over and fix axis on it. Then
place it at side for use.
12.
①
,
Remove the screw hole cover
then install it to the right side
as
②
,
shown in figure below.
13. Move the upper door to appropriate
position, adjust part
and upper door,
①
and then fix part
by screws
Please
①
②
(
hold upper door by hand when installing) ,
and then install another part
in the
③
(
plastic bag).
Note: When installing part
firstly, push it
③,
from left to right completely, then push it
down tight.
10. Move the lower door and adjust its
position to align lower hole site and upper
hinge axis. Turn the middle hinge by 180,
adjust the middle hinge to the appropriate
position and then install it.
1
2
3
4
1
2
3
5
1
2
14. Open the upper door, mount door racks
and then close it.
12
Summary of Contents for EVUD4020
Page 46: ...Children should be supervised to ensure that they do not play with the appliance...
Page 48: ...a es...
Page 49: ...C This refrigerating appliance is not intended to be used as a a built in appliance...
Page 50: ...d...
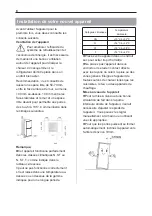
Page 51: ...50 70mm 50 70mm 610 630 1055 1075 840 135 N ST or N ST T 50 70 8...
Page 62: ...19...
Page 86: ......

