background image

Customer Service 1-888-707-1880  


Dyaco Canada Inc. 2013  

Email: customerservice@dyaco.ca 

14


English Table 

Summary of Contents for 1653501

Page 1: ...Owner s Manual Model No 1653501 Assembly Operation Adjustments Parts Warranty CAUTION Read and Understand this Manual before Operating unit Retain For Future Reference ...

Page 2: ...co ca 1 TABLE OF CONTENTS Important Safety Instructions 2 Important Electrical Instructions 4 Assembly instructions 5 Folding Transport Instructions 10 Operation of Your New Treadmill 11 Exploded View Diagram Parts List 15 General Maintenance 19 Manufacturer s Limited Warranty 22 ...

Page 3: ...nd receptacle 4 Never leave the treadmill unattended when plugged in Remove the safety key and unplug the unit from the outlet when not in use and before removing or replacing parts 5 Never operate the treadmill if it has a damaged cord or plug if it is not working properly if it has been dropped damaged or exposed to water Never move the treadmill belt while the power is turned off 6 Do not pull ...

Page 4: ...dmill at once 21 Warm up 5 to 10 minutes before each workout and cool down 5 to 10 minutes afterward This allows your heart rate to gradually increase and decrease and will help prevent straining muscles 22 Never hold your breath while exercising Breathing should remain at a normal rate in conjunction with the level of exercise being performed 23 Start your program slowly and very gradually increa...

Page 5: ... product is properly grounded Do not modify the plug provided with the product if it will not fit the outlet have a proper outlet installed by a qualified electrician NEVER operate this treadmill without reading and completely understanding the results of any operational change you request from the computer Understand that changes in speed and incline do not occur immediately Set your desired work...

Page 6: ...und in the orientation it would be in if you were using the treadmill Do not turn the treadmill up on its side while removing the shipping strap This could cause the treadmill s folding mechanism to spring open If the end of the Velcro strap that you need to grab to remove it happens to be under the treadmill deck reach under the deck to grab it but do not tilt the treadmill up to gain access to t...

Page 7: ...m Phillips Head Screw 6pcs 100 Ø8 Ø18 1 5m m Flat Washer 8pcs 99 5 16 1 2 Hex Head Bolt 8pcs 125 5 16 3 4 Button Head Socket Bolt 10pcs 126 Ø8 Ø19 1 5T Curved Washer 2pcs 44 Safety Key 1pc 104 Lubricant 1pc 103 M6 66 86 L Allen Wrench 1pc 102 Combination M5 Allen Wrench Phillips Head Screw Driver 1pc 90 13m m Wrench 1pc ...

Page 8: ...h level surface Step2 Connect Computer Cable Middle 54 with Computer Cable Lower 55 then insert Right and Left Uprights 4 and 5 into the Frame Base 2 and use 13m m Wrench 90 to tighten 8 pcs of 5 16 1 2 Hex Head Bolts 99 and 8pcs of Ø8 Ø18 1 5T Flat Washers 100 99 55 99 99 100 100 99 99 100 100 100 100 100 99 99 99 100 54 90 4 5 2 Assembly Instructions ...

Page 9: ...s of 5 16 3 4 Button Head Socket Bolts 125 and 2pcs ofψ8 x 19 x 1 5T Curved Washers 126 by using the Combination M5 Allen Wrench Phillips Head Screw Driver 102 125 125 125 126 125 102 125 126 125 5 4 Step 5 1 Connecting the Speed Hand Pulse Complex 28 with the Console Assembly 21 2 Connecting the Incline Hand Pulse Complex 29 with the Console Assembly 21 3 Connecting the Computer Cable Upper 53 wi...

Page 10: ...Phillips Head Screws 156 by using Combination M5 Allen Wrench Phillips Head Screw Driver 102 Step 7 Install Handrail Support 9 between left and right Uprights 5 and 4 and use Combination M5 Allen Wrench Phillips Head Screw Driver 102 to tighten 4 pcs of 5 16 3 4 Button Head Socket Bolts 125 102 9 125 125 125 NOTE Please Tighten All Screws After All Components Assembly Complete ...

Page 11: ...se both handrails to maneuver the unit to the desired position TO FOLD THE TREADMILL Lift the deck until the latch clicks in place TO UNFOLD THE TREADMILL Press the tube with your foot at the yellow sticker To release latch see picture to the right The treadmill is equipped with four transport wheels that are engaged when the treadmill is folded After folding simply roll the treadmill away Folding...

Page 12: ...LINE DOWN Pressing this button decreases the incline level by 1 Press and hold this button for 3 seconds to decrease the incline level rapidly Press this button during setting the program to adjust the value to decrease E ENTER for program setting Press this button to set Time Distance Calorie and and other functions Press and hold this button for more than 3 seconds all set value will reset to ze...

Page 13: ...speed is 0 5 1 0 mile km with the incline level 0 Preset PROGRAM There are 24 built in programs P1 P24 Press PROGRAM button to choose program P1 P24or press START button to start The preset time is 30 00 or press ENTER button to enter time parameter setting 30 00 5 00 99 00 with increment of 1 00 HRC This program controls Heart Rate Please consult doctor or professional training guide before train...

Page 14: ...Customer Service 1 888 707 1880 Dyaco Canada Inc 2013 Email customerservice dyaco ca 13 Metric Table ...

Page 15: ...Customer Service 1 888 707 1880 Dyaco Canada Inc 2013 Email customerservice dyaco ca 14 English Table ...

Page 16: ... 2 21 7 350121 7 Console Inner Cover 1 21 12 350121 12 400m m_Sensor W Cable 1 21 15 350121 15 Speaker Grill Anchor 6 21 16 350121 16 750m m_Speaker W Cable 1 21 17 350121 17 0 5W_Amplifier Controller 1 21 18 350121 18 500m m_Amplifier Cable 1 21 19 350121 19 300m m_Speaker W Cable 1 21 20 350121 20 Interface Board 1 21 22 350121 22 500m m_Sound Board W Cable 1 21 24 350121 24 Ø3 0 10m m_Sheet Met...

Page 17: ...350165 5 16 3 _Button Head Socket Bolt 2 66 350166 3 8 1 3 4 _Hex Head Bolt 1 67 350167 5 16 1 1 2 _Flat Head Socket Bolt 4 68 350168 3 8 3 4 _Button Head Socket Bolt 2 69 350169 M8 80m m_Socket Head Cap Bolt 2 70 350170 M8 25m m_Flat Head Countersink Bolt 6 71 350171 Motor Bottom Cover 1 73 350173 Ø5 16m m_Tapping Screw 7 74 350174 Ø3 5 12m m_Sheet Metal Screw 2 75 350175 1 2 8 0T_Nyloc Nut 2 76 ...

Page 18: ...01113 Top Motor Cover Plate 1 116 3501116 Ø3 10m m_Sheet Metal Screw 2 117 3501117 400m m_Console Ground Wire 1 125 3501125 5 16 3 4 _Button Head Socket Bolt 10 126 3501126 Ø8 Ø19 1 5T_Curved Washer 2 128 3501128 M5 10m m_Phillips Head Screw 4 135 3501135 Ø3 25m m_Sheet Metal Screw 2 140 3501140 Ø4 19m m_Sheet Metal Screw 4 146 3501146 Drink Bottle 1 151 3501151 400m m_Audio Cable 1 154 3501154 10...

Page 19: ...Customer Service 1 888 707 1880 Dyaco Canada Inc 2013 Email customerservice dyaco ca 18 PARTS DIAGRAM ...

Page 20: ...irt that may accumulate UNPLUG POWER CORD BEFORE THIS TASK BELT ADJUSTMENTS Treadbelt Tension Adjustment Belt tension is not critical for most users It is very important for joggers and runners in order to provide a smooth steady running surface Adjustment must be made from the right side of the rear roller in order to adjust tension with the 6 mm Allen wrench provided in the parts package The adj...

Page 21: ...as required to center the treadbelt Adjustments will become less of a maintenance concern as the belt is used Proper belt tracking is an owner responsibility common with all treadmills ATTENTION DAMAGE TO THE RUNNING BELT RESULTING FROM IMPROPER TRACKING TENSION ADJUSTMENTS IS NOT COVERED UNDER THE WARRANTY BELT DECK LUBRICATION Do not re lube with other than lubricant provides one application wit...

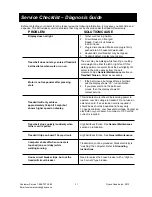
Page 22: ...ushed into AC household wall outlet 4 Household circuit breaker may be tripped 5 Treadmill defect Contact your dealer The user may be walking while favoring or putting more weight on either the left or right foot If this walking pattern is natural track the belt slightly off center to the side opposite from the belt movement See General Maintenance section on Treadbelt Tension Adjust as necessary ...

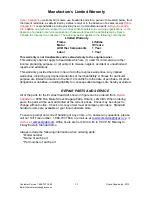
Page 23: ... or unauthorized repairs and alterations This warranty provided herein is in lieu of all other express warranties Any implied warranties including any implied warranties of merchantability or fitness for particular purpose are limited in duration to the first 12 months from the date of purchase All other obligations or liabilities including liability for consequential damages are hereby excluded R...

Reviews: